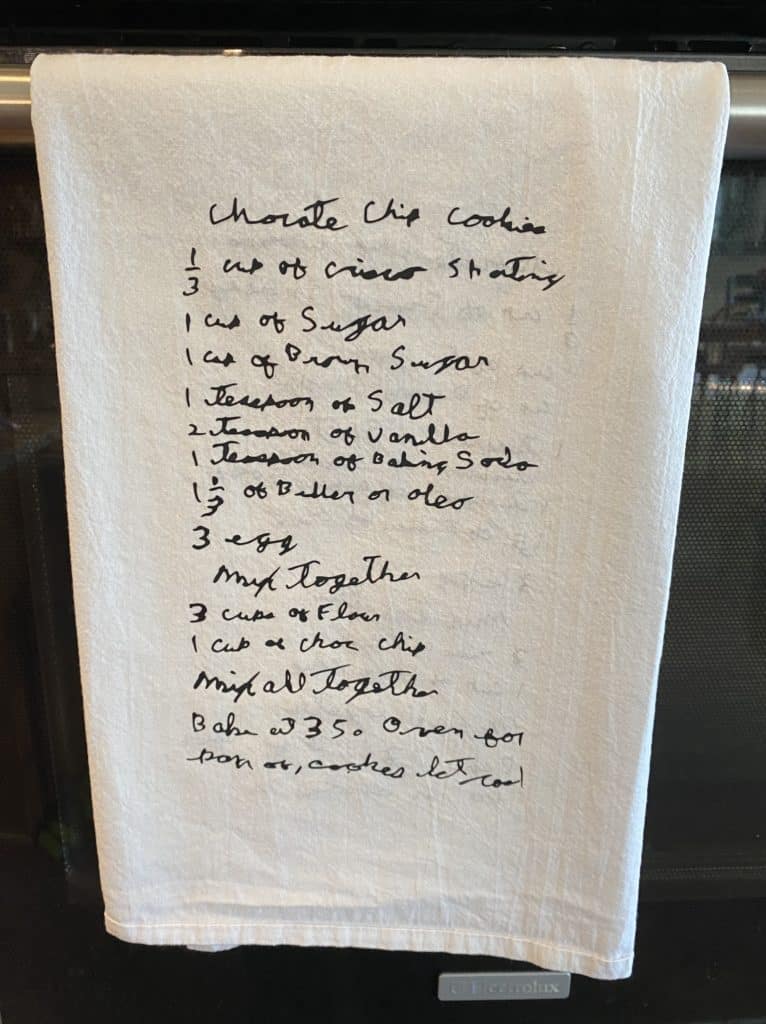
Handwritten Recipe Transferred to a Tea Towel

I experimented with a few methods of transferring a handwritten recipe to cotton tea towel and narrowed it down to the two methods that follow in the tutorial below. I don’t have one single recommendation for this project because in my opinion it depends on the quality of the scanned recipe you are transferring and the intended purpose of the tea towel. For example if you have a very dark copy of handwritting with thicker solid lines like my handwritten cookie recipe I like how the HTV looked. It provided great contrast against the white tea towel. Or my old typed copy of a family favorite dessert recipe to me doesn’t need so much contrast, in fact I think it gives it an antique look with the heat transfer printable paper. And the Liquitex Gel Medium worked great with the photo transfer. I hope this tutorial will give you some information so you can find the best method for your particular project. This page contains affilated links that I will earn a small commission on at no cost to you.
MATERIALS FOR THIS PROJECT
100% Cotton Tea Towel or Flour Sack Towel
One of the following products to transfer your image, explanation in tutorial:
HTV (I used Siser Black Matte)
JET-PROSS JETPRO SOFSTRETCH HEAT TRANSFER PAPER
Image to transfer, SVG or scanned copy of recipe
STEP 1: WORKING WITH THE IMAGE
For both methods of transferring to the tea towel, you will have to obtain and manipulate a copy of the recipe to transfer. This is probably best to obtain by scanning the image or recipe, but if you don’t have a scanner you may be able to work from a quality picture of what you intend to transfer.
If the recipe you are using is very clear, and does not need any major clean up of creases, smudges, or lines you can manipulate the image directly in Cricut Design Space by uploading a picture of scanned copy of the image to transfer. Most likely if this recipe was a treasure it will not be this easy and you will need to digitally edit the file in image software. An SVG file with the image background removed is easily created in Inkscape, and I go through the process in the video.
The image will need to be mirrored before printing or cutting. This can be accomplished in Cricut Design Space, Inkscape, Adobe Illustrator, or any program of your choice that has this capability. I choose to use the free program Inkscape because it is the easiest for me to use that I have easy access to.
STEP 2: UPLOADING & SIZING IMAGE IN DESIGN SPACE
In a new project you will upload your image file with the background removed and size it to your destination towel. Before you send it to cut or print you might need to attached all the objects in the file so that it prints or cuts correctly.
STEP 3: CUT AND/OR PRINT IMAGE
This step varies depending on which transfer method you choose so I will outline each method independently.
For the HTV you will mirror your image and cut on the Iron-On Vinyl setting. Make sure to put the HTV shiny side down on your mat. You will weed the image so that all that remains is the recipe.
For the Heat Transfer Printable Paper you will first print the mirrored image on an ink jet printer and then cut it by hand or cut a loose outline of your image on the Cricut.
For the Gel Medium you will print a mirrored copy of the image on a laser printer and let it dry. Then paint a thick even coat of the print with gel medium.
STEP 4: IMAGE TO FABRIC
The HTV cut & weeded image needs to be pressed with a heat press, Cricut Easy Press or household iron. You can find pressing time, pressure, and temp online. Remove carrier sheet after pressing. Cover the image with parchment paper and press again to seal. Press again for 1/2 the time on the back side of fabric.
The printed trimmed image will need to be pressed to tea towel, I found the best method was a household iron. Make sure you press on a firm smooth surface, not an ironing board! Remove the paper backing while warm. Cover the image with parchment paper and press again to seal. Press again for 1/2 the time on the back side of fabric.
The gel medium painted printed image will be placed facedown on the tea towel and the excess medium will be squeezed out as you smooth the image flat. When this is dried remove the paper by moistening & peeling the paper. Cover the image with parchment paper and press again to seal. Press again on the back side of fabric.
