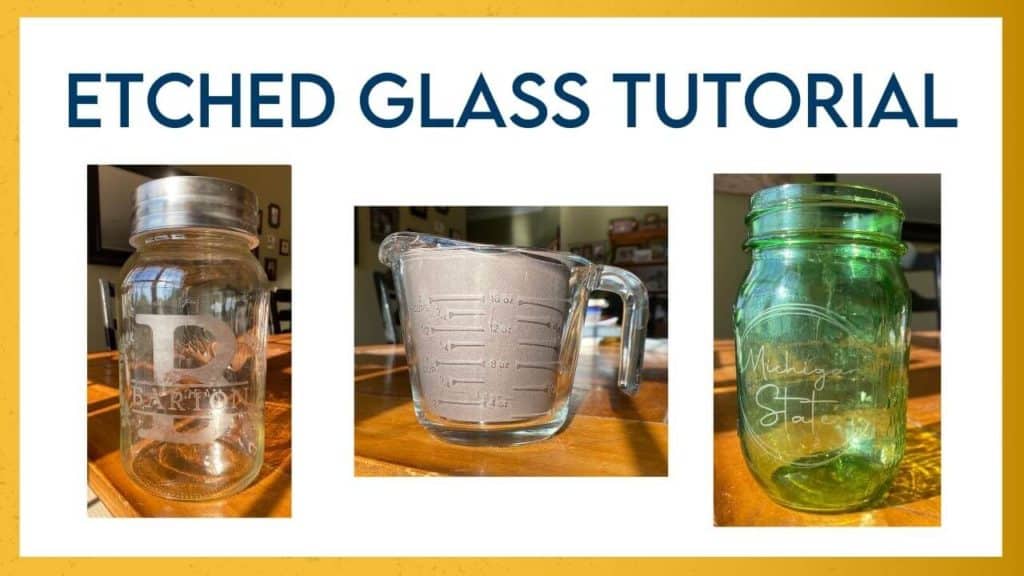
ETCHED GLASS TUTORIAL
LEARN AN EASY WAY TO PERMANENTLY ETCH GLASS
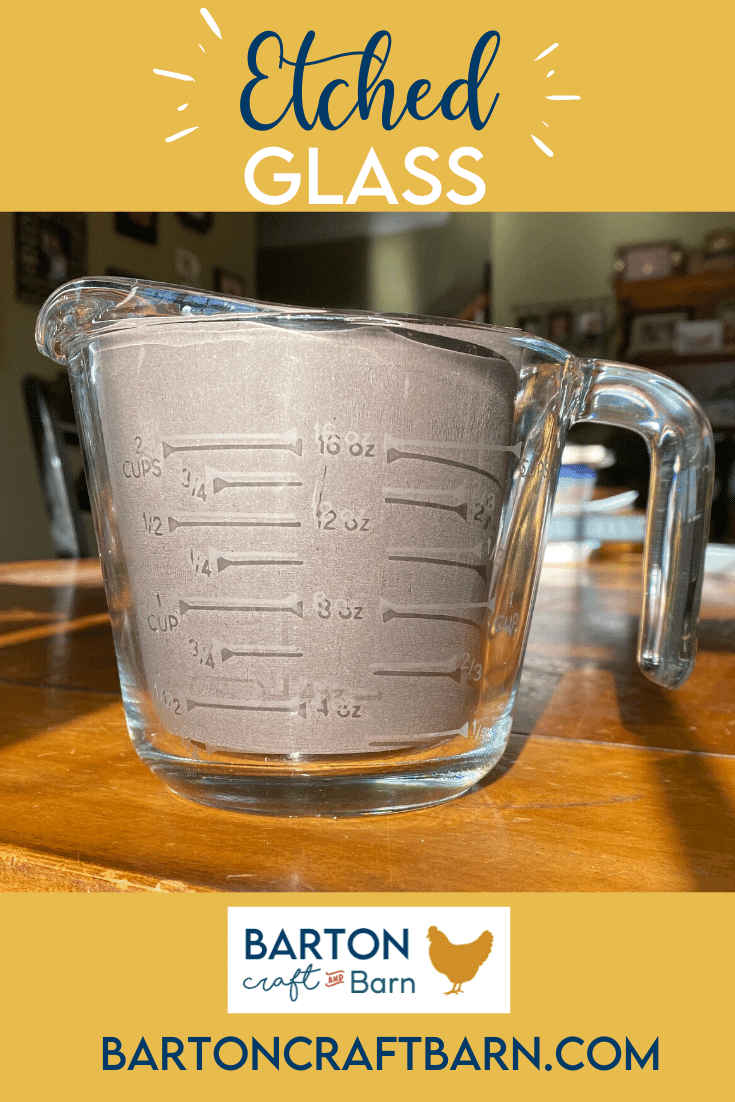
Welcome, welcome. In this tutorial, I will teach you how to etch glass using a vinyl stencil and Armour Glass Etching Cream. I had a couple of old glass measuring cups challenging my eyesight to read the very faded measuring lines and decided the perfect addition to these cups were permanent etched measurement lines. No more having to hold it up to the light in all directions and straining to see how much of an ingredient I had in the cup for me.
This was a bit of a challenging project for me, but only because my measuring cups were almost completely worn off. I didn’t particularly want to buy another cup because I believe the same thing would happen to them. So I worked from the faded markings of my glass along with a picture online of the measurement lines that I wanted in the end.

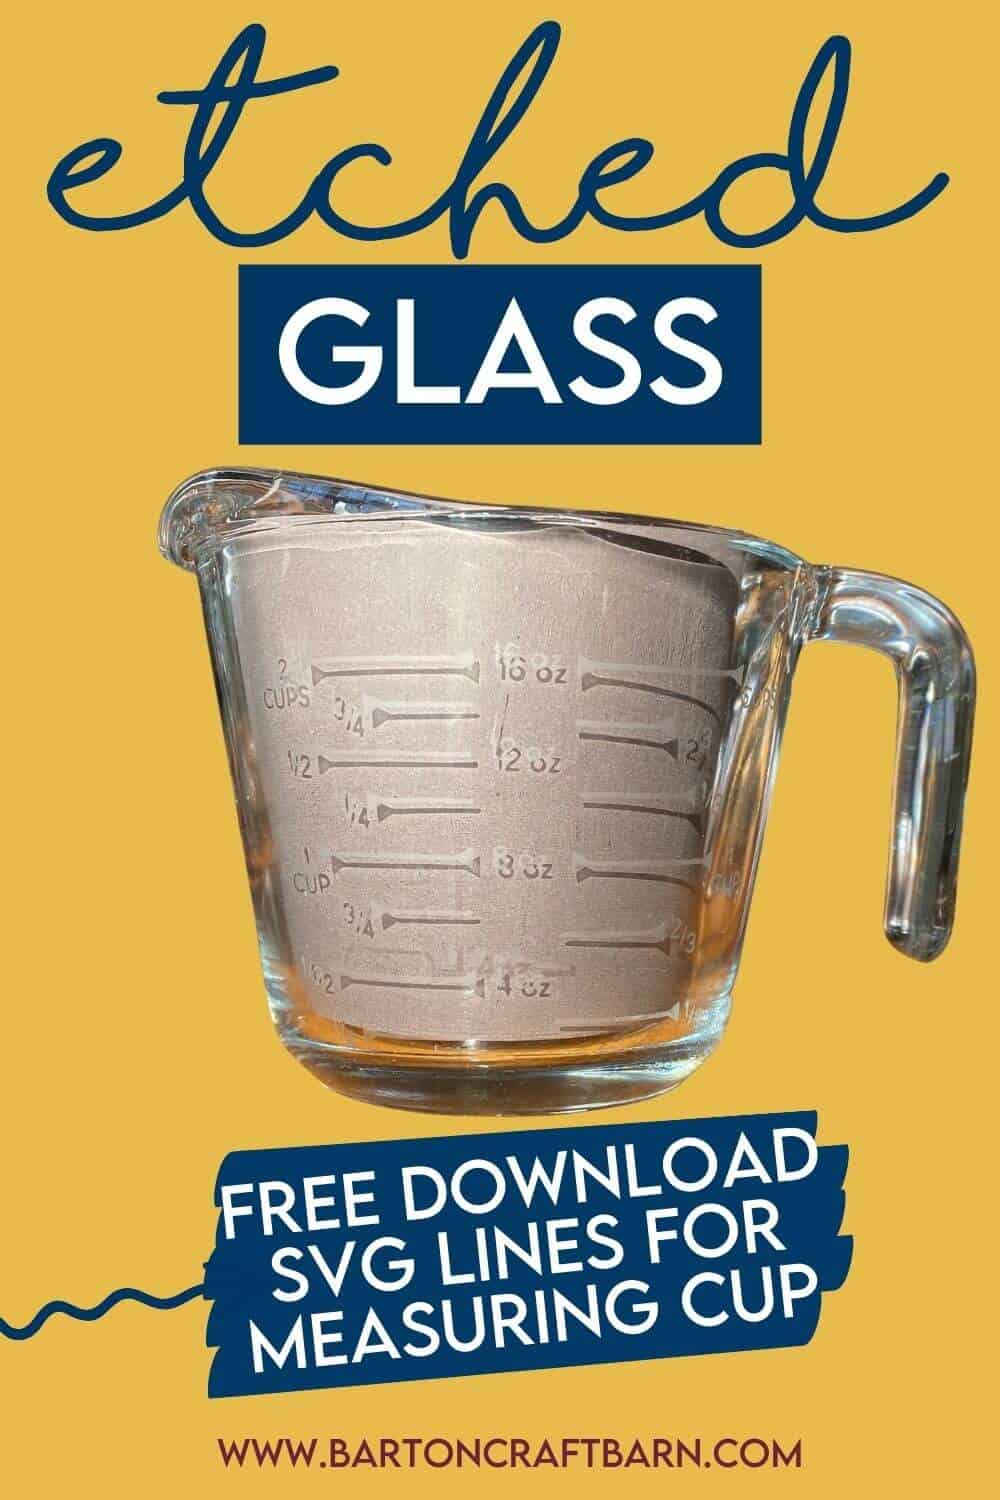
So a big part of this project was to create an cutting file that would wrap around a cone shaped object while maintaining parallel level measurement lines. You can download that file for free in the free resource library. The second challenging step was to apply the vinyl so the lines showed parallel level lines at the correct height for the corresponding measurements. (I might have had to repeat this step because of a crooked application! I’m just going to say vinyl is very sticky!)
CAN YOU ETCH YOUR GLASS?
It’s worth noting that after I was on step 6 of this tutorial I read the back of my Armour Glass Etching Cream and it said, “Will not etch plastic or some Pyrex.” I almost fainted – all that work! Thankfully it did etch my Pyrex glass. I believe it’s only the older Pyrex glassware that is super scratch resistant that will not etch. I’m safe, my measuring glassware is scratched all to bits from all the use they see.
I’m not sure if I am the only one with their measurement lines worn off, but this tutorial will give you the know-how and SVG file to etch the lines permanently into your measurement glasses. And if you don’t need this particular know-how, you will at least learn the steps that if taken will etch glass (as long as it’s not super scratch-resistant special glass). I think this seems like a hard project, but hopefully, I will break it down into simple steps for you. You can check out the tutorial in the following video and I’ll also have the steps typed below the video.
This page contains a few affiliate links. Using these links, I earn a small commission at no additional cost to you.
MATERIALS NEEDED TO ETCH GLASS:
- Smooth & Clean Glass
- Permanent or Removable Adhesive Vinyl
- SVG file with design for vinyl (Free download in Free Resource Library)
- Cricut Maker or another method of cutting vinyl
- Cutting Mat
- Weeding tools or a needle
- Transfer Tape (I like the kind with grid lines, also you can use contact paper)
- Masking tape of some kind to protect the non-etched area
- Armour Glass Etching Cream (A little goes a long way)
- Paint Brush
- Personal Protective Equipment for working with chemicals (Clothes, eye & Skin protection)
LEARN HOW TO ETCH GLASS WITH ARMOUR ETCHING CREAM BELOW
Etched Glass Tutorial
This tutorial specifically shows how I etched the lines back on my super faded glass measuring cup, but the same process will etch most glass surfaces.
Materials
- Smooth & Clean Glass
- Permanent or Removable Adhesive Vinyl
- SVG file with design for vinyl (Free download in Free Resource Library)
- Transfer Tape (I like the kind with grid lines, also you can use contact paper)
- Masking tape of some kind to protect the non-etched area
- Armour Glass Etching Cream (A little goes a long way)
Tools
- Cricut Maker
- Cutting Mat
- Weeding tools or a needle
- Paint Brush
- Personal Protective Equipment for working with chemicals (Clothes, eye & Skin protection)
Instructions
STEP 1: CRICUT DESIGN SPACE FILE
Upload an SVG, or create a cut file, in Cricut Design Space. Size the image to fit the object that is to be etched. I typically add a small shape to my file in a different color to use for a test cut. This allows me to be sure I am selecting the correct cut & pressure settings for my material.
If you are following along this tutorial to etch the 2 cup measuring glass, the free SVG file that I created with the 2 cup measurement lines is located in the free resource library.
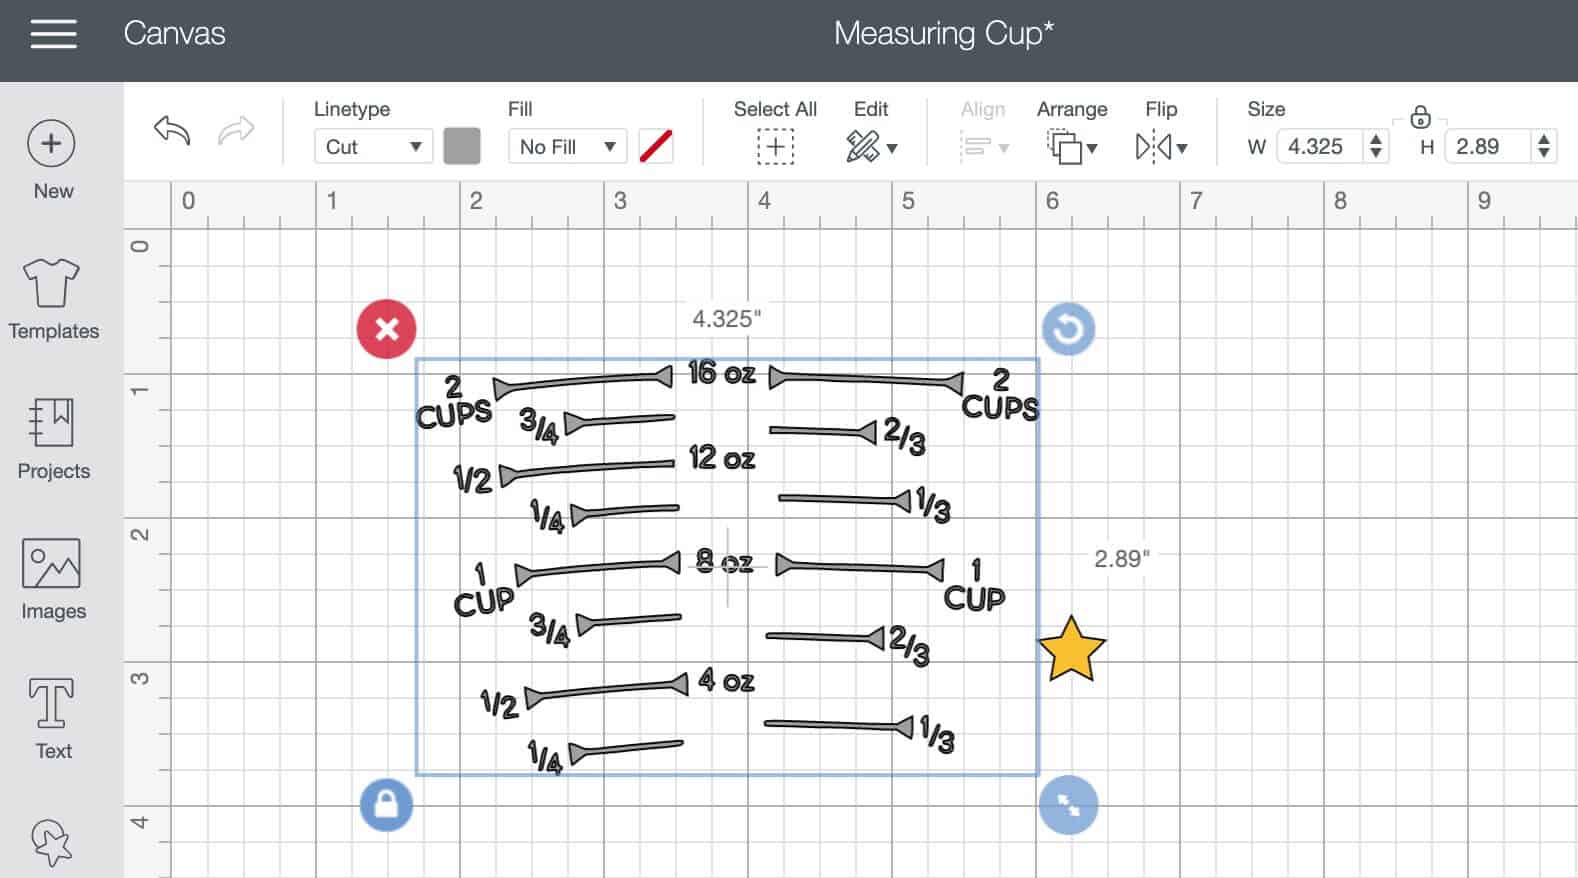
After you save this SVG file on your device you will have to upload it into Cricut Design Space. You will click the upload cloud, upload image, browse & find your saved file and open it, save it in your uploaded images, and insert it in a new project. It will need to be resized to the dimensions: width=4.325 and height=2.89.
It’s worth a check on your measuring cup what the distance needs to be between the 2 cup & 1/4 cup lines and make sure it corresponds to the design. All cups are not exactly the same size. I first printed it out on paper, by changing the fill to print, to make sure it would line up properly with my existing faded lines.
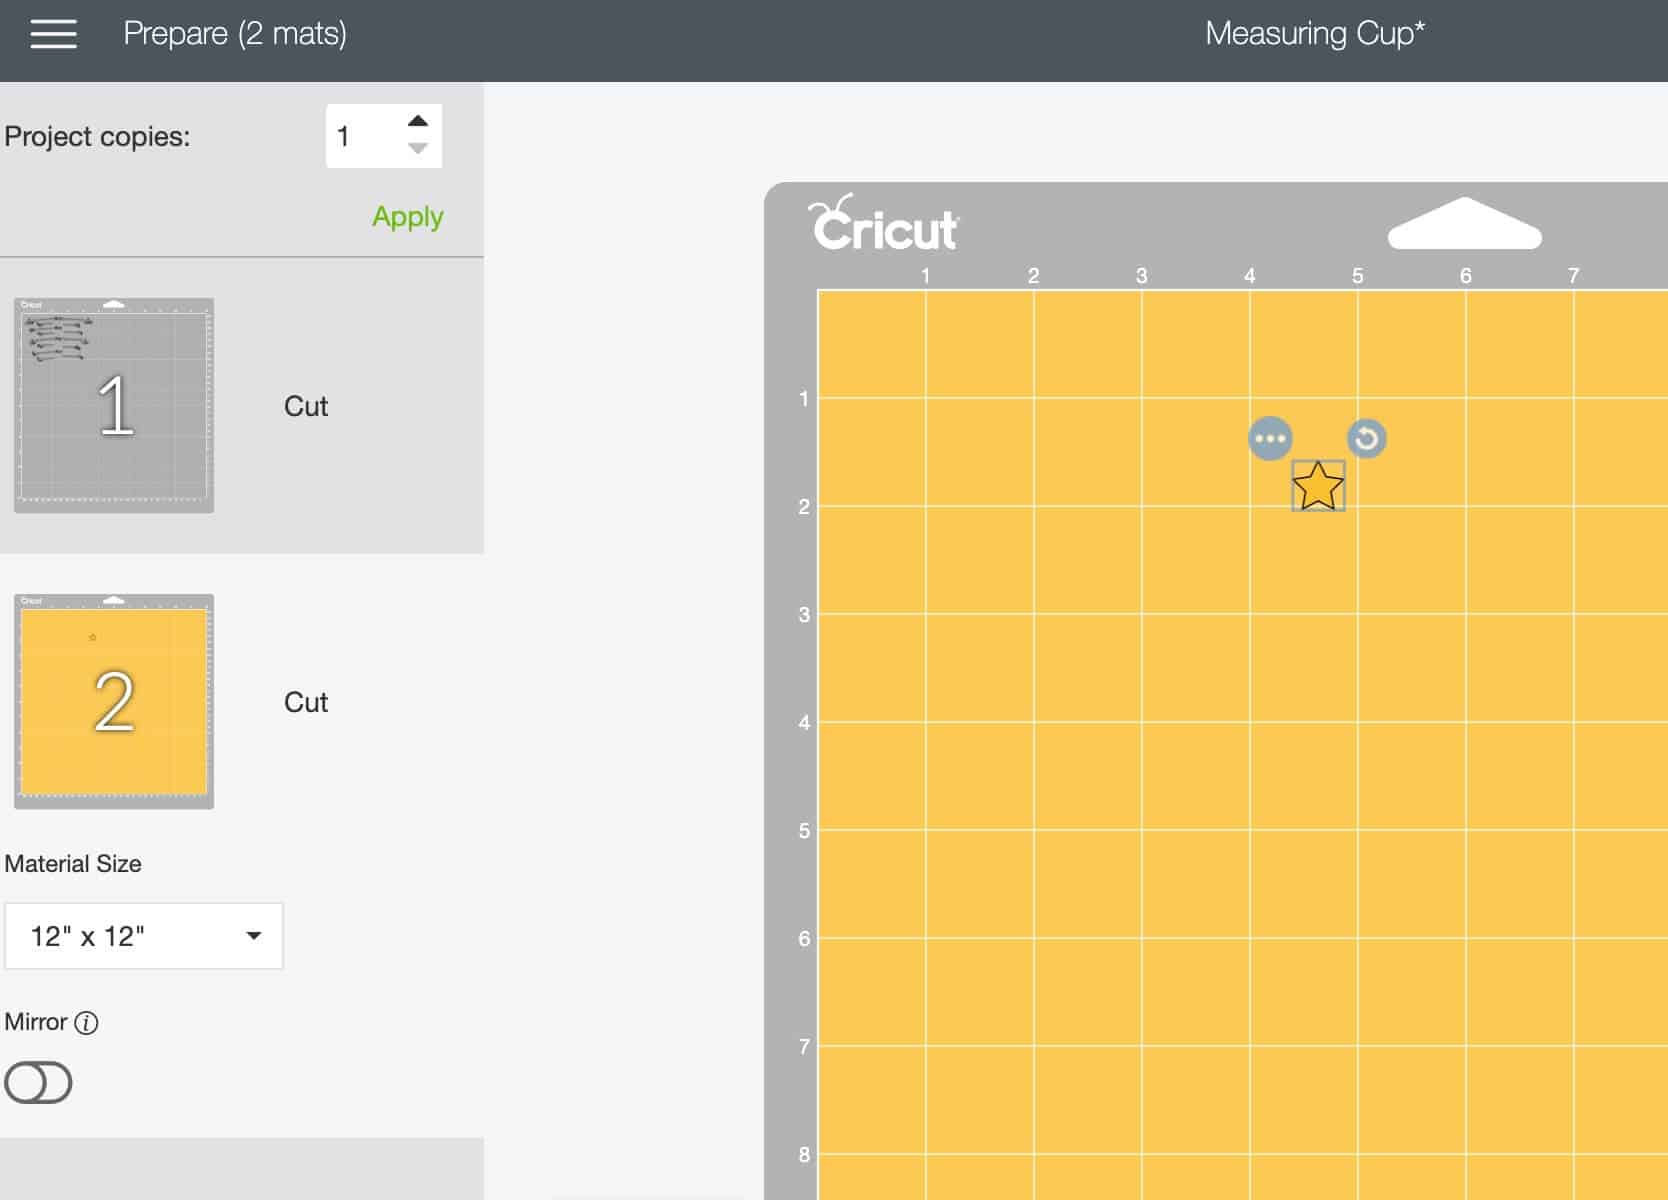
STEP 2: CUT THE VINYL ON CRICUT
When you are ready to cut, place the adhesive vinyl color side up on the cutting mat and make sure the fine-point blade is installed in the Cricut. I recommend using removable or permanent vinyl for etching glass. I choose removable because I had extra on hand.
First, cut your test shape by clicking the Make It in the upper right-hand corner. You may need to toggle the cutting mats to have the mat with the small shape selected. Do this by clicking on the mat you would like to cut. This will show you what’s about to be cut, you can move the little shape around to cut in a position that will not overlap the final design. Click Continue in the lower right corner, then select your material cut setting for vinyl.
If you have an older blade you may need to select more pressure. This is why I suggest starting with a test cut. Load the mat into the machine and press the flashing Cricut button to start cutting. When it’s done cutting, remove the mat from the machine & make sure the settings used cut all the way through the vinyl, but not through the backing paper. If it looks good repeat the process with the final design.
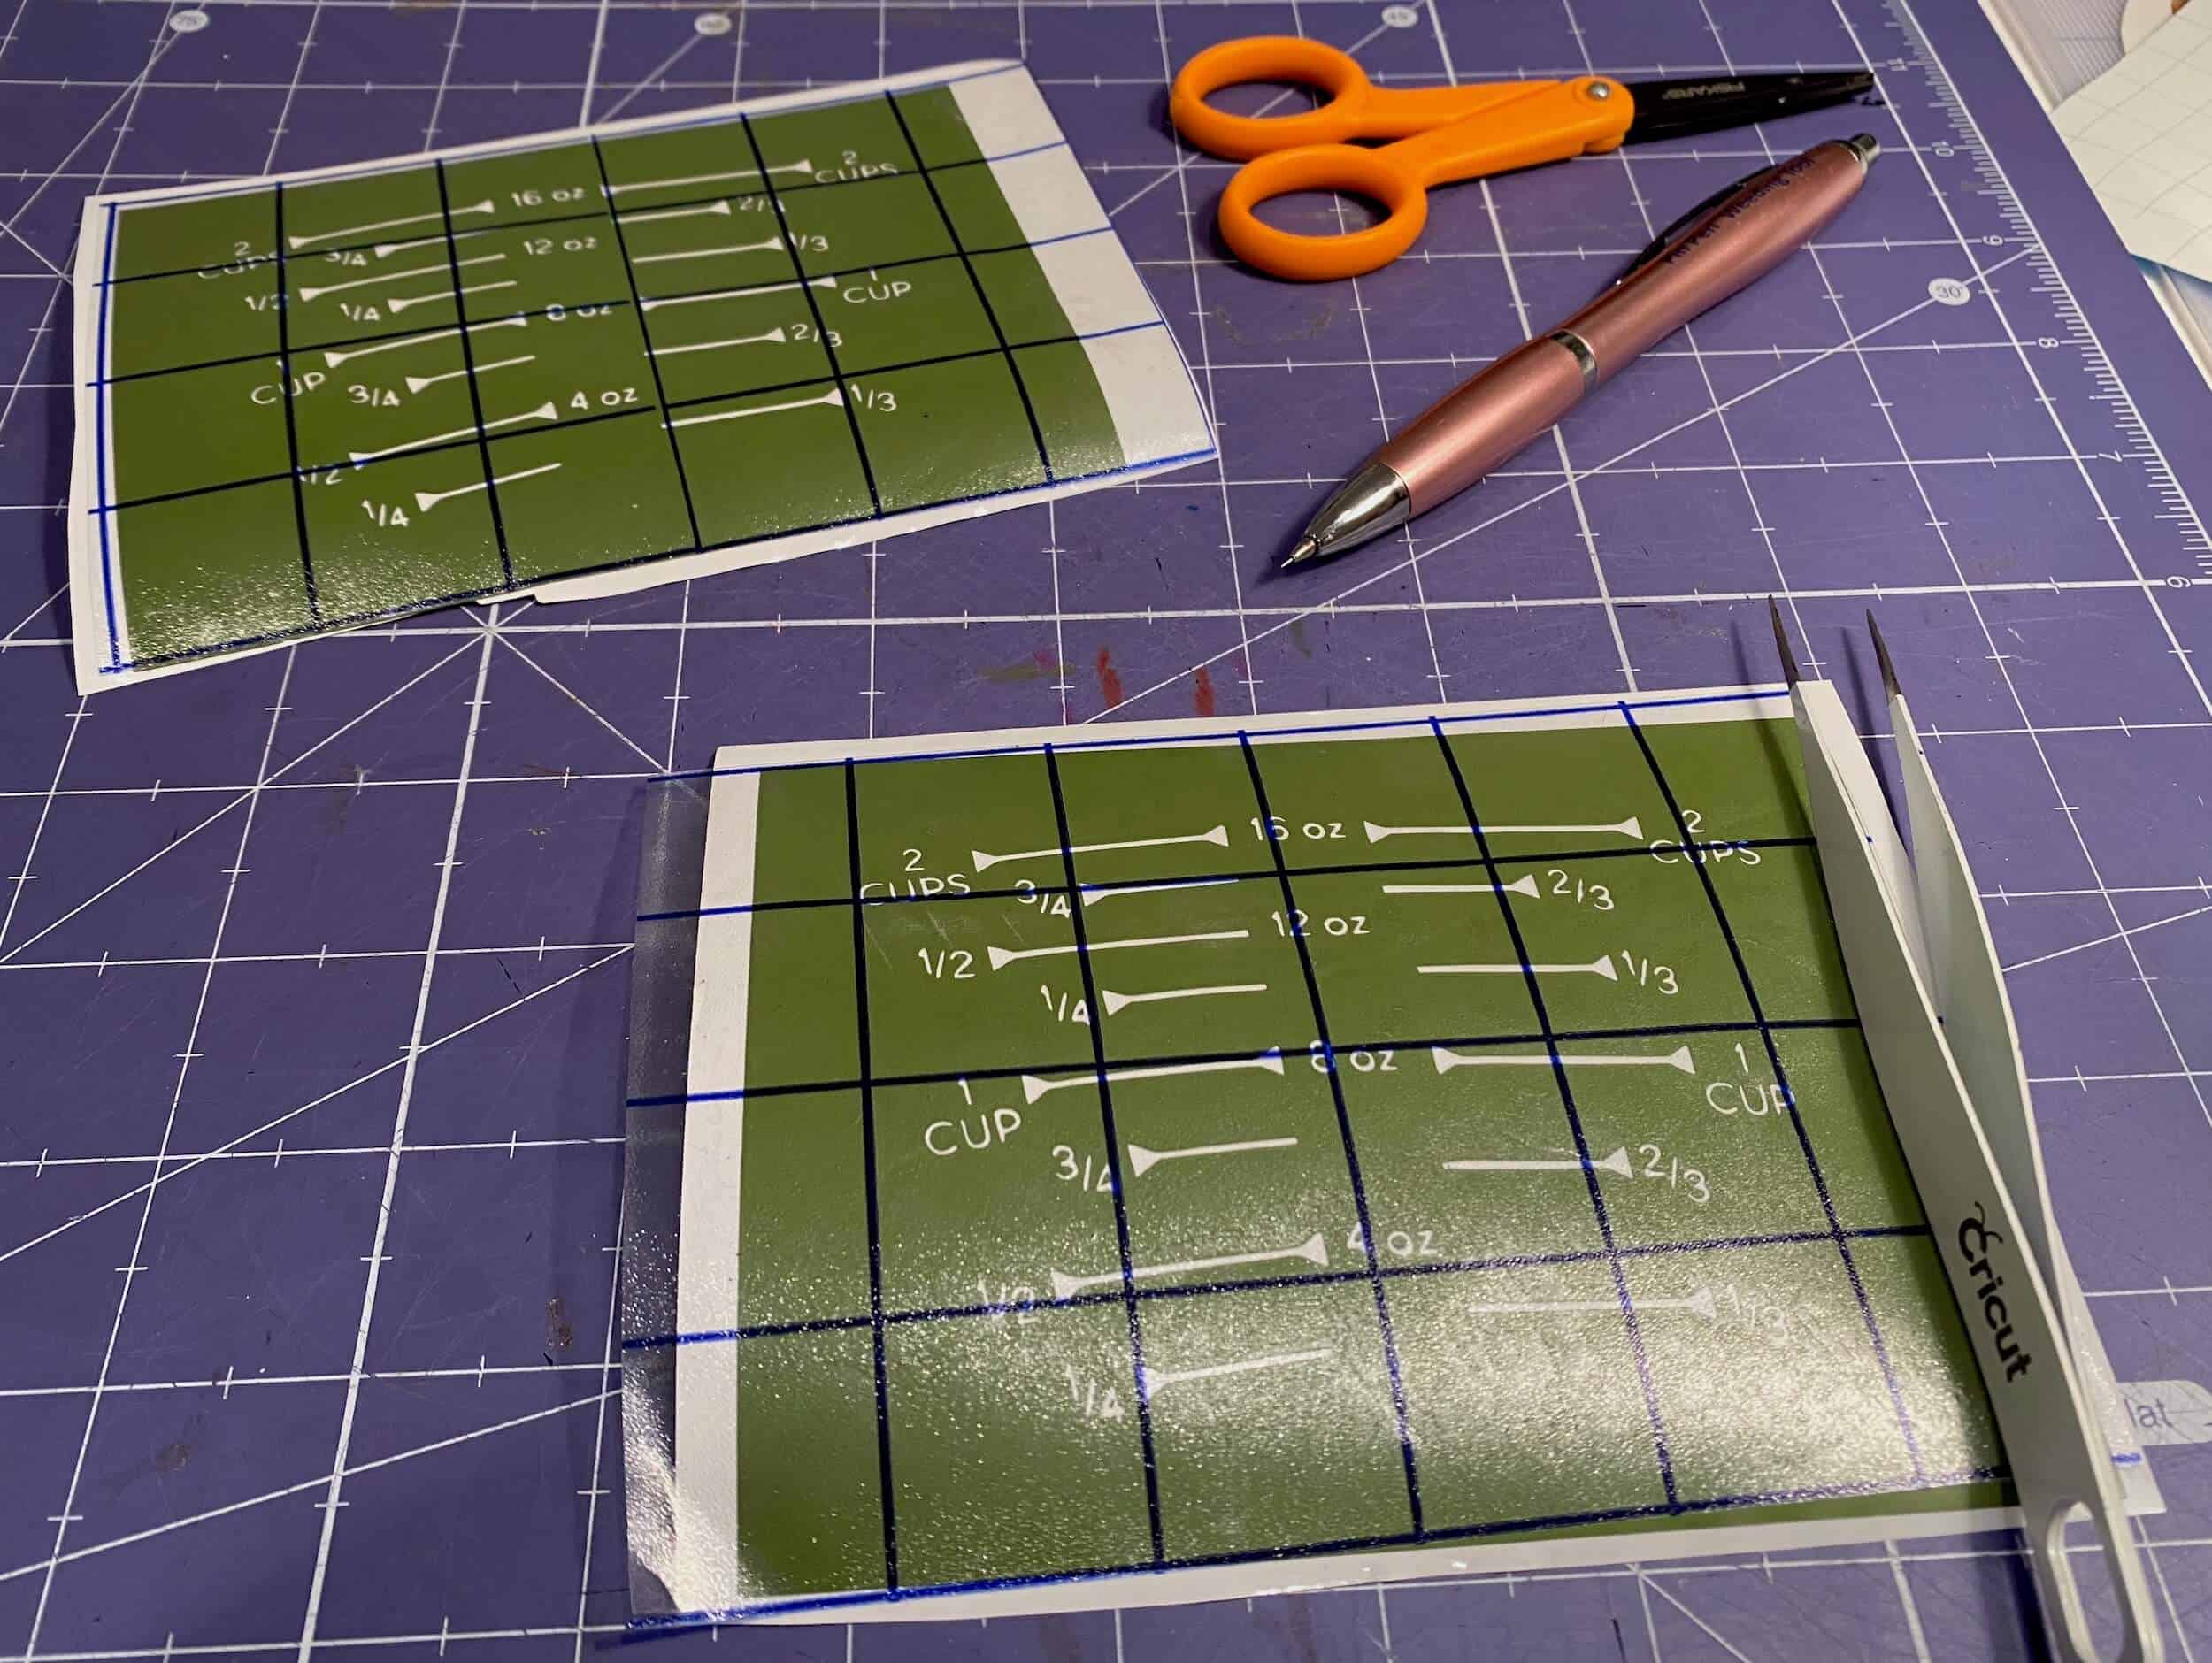
STEP 3: REVERSE WEED THE DESIGN
Reverse weeding vinyl simply means to remove all of the design that you want etched and leave the outline and extra vinyl. You may need weeding tools for this step but can sometimes get away with using a needle.
STEP 4: APPLY TRANSFER SHEET TO VINYL
If you have a simple image you may not need this step, but for intricate cuts with many pieces, a transfer sheet will help keep intricate cuts in their place and keep the design intact. Cut a piece of the transfer sheet the same size of your design. Remove the backing and place it over the weeded vinyl. Usually, my transfer sheet is rolled up or moves around so I like to place the transfer sheet with backing up on my cutting mat.
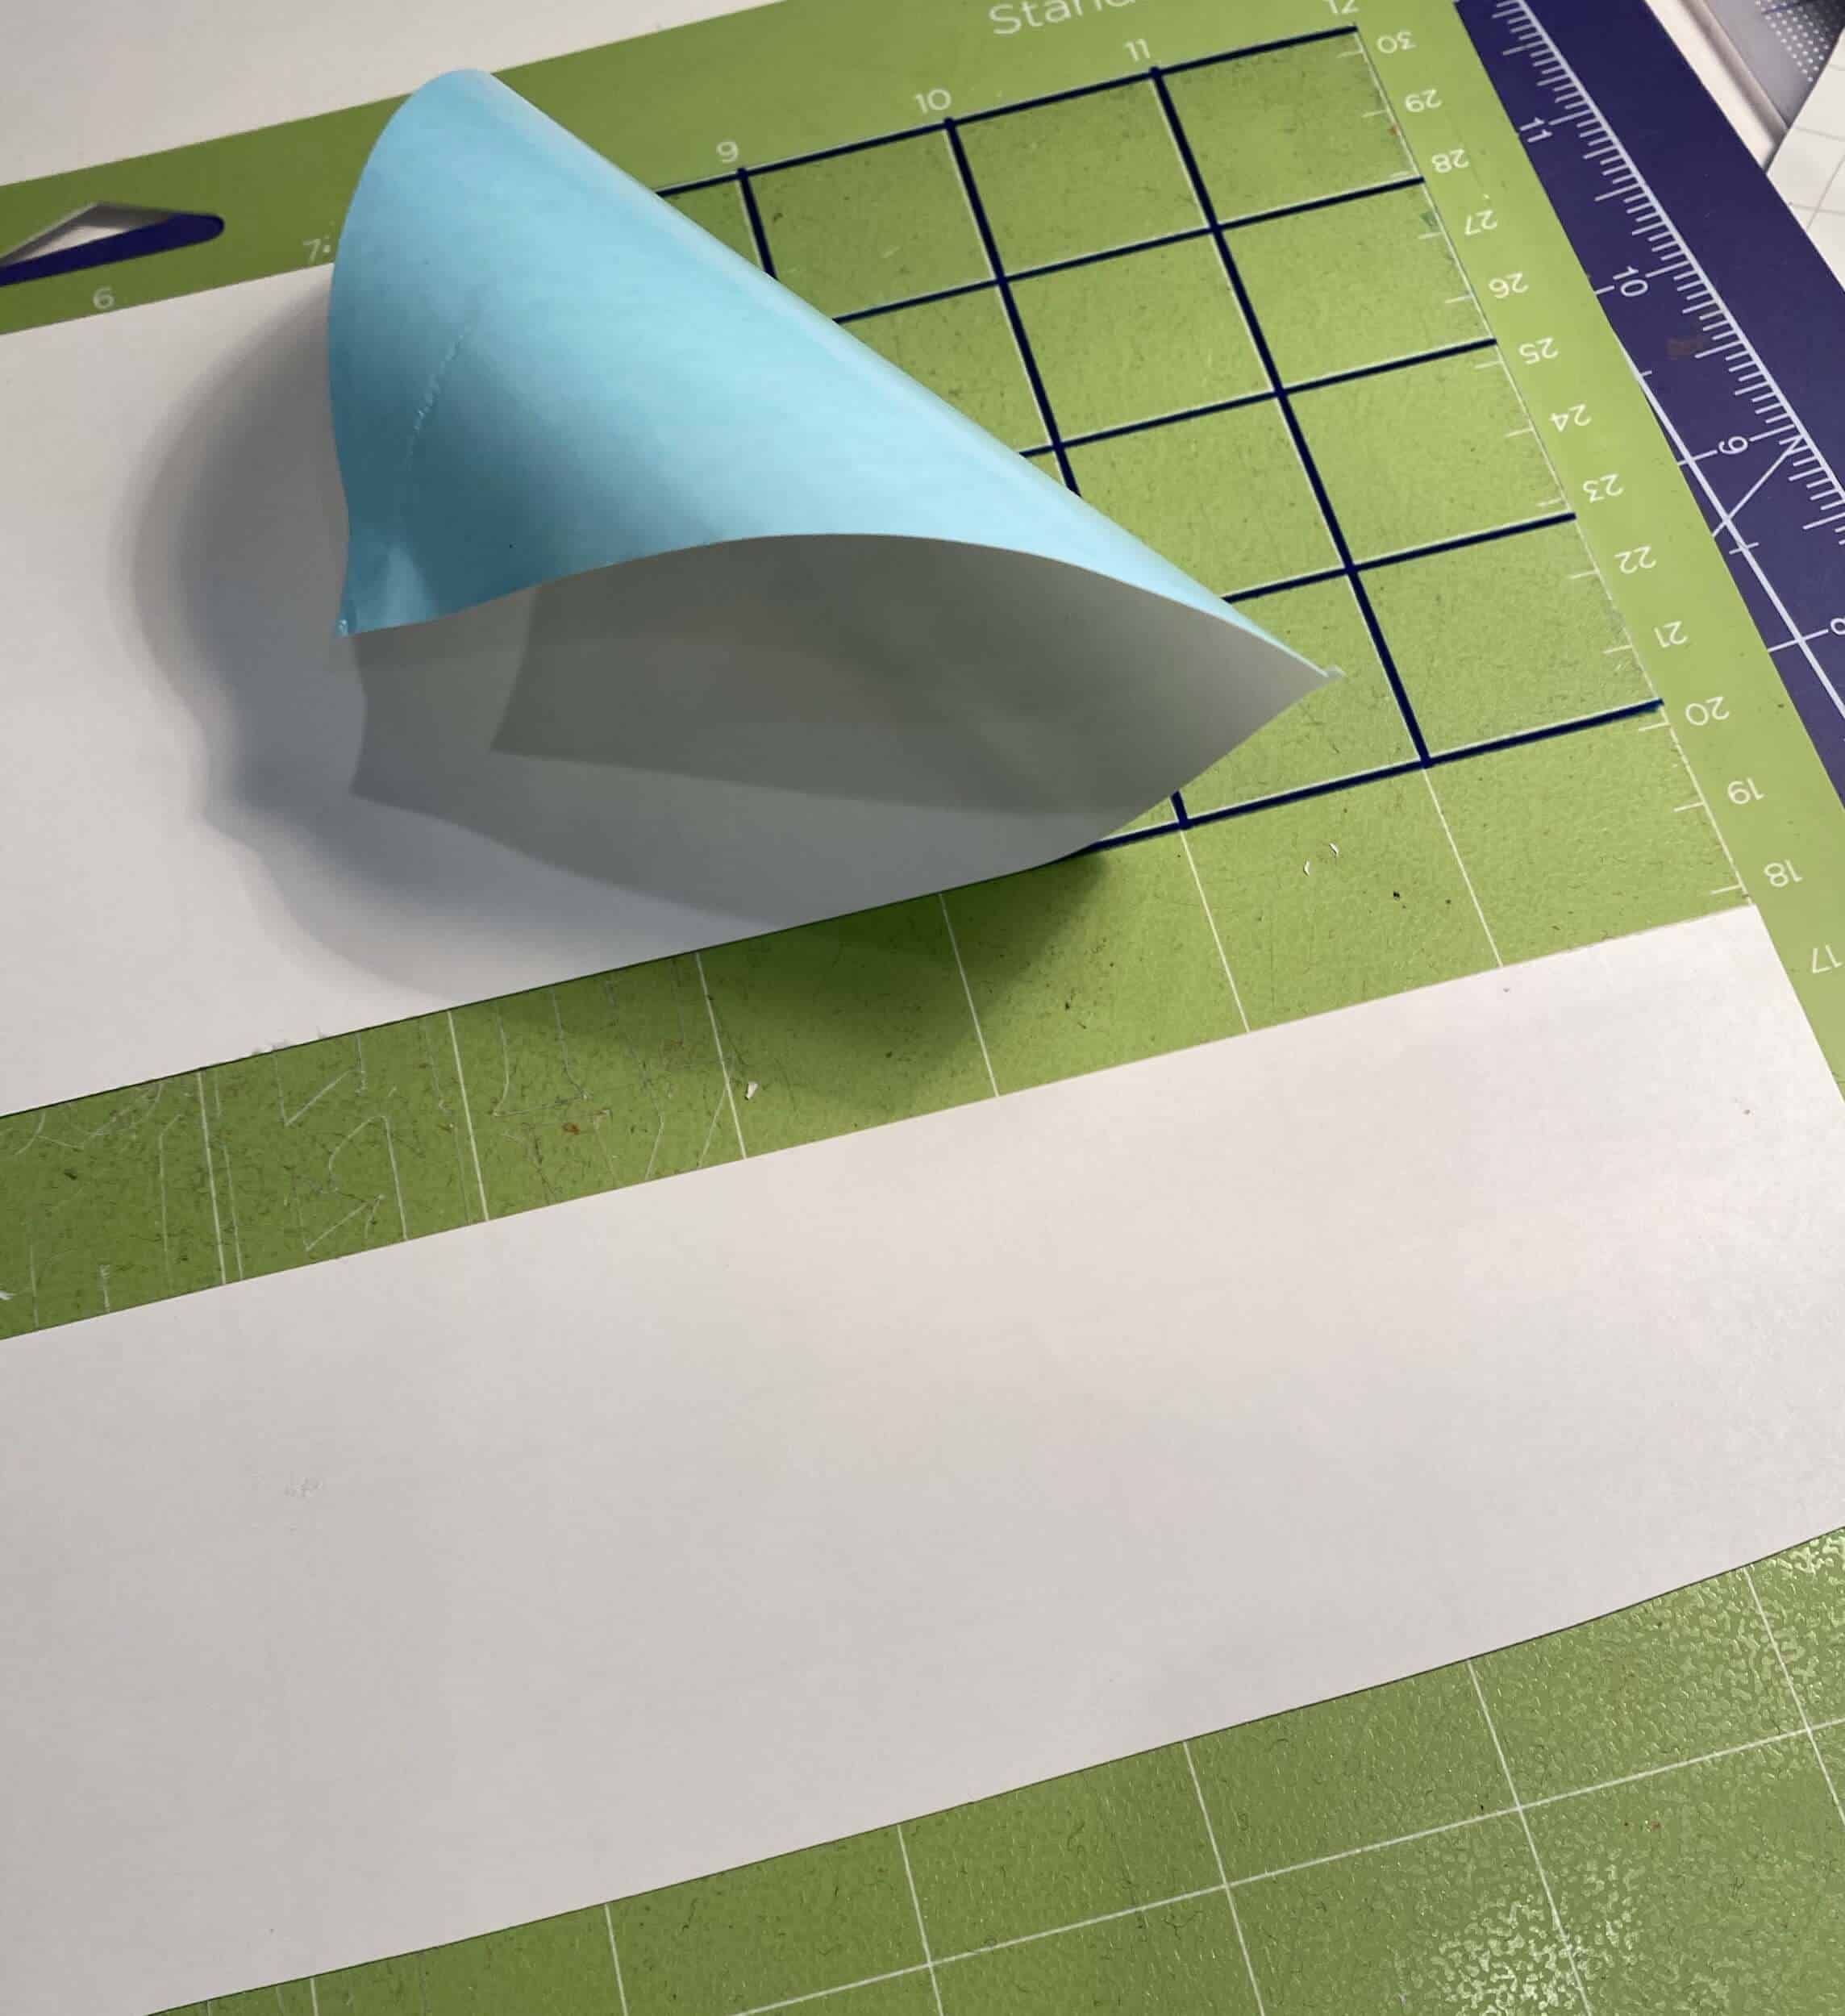
This just helps to hold the sticky paper in place so I can just place my weeded design face down on the sticky side of the transfer sheet. Start at the corner and move outwards so that there are no creases or bubbles. I prefer the transfer sheets with a grid to help align the vinyl on its final destination. For a savings note I have found you can reuse transfer sheets many times, so keep the backing for easy storage. Also, a cheap option for a transfer sheet is contact paper. Remove the transfer sheet with the vinyl decal attached and move on to the next step.
STEP 5: APPLY VINYL TO SURFACE TO BE ETCHED
Clean the glass surface you will be etching thoroughly. The best way to do this is with rubbing alcohol. If the object you are applying vinyl to is curved (like a wine glass) you may want to make small cuts around the design in the transfer tape to allow it to bend with the curve of the surface without creasing.
Just be sure to completely cover these cuts with tape when etching. Remove the vinyl backing from the transfer sheet, place it on your object, and smooth out the vinyl. Be sure to smooth out any air bubbles especially those surrounding the cut image. Any wrinkle or bubble will allow the etching cream to leak and this will etch parts of your glass that are not designed to be etched. (It is very easy to make this mistake!)
After the vinyl is applied you will cover all surrounding exposed areas of glass to be sure not to accidentally etch them. And now we are ready to etch glass! (Make sure there are no bubbles, there are no takebacks after this step.)
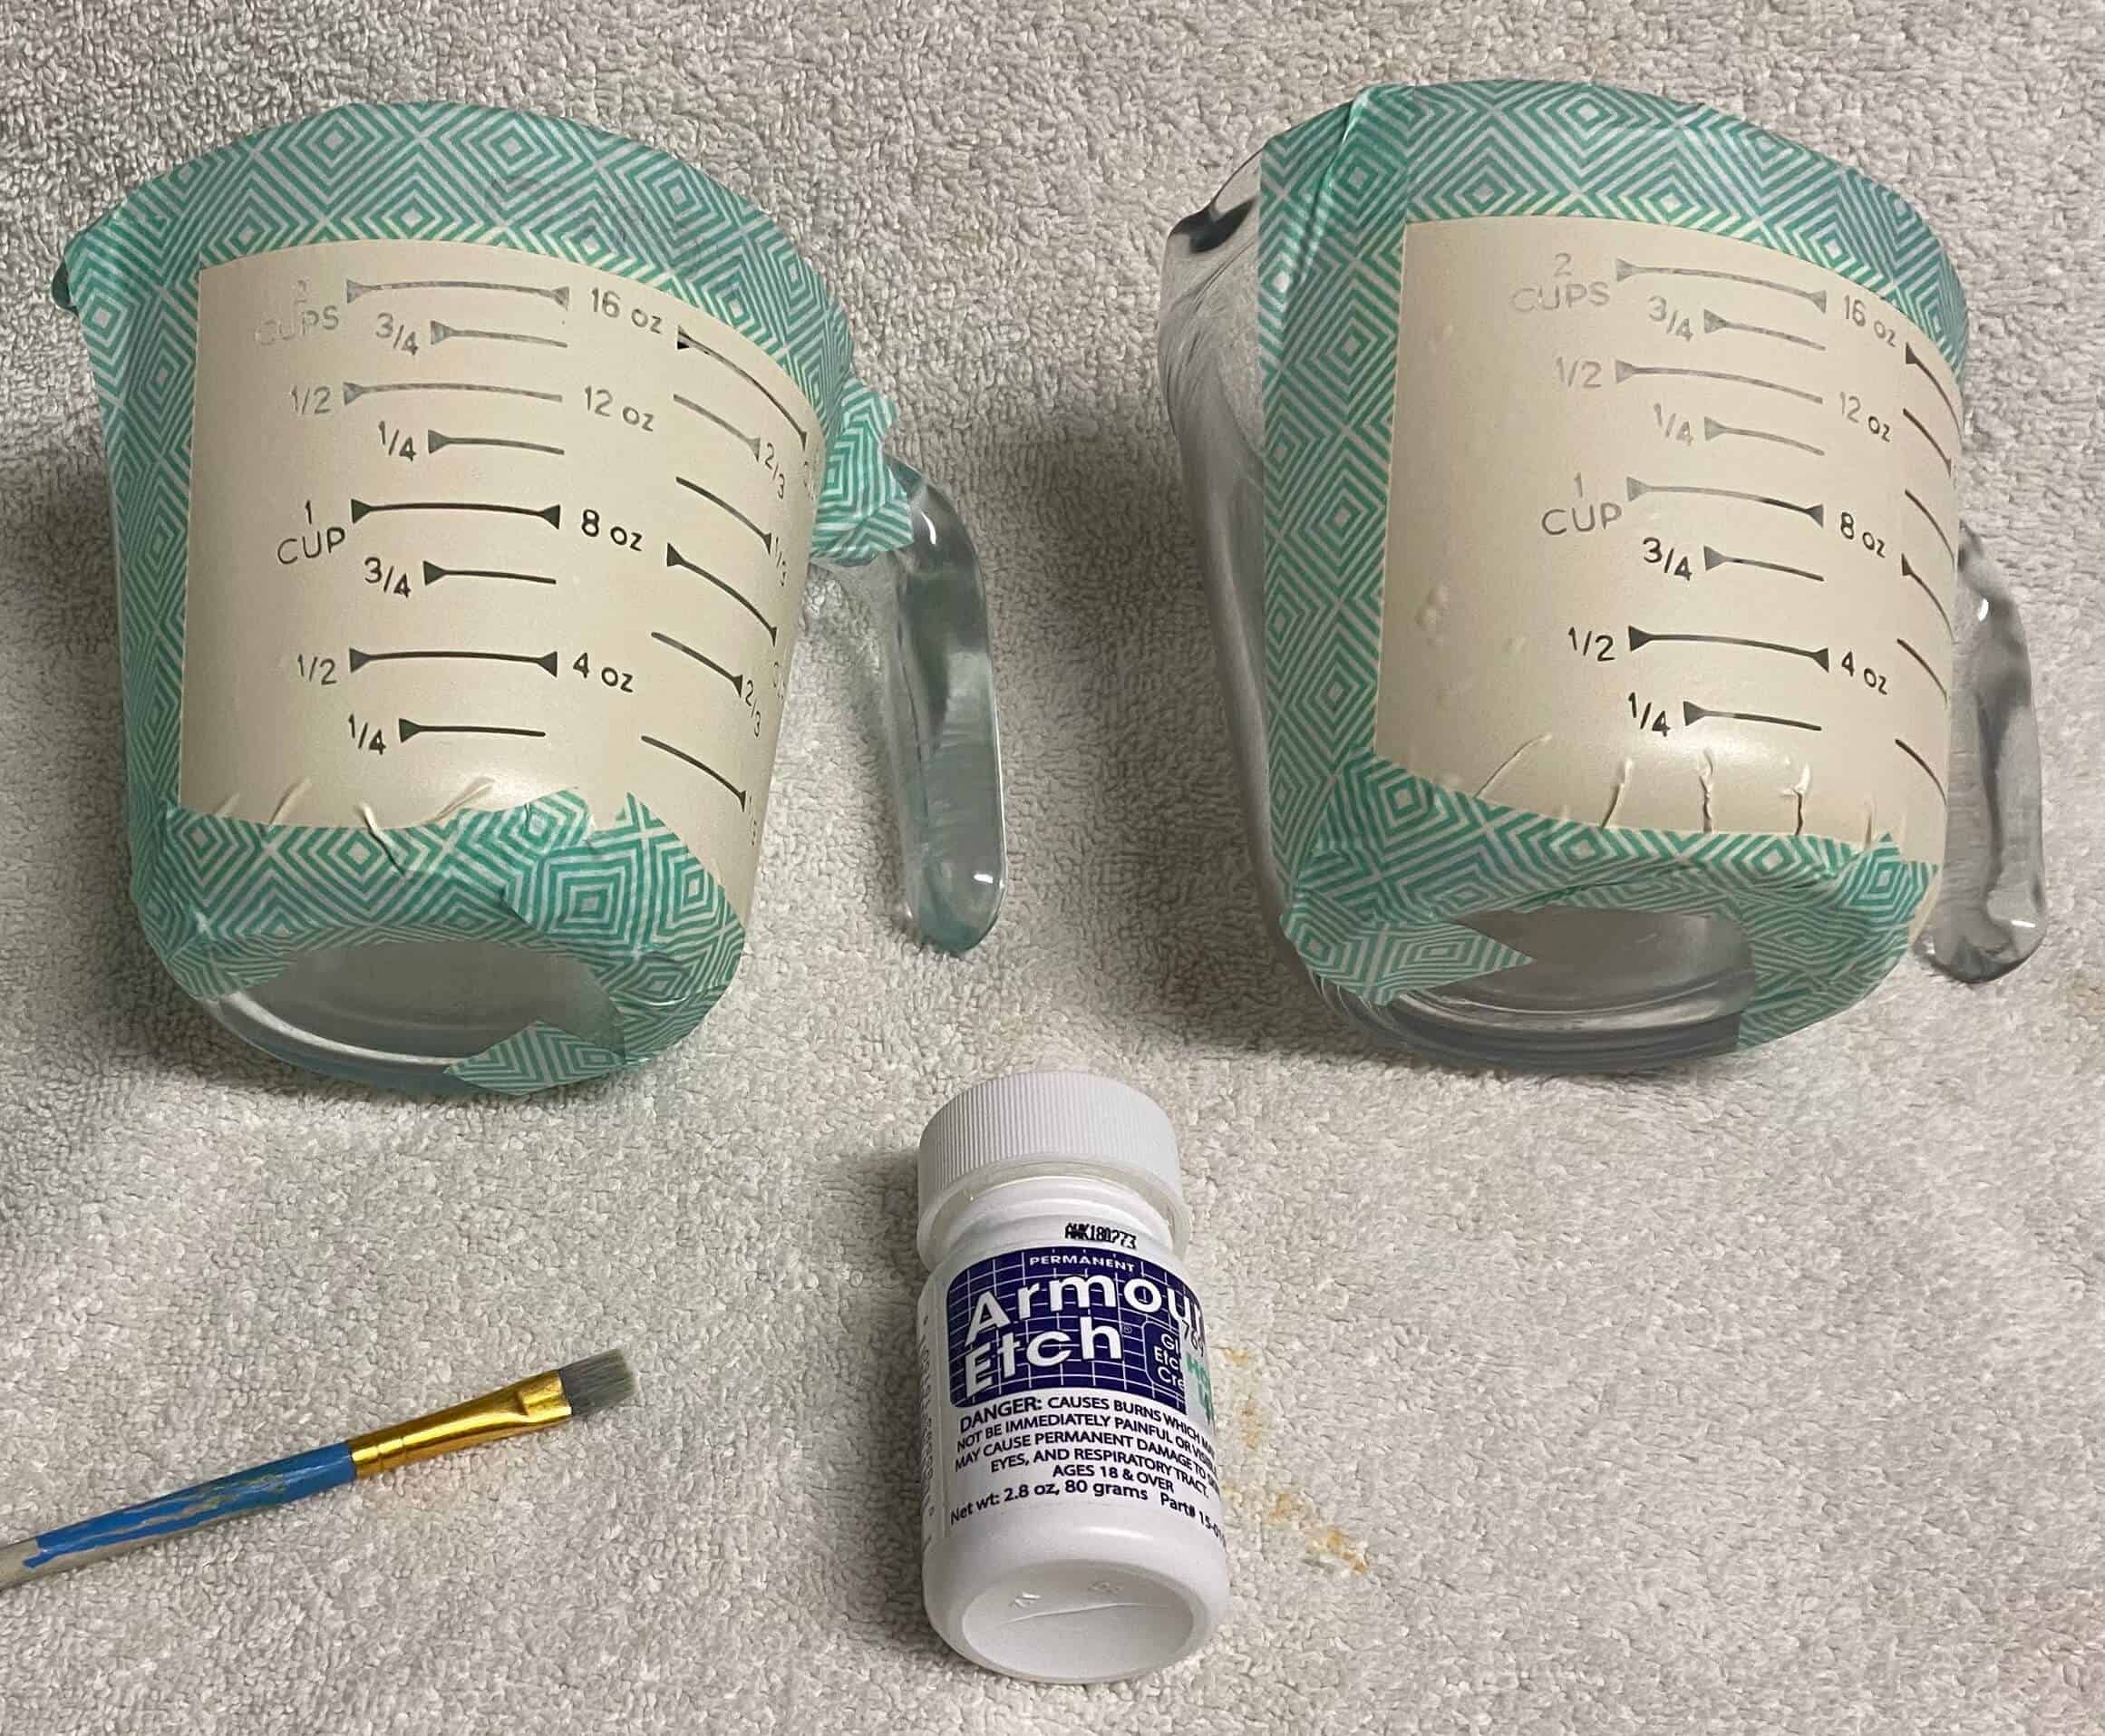
STEP 6: APPLY ETCHING CREAM TO GLASS
For this step, you should wear personal protective equipment, read and follow all the instructions from the etching cream you are using. Shake the etching cream before opening it, if it has a bunch of crystallized bits in it you made have an old bottle. It should be chunk-free.
Apply a coat of the etching cream over the open parts of your design. You don’t need a ton here and you can even put the excess back in the bottle when you're done to use on another project. A little bit of this cream goes a long way. I have had my little bottle for many projects and still have plenty left.
You want to continuously brush the cream around in all directions making sure to get it in all the tiny corners and small spaces. I brushed mine around for about 5 minutes then rinsed the cream off in the utility sink. You can see my process on the video in the beginning of this tutorial. My design was intricate and I had to brush off the excess etching cream with a cleaning brush so that it wouldn't be spread around in the next step.
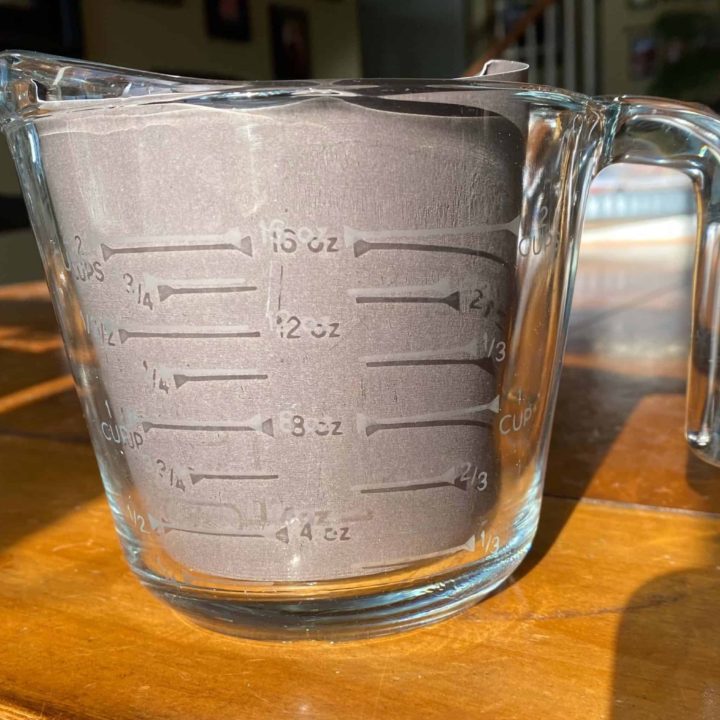
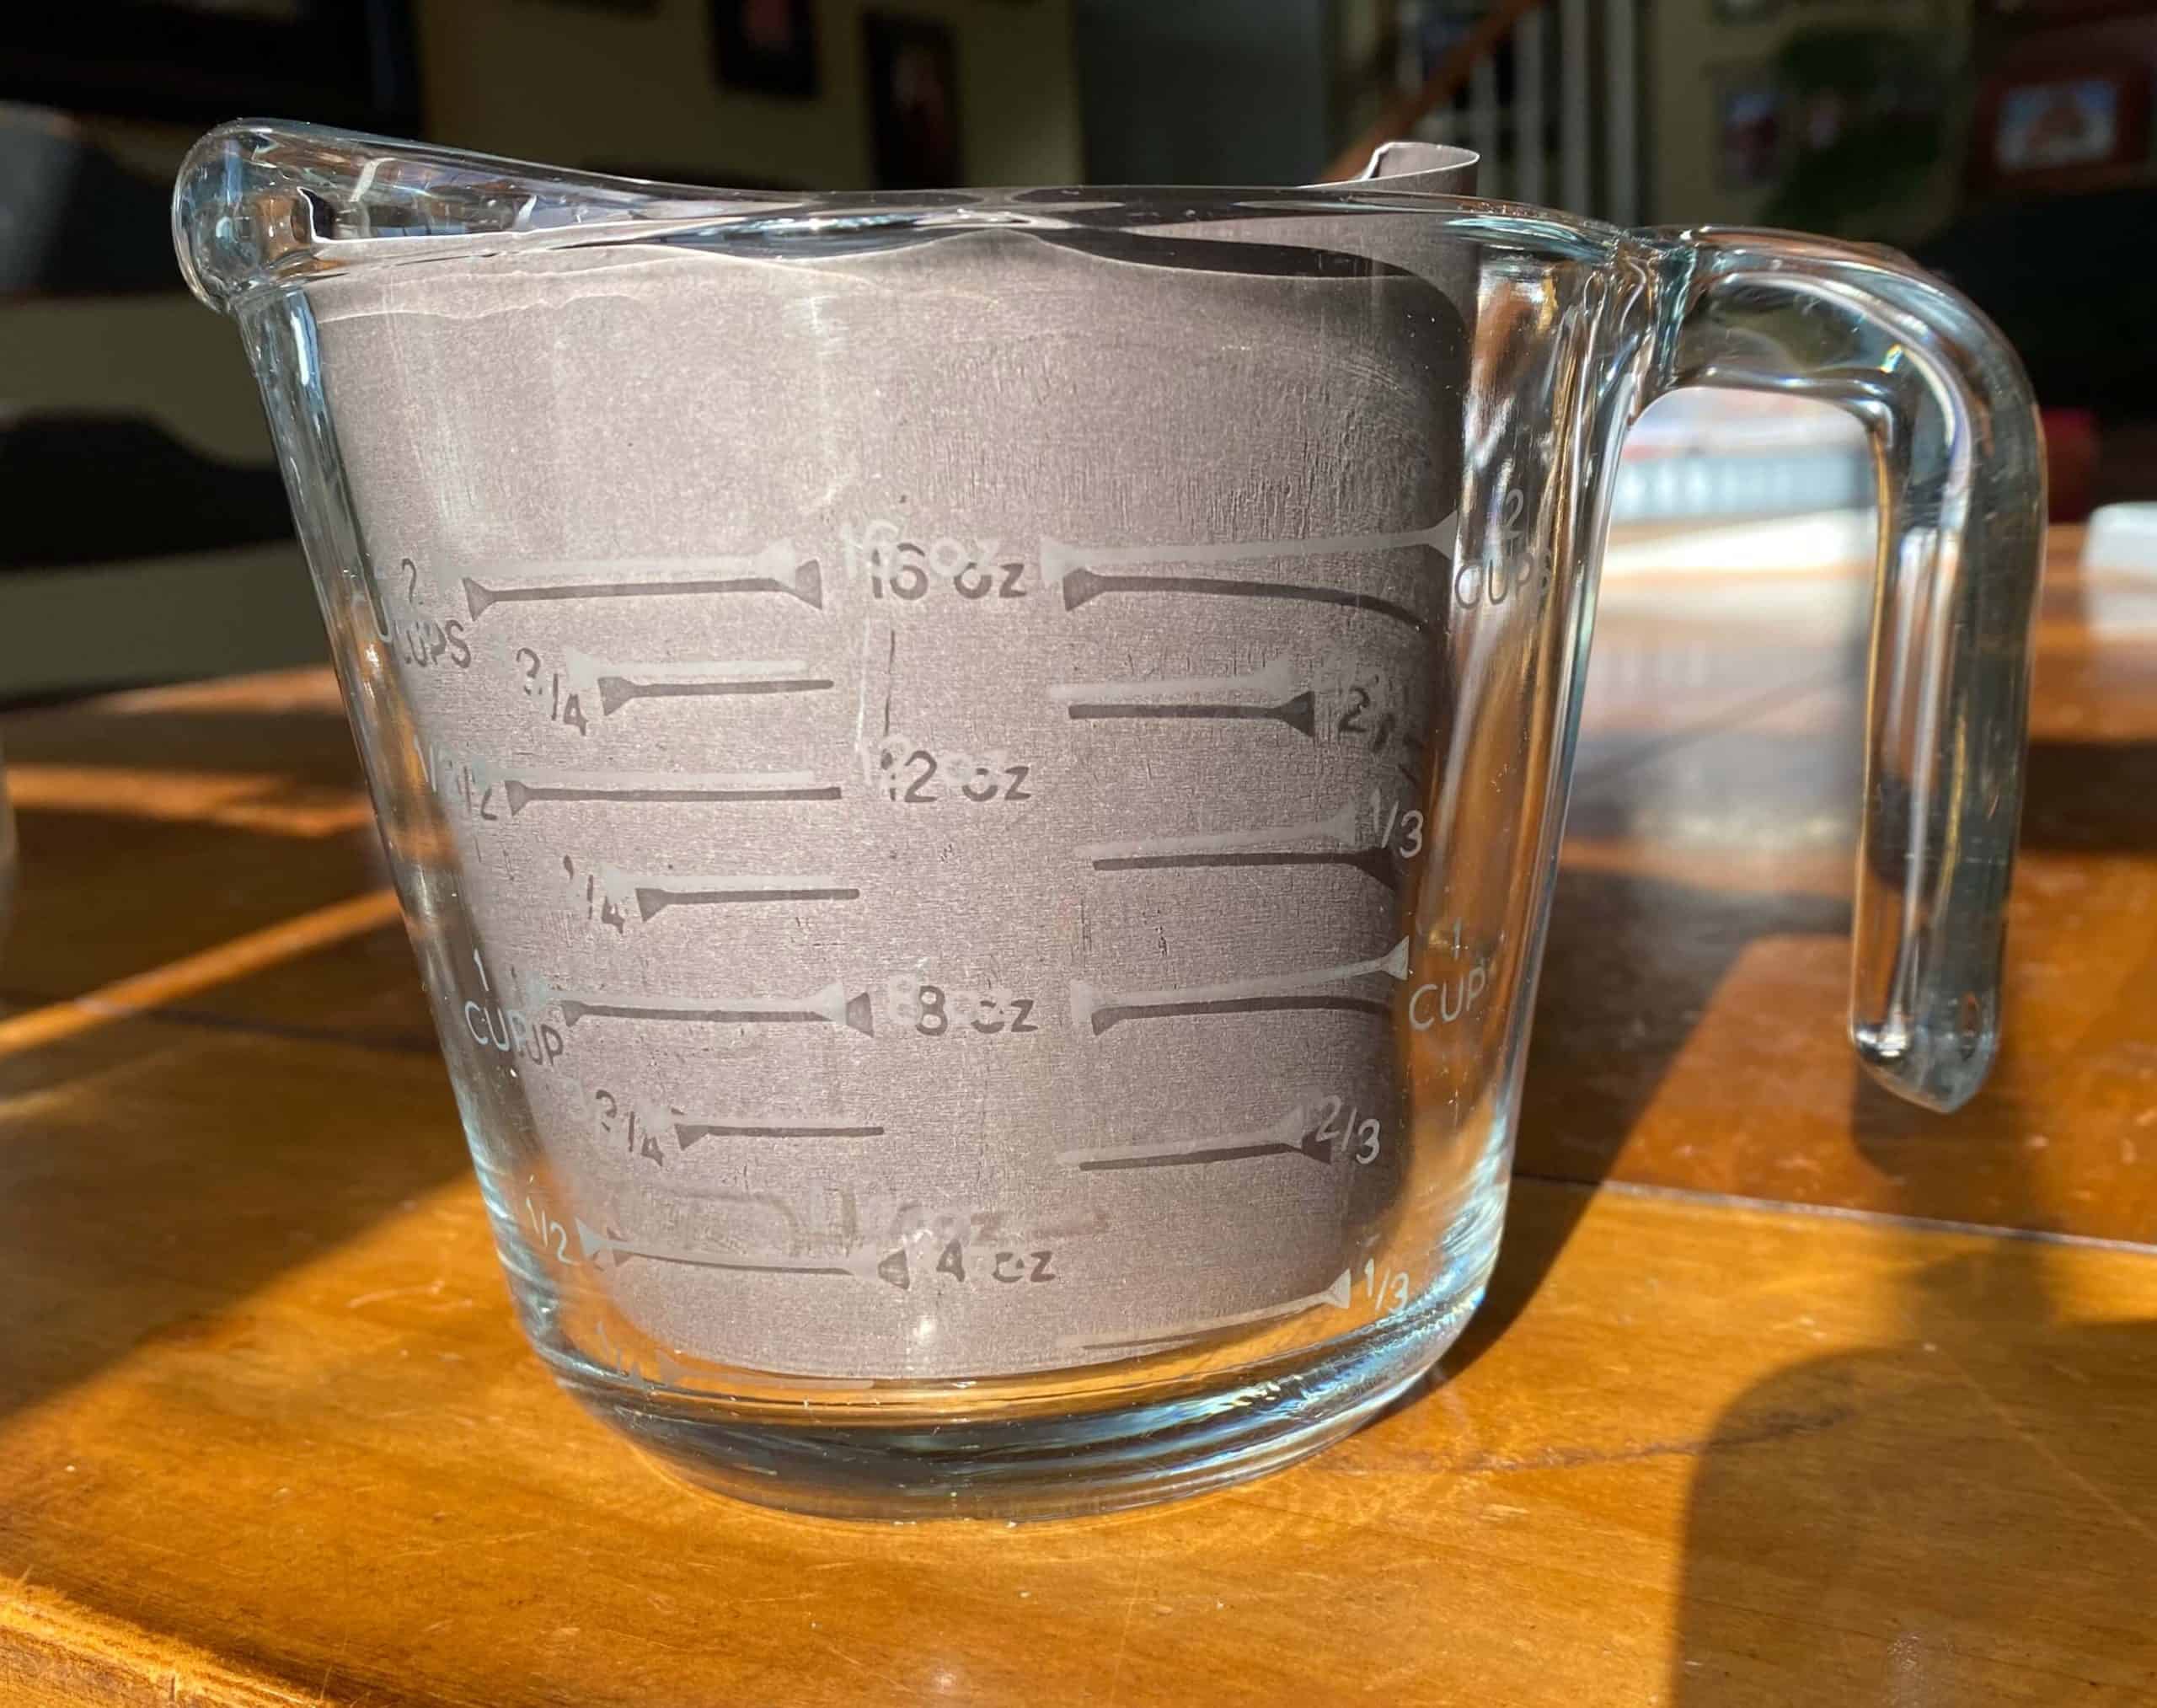
STEP 7: REMOVE VINYL
After the etching cream is washed completely off you remove the vinyl and the project is complete. The best part of etched glassware is that it’s dishwasher safe. All my favorite kitchen tools are.
NOTES ON UPDATING OLD PYREX MEASURING CUPS
If you didn’t want to etch the measuring cup glass you could still use the stencil with a sharpie, and after it’s dry remove the stencil and bake it at 350 degrees for 30 mins to seal it. Another option with the stencil (or without if you have a steady hand) is using a paint pen, be sure to follow the manufacturer’s directions to seal it so that it doesn’t wash off.
If your measuring glass needs some help and you don’t have a cricut, or the time to tediously weed this vinyl, or a steady hand for the sharpie or paint marker, just go ahead and buy a measuring cup with raised markings like this cute one from Target.
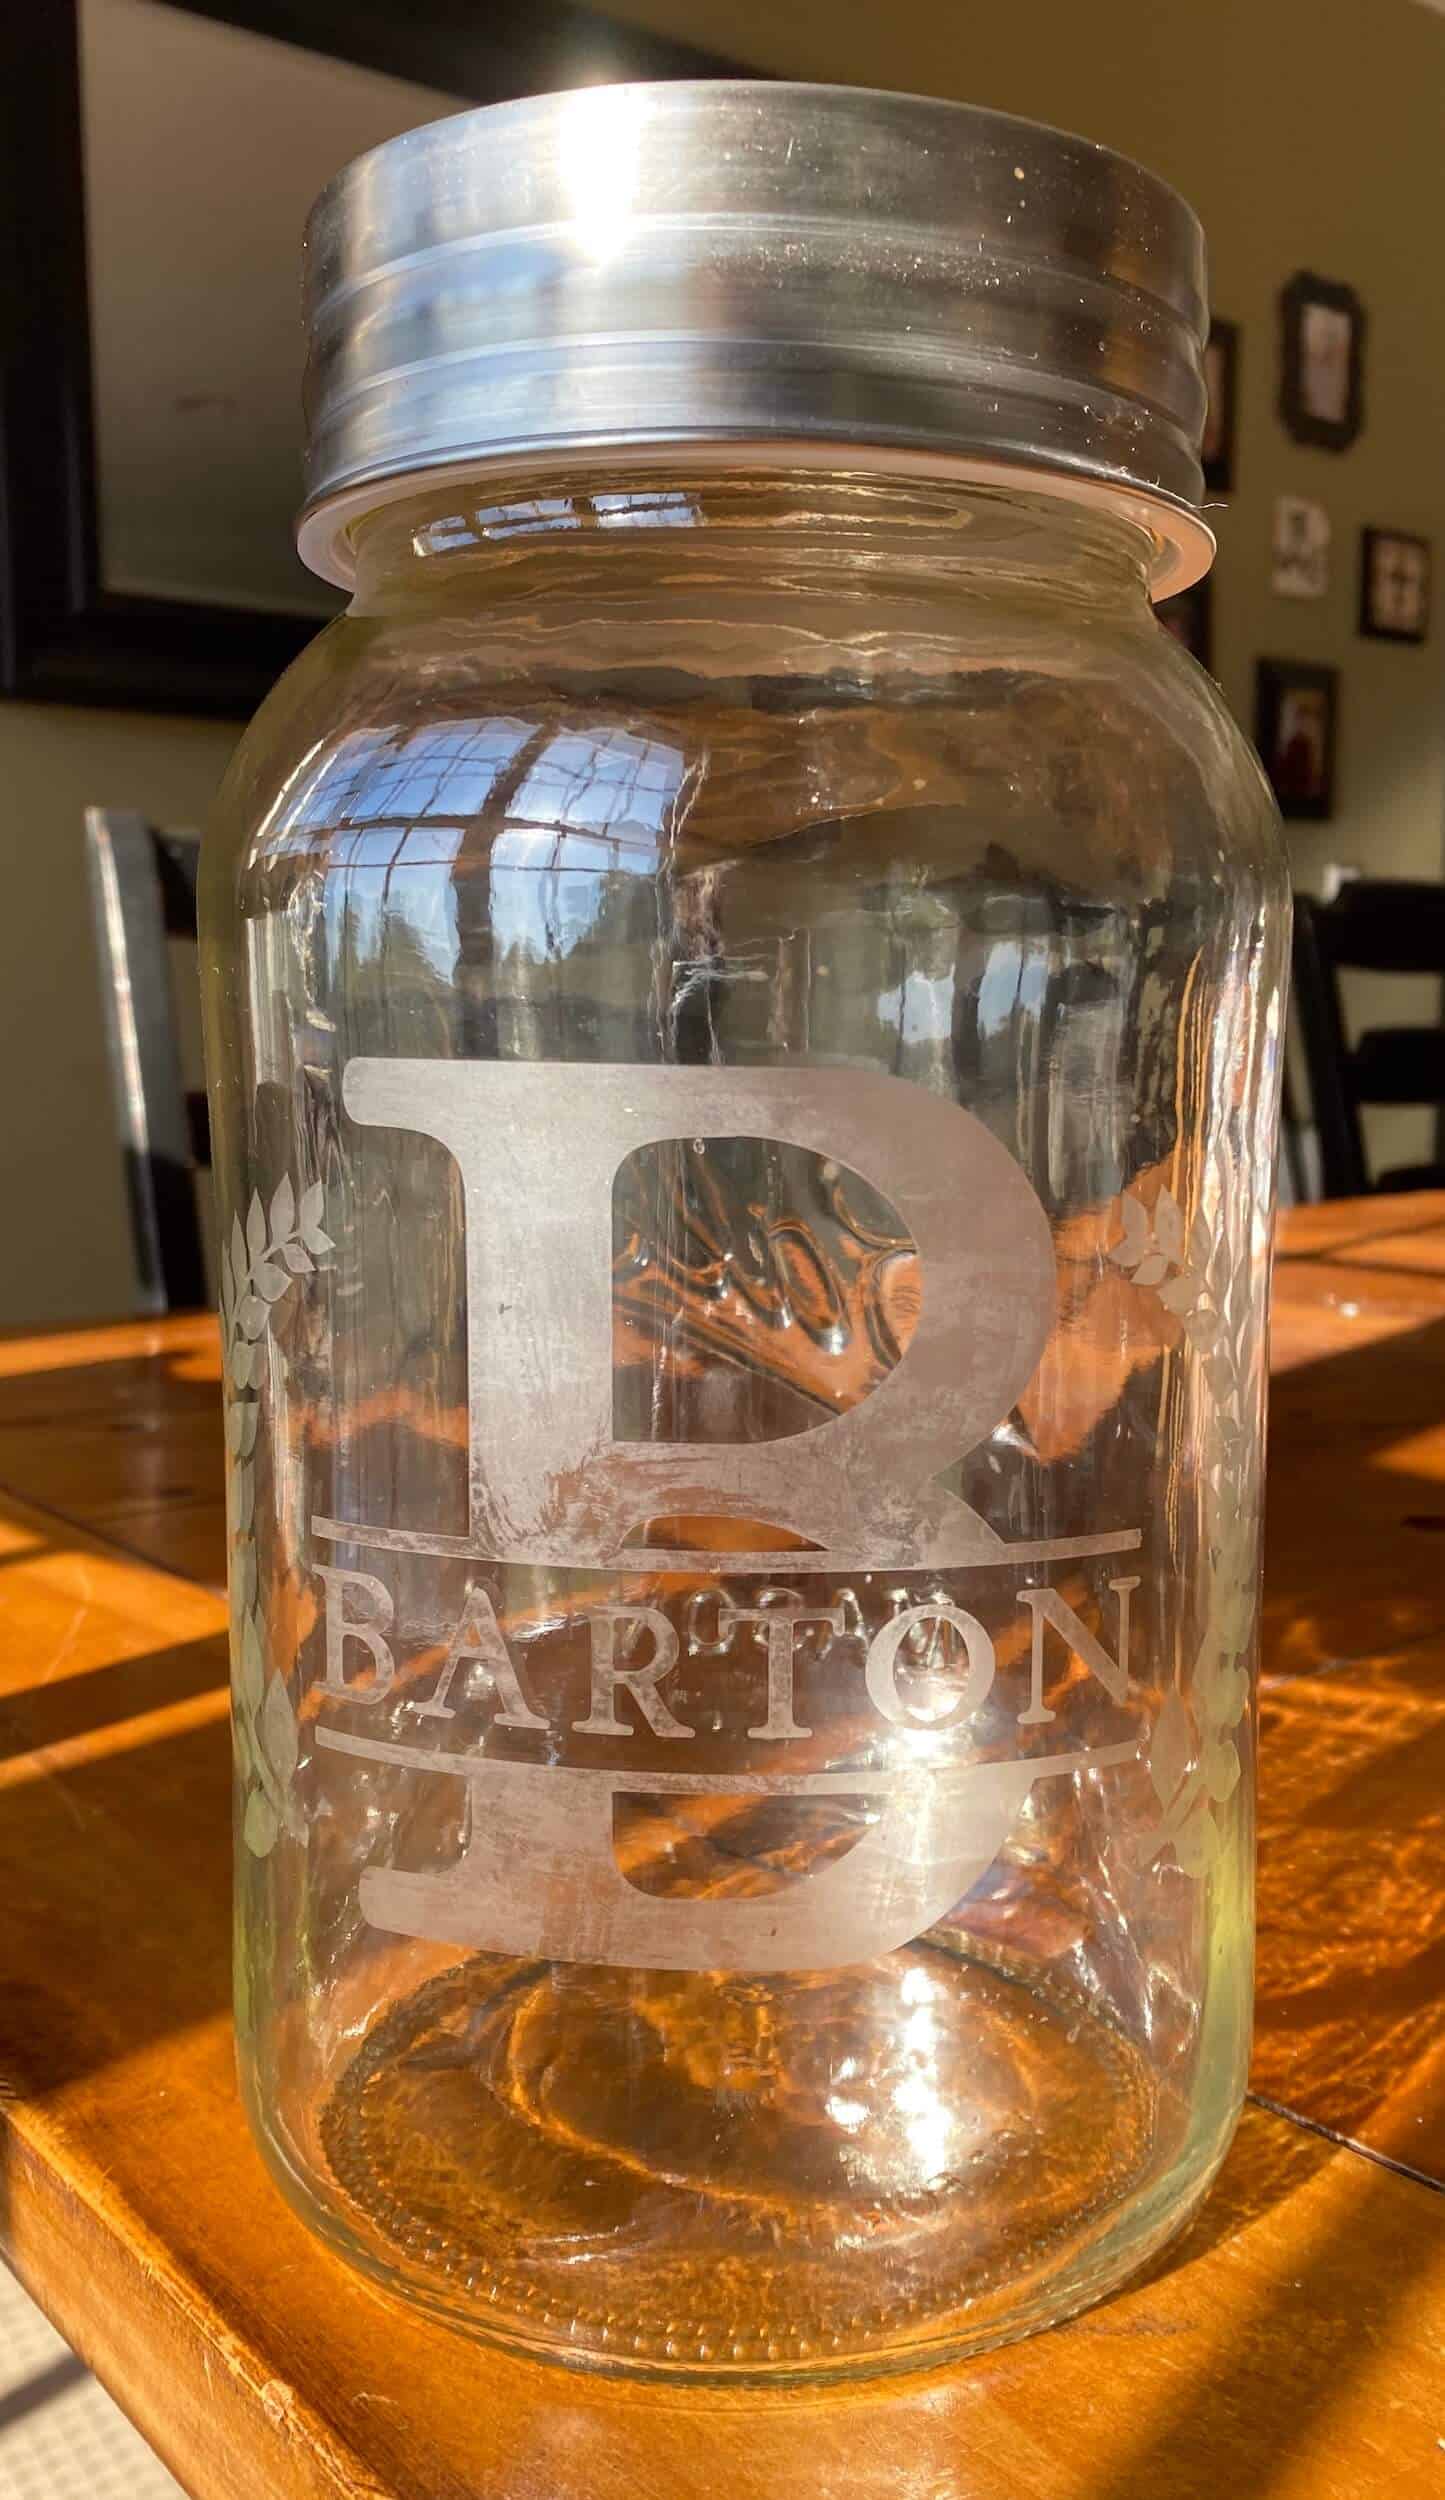
I do not recommend using the etching cream on large areas. You can see in this pick of my oversized mason jar that the “B” in the center was a bit too thick and the cream didn’t spread evenly. It looks ok out of the direct sun, but I know it’s not perfect and it bugs me. If I did it again I would have used a thinner font.
Hope you learned someone and enjoyed this tutorial. If you happen to use any of my methods or SVG stencil file send me a pic! I would love to see your work. Now let’s get crafting!
I think this seems like a lot of steps, but once you finish one etching project and see how easy it is to complete you will likely look around and notice how boring the glass around you looks. You will want to etch all the things!
If you found this helpful and try it for yourself, please send me a pic of your work! I would love to see it and hear about your project. Check out the SVG used in this tutorial by subscribing below for access to the free resource library.
Related Cricut crafts:
- Cricut Basics for Beginners
- Vinyl Decals
- Waterslide Decals
- Elephant Stuffy
- Reverse Canvas
- Free Resource Library
Update Glass with Etching Today!