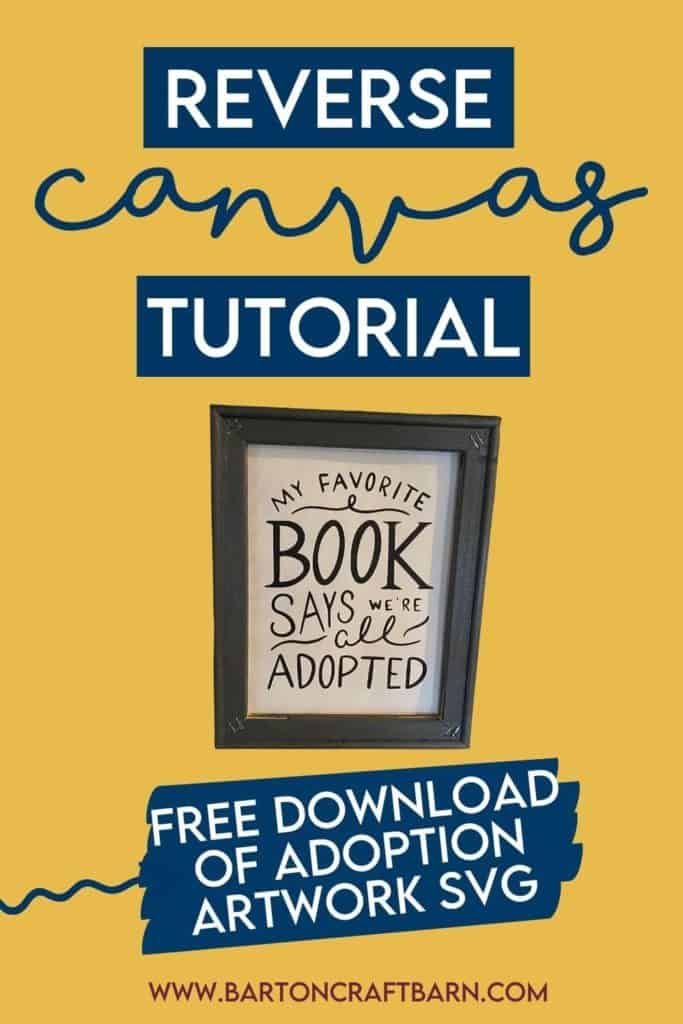
REVERSE CANVAS TUTORIAL

DIY ADOPTION GIFT REVERSE CANVAS TUTORIAL
If you are not familiar with what a reverse canvas is or how easy it is to create one keep scrolling for a step-by-step guide in this reverse canvas tutorial.
The idea for this canvas came from me brainstorming what I could make for a former foster placement’s forever family when they are able to finalize the adoption. I came across this adoption quote and I loved it! I knew I wanted to do something with it for that amazing family, and maybe I made one for myself as well! I also hope to personalize a stuffy using the same method from my Elephant Stuffy Tutorial. I can’t wait till that happy, happy day! If you are at all familiar with the foster system, it may be a while, so I guess I’ll have time to make them my cute gifts. For more insights on fostering, check out my blog post!
This reverse canvas is an easy & quick project. The 7 steps are detailed below in this tutorial, and some are optional depending on how the frame is finished. So what is a reverse canvas? Basically a reverse canvas turns a plain wrapped canvas into a piece of artwork by reusing it’s own frame. It’s a quick and inexpensive way to create framed art. This method can be used with number of canvas techniques like painting, stenciling, hot mess canvas, or using iron-on vinyl like I will show in this tutorial. This page contains a few affiliate links. Using these links, I earn a small commission at no additional cost to you.
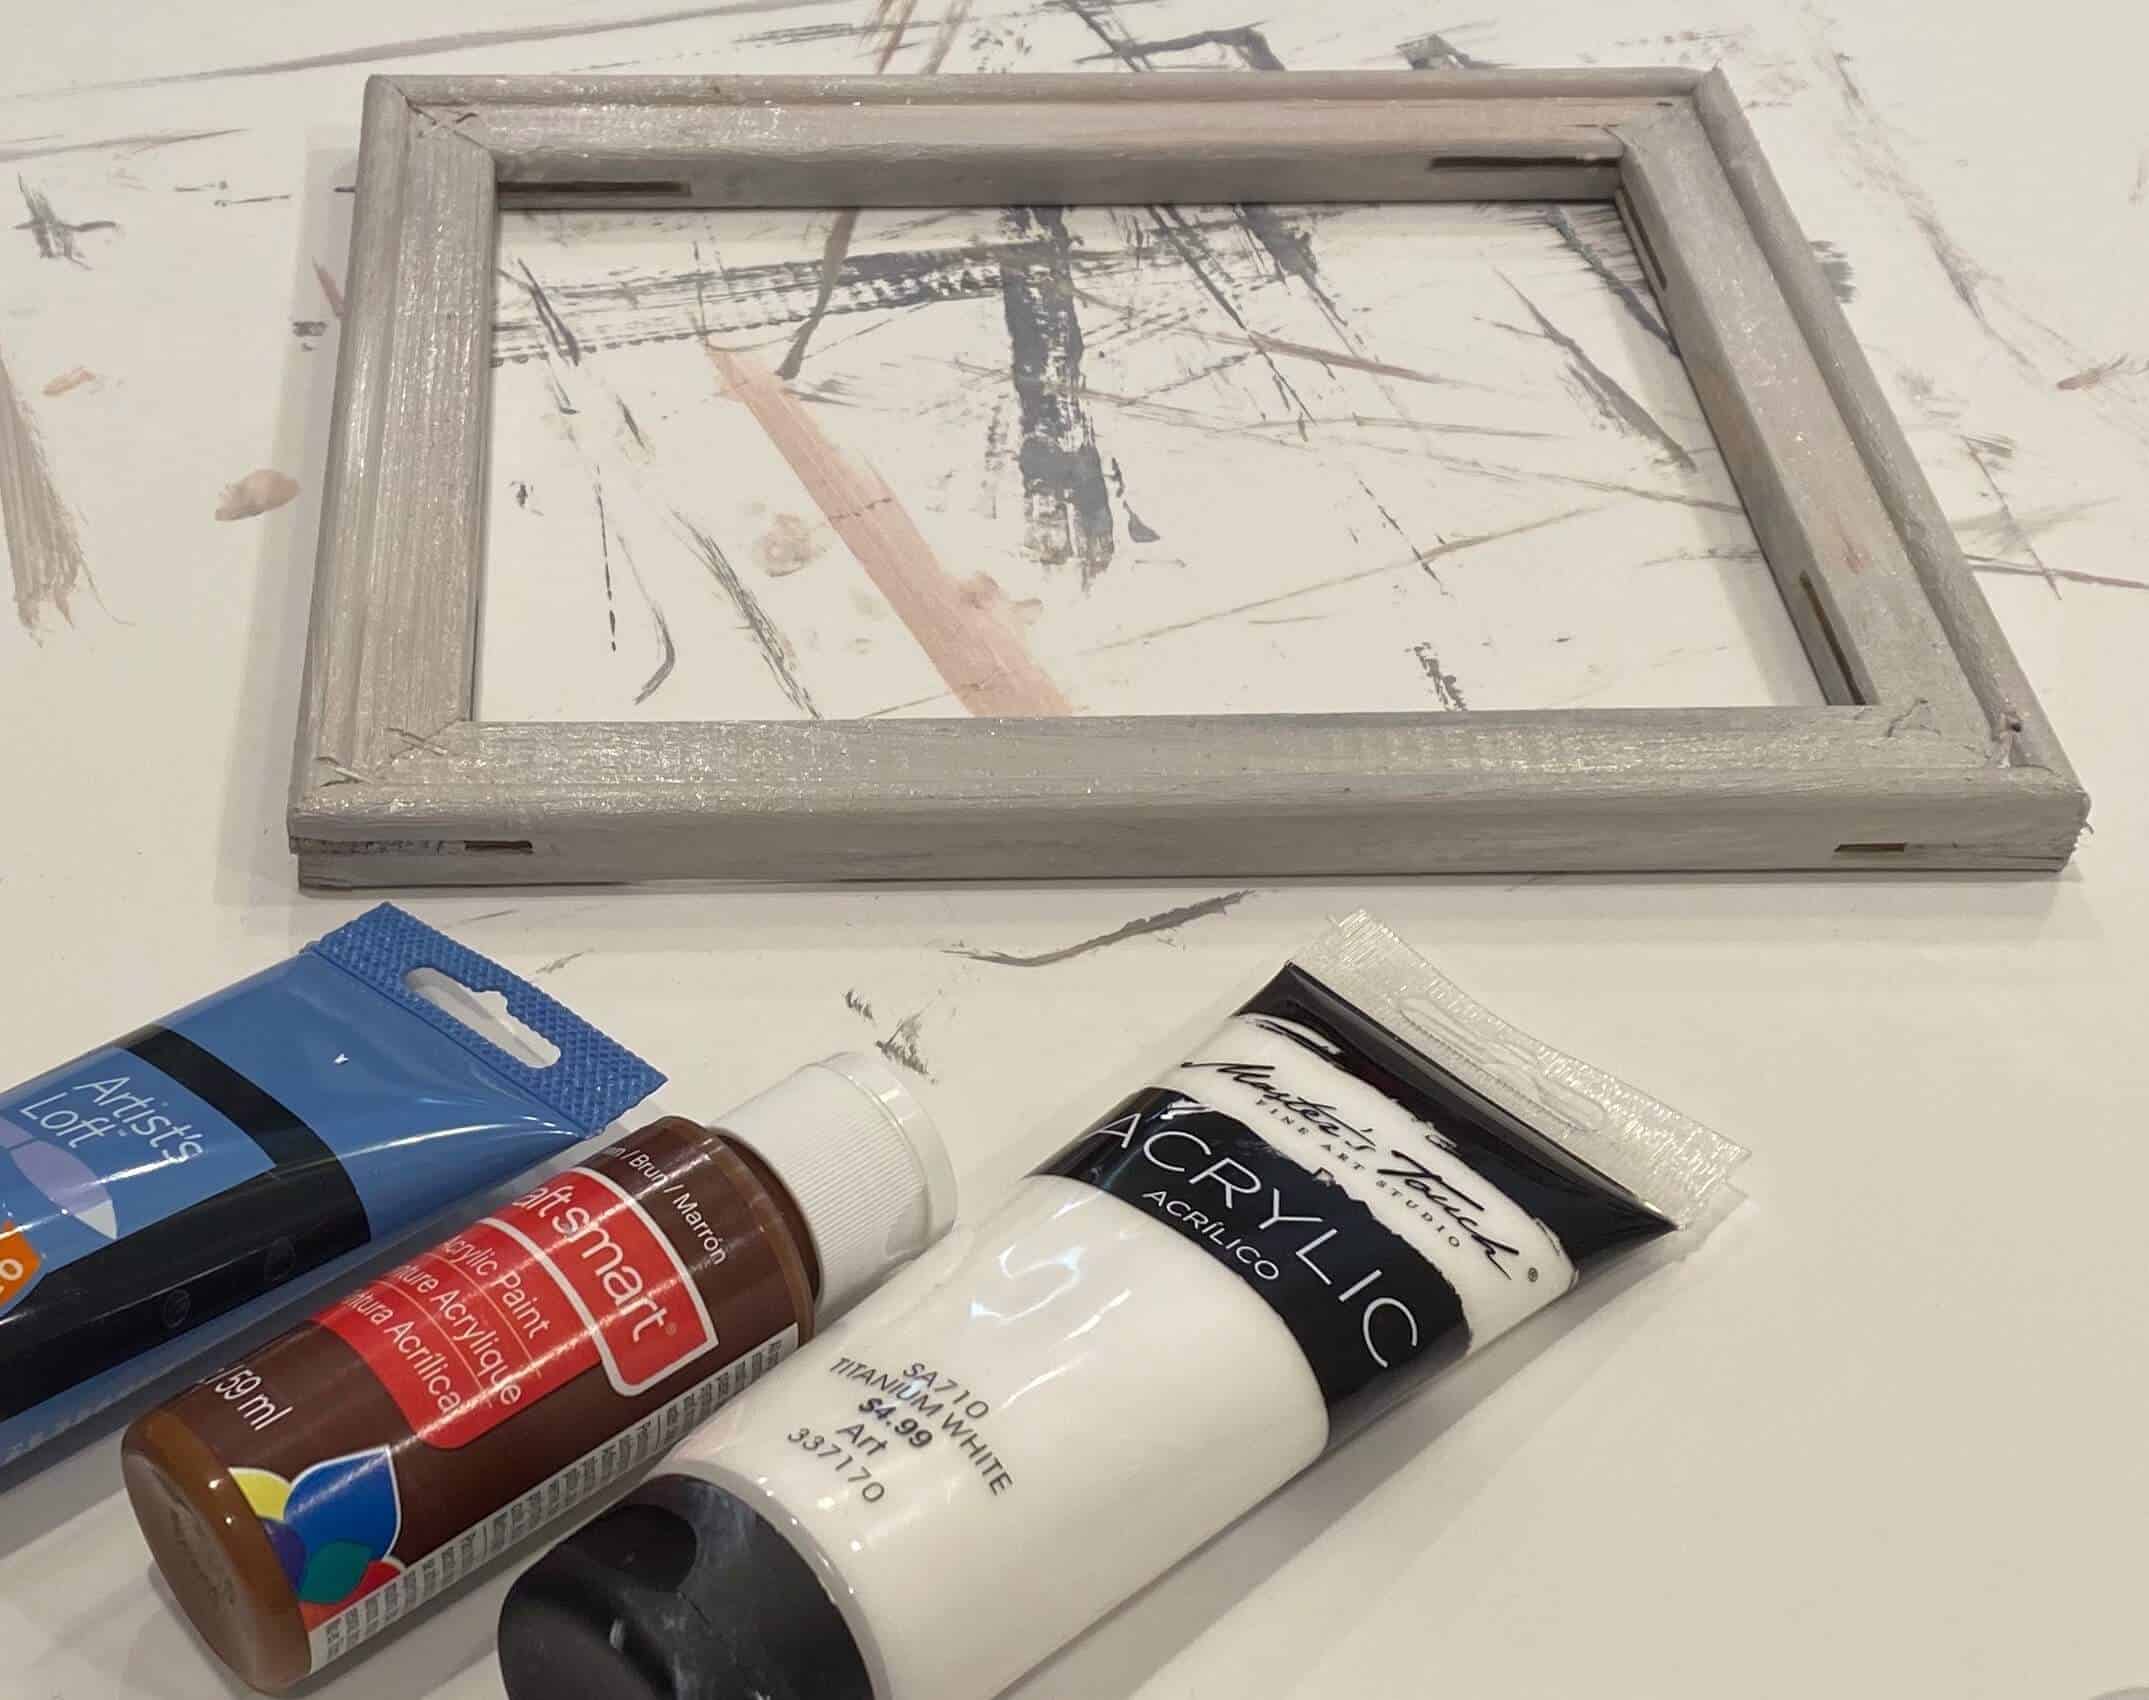
Materials you will need for this project:
- Wrapped Canvas
- Craft Knife or Rotary Cutting Blade
- Craft Ruler
- Pliers & screwdriver (only if removing staples)
- Paint or Stain & brush (only if finishing the frame)
- Image File (Adoption artwork available in the free resource library)
- Cricut Maker
- Cutting Mat
- HTV, Heat Transfer Vinyl, I used Black Siser Easyweed
- Weeding tools or a needle
- Cricut Easy Press, a Heat Press or Household Iron
- Teflon Protective Sheet for pressing
- Pencil
- Scissors or something to cut the canvas to size
- Hot Glue Gun
HOW TO CREATE A REVERSE CANVAS

Reverse Canvas Tutorial
Easy steps to create a clean, crisp-looking canvas with a wrapped canvas and HTV. Get the adoption artwork used in the tutorial in the free resource library.
Materials
- Wrapped Canvas
- Paint or Stain & brush (only if finishing the frame)
- Image File (Adoption artwork available below tutorial)
- HTV, Heat Transfer Vinyl, I used Black Siser Easyweed
Tools
- Craft Knife or Rotary Cutting Blade
- Craft Ruler
- Pliers & screwdriver (only if removing staples)
- Cricut Maker
- Cutting MatWeeding tools or a needle
- Cricut Easy Press, a Heat Press or Household Iron
- Teflon Protective Sheet for pressing
- Pencil
- Scissors or something to cut the canvas to size
- Hot Glue Gun
Instructions
STEP 1: CUT CANVAS OFF FRAME
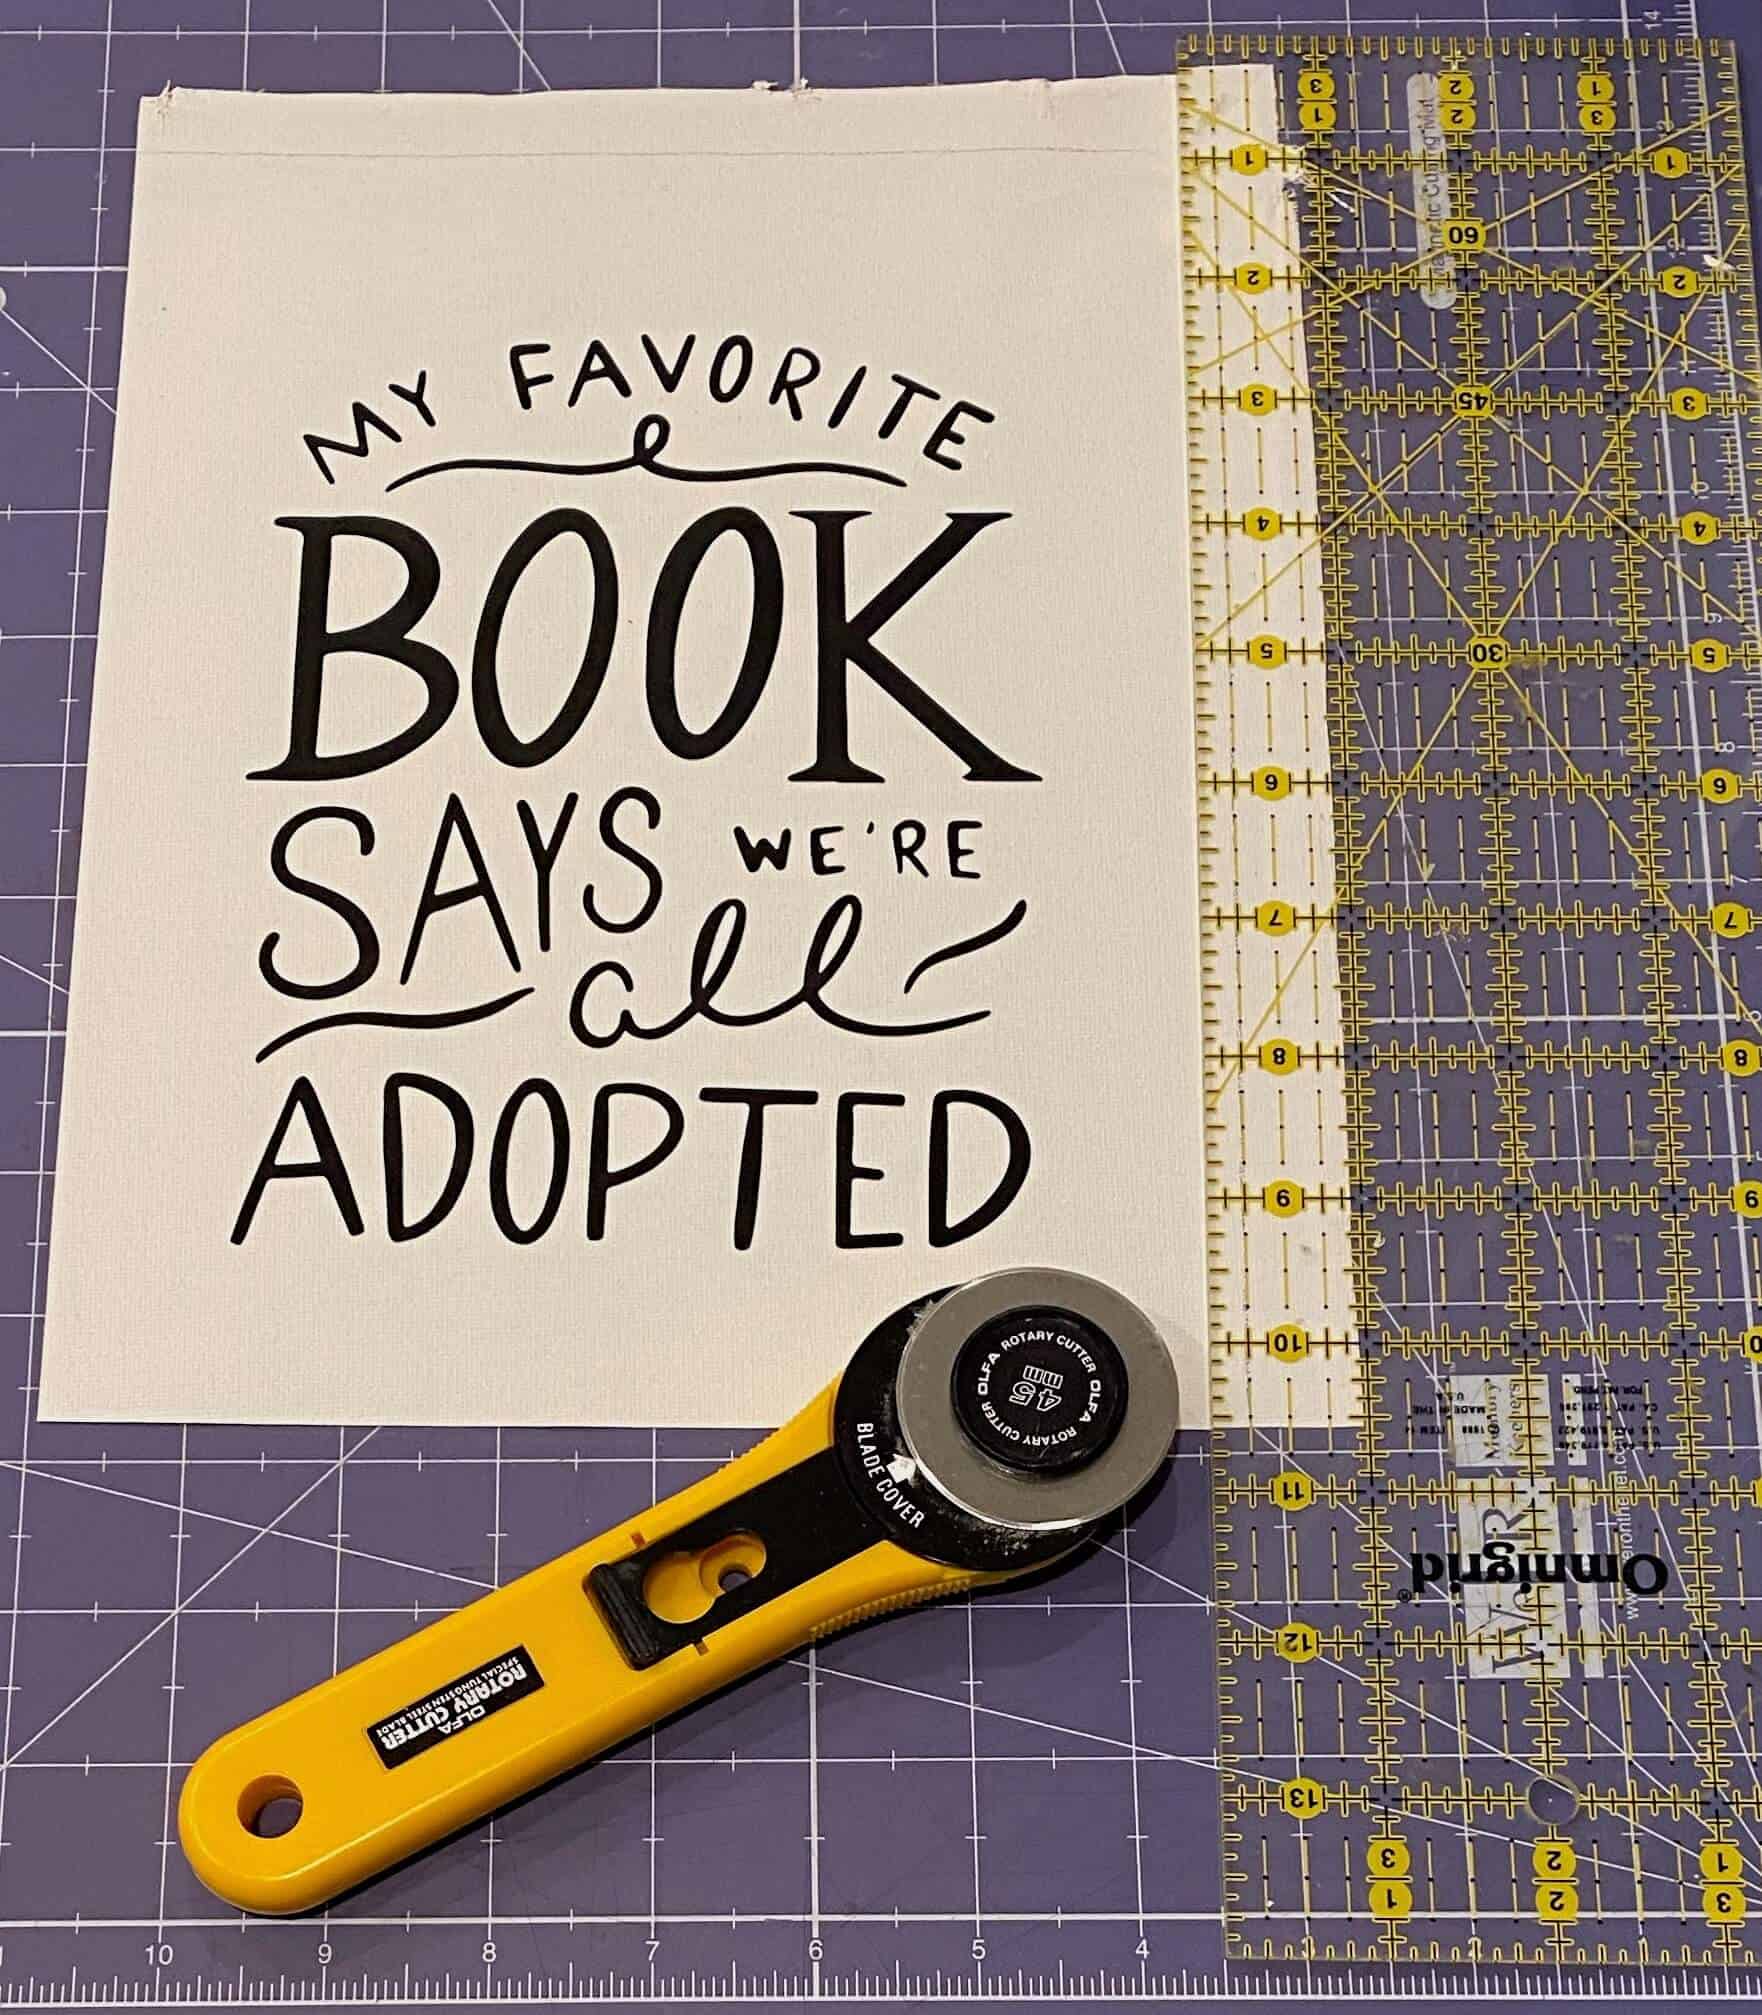
Using the knife, carefully cut the canvas off the wood frame - I used my clear fabric cutting ruler and rotary blade to keep a straight line and see where I was cutting. Make sure to cut on the outside of the staples. At first, I cut on the inside and tried to remove the canvas, but it wanted to tear, so I cut again around the outside.
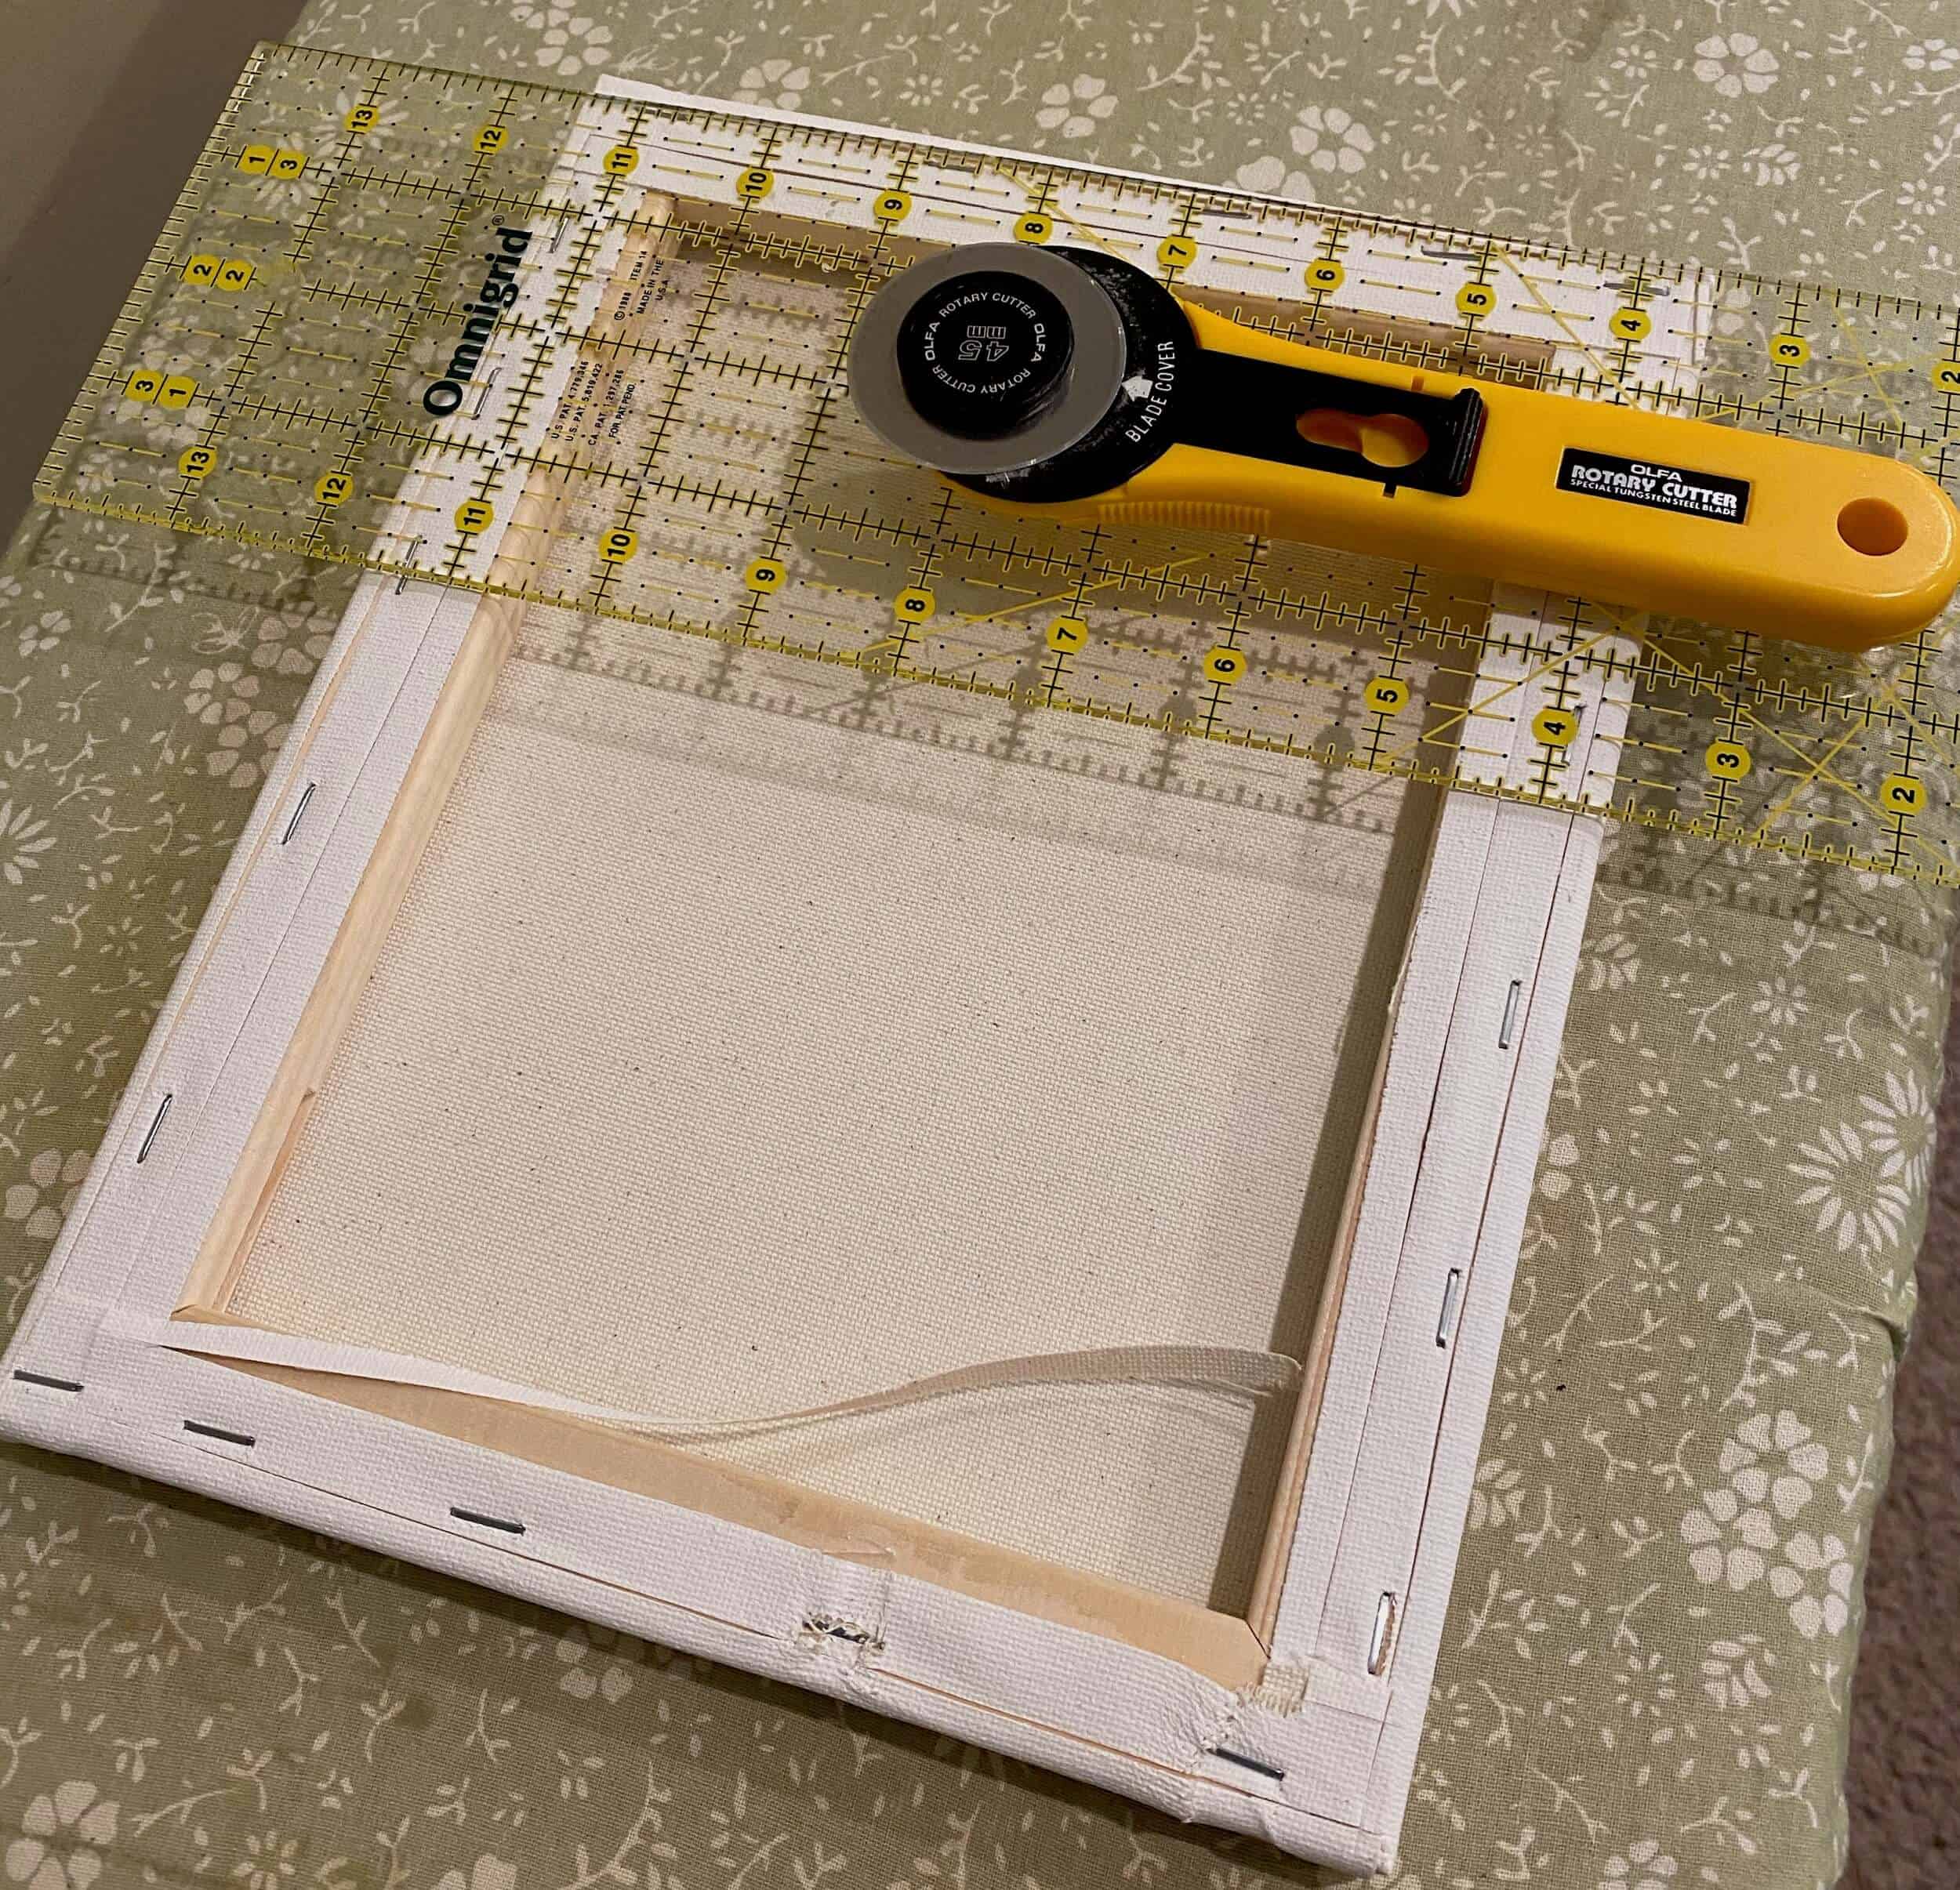
Set the canvas aside while working with the frame and preparing the image.
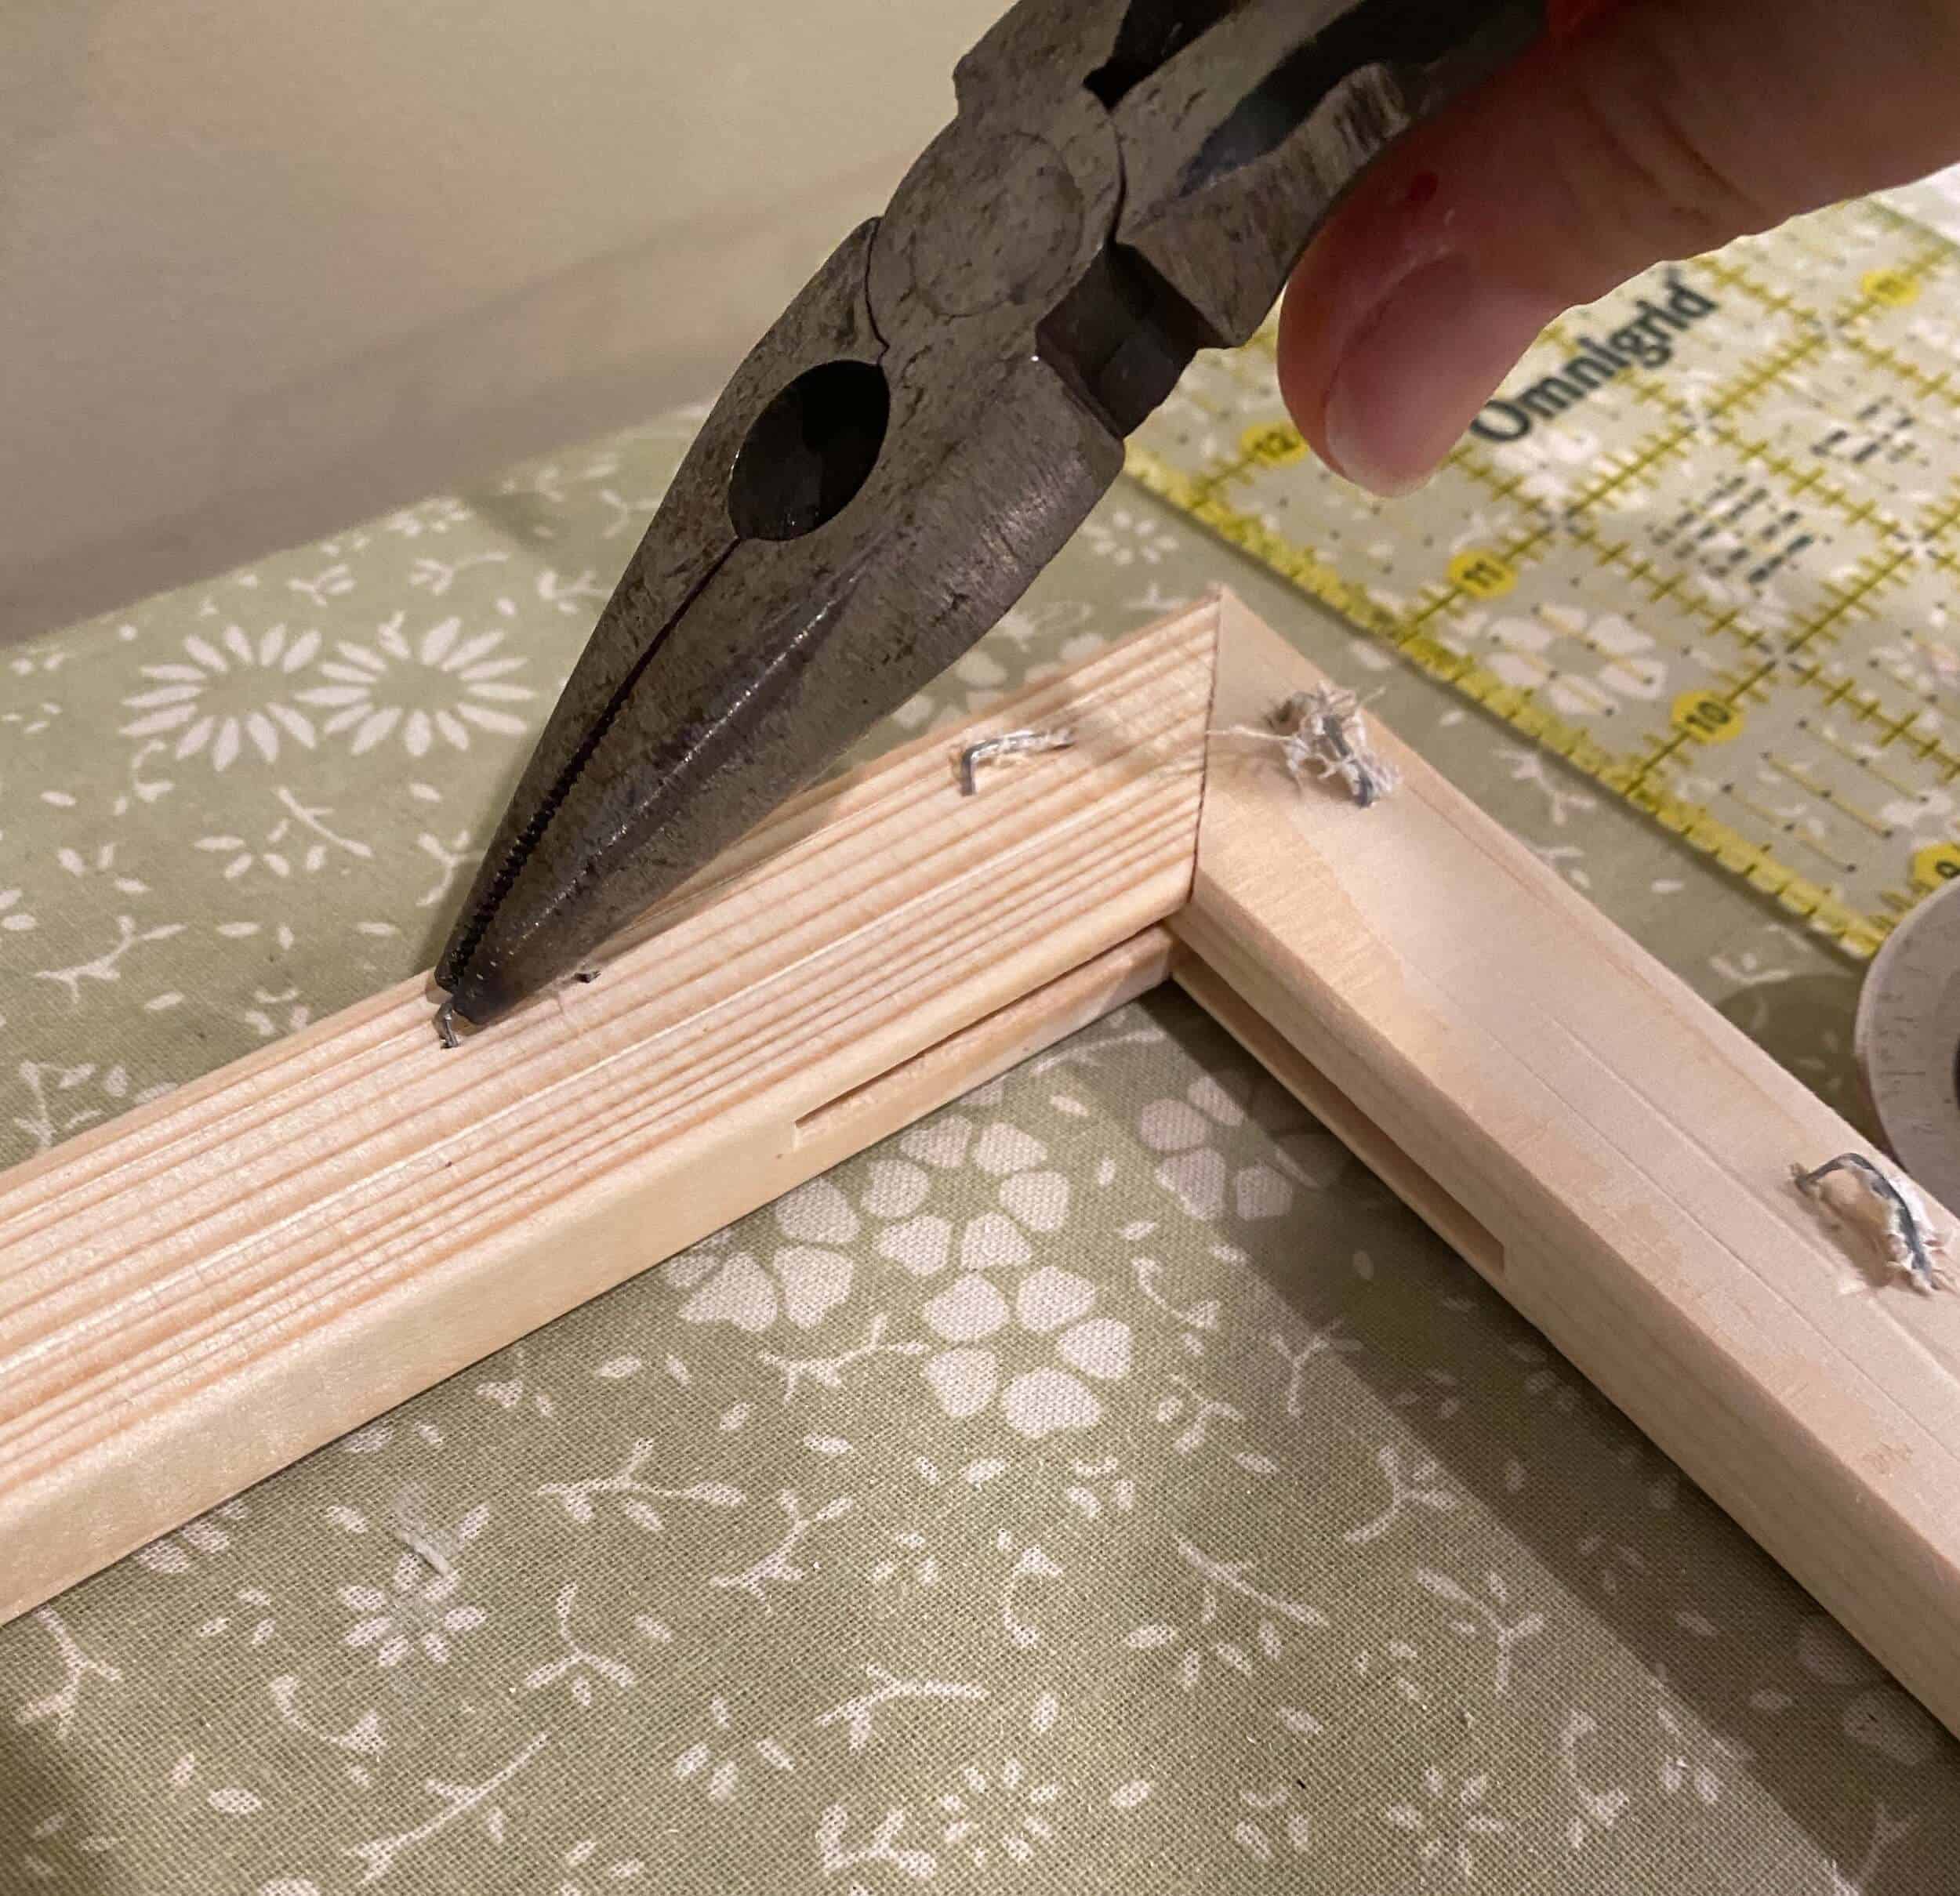
The staples can remain in the frame or they can be removed. If the staples are removed, the holes can be filled with wood filler and sanded or be left as is, giving the frame a rustic look. I removed the staples on the back of the frame with a screwdriver and pliers to have a clean flat surface for attaching the canvas to or hanging on the wall later.
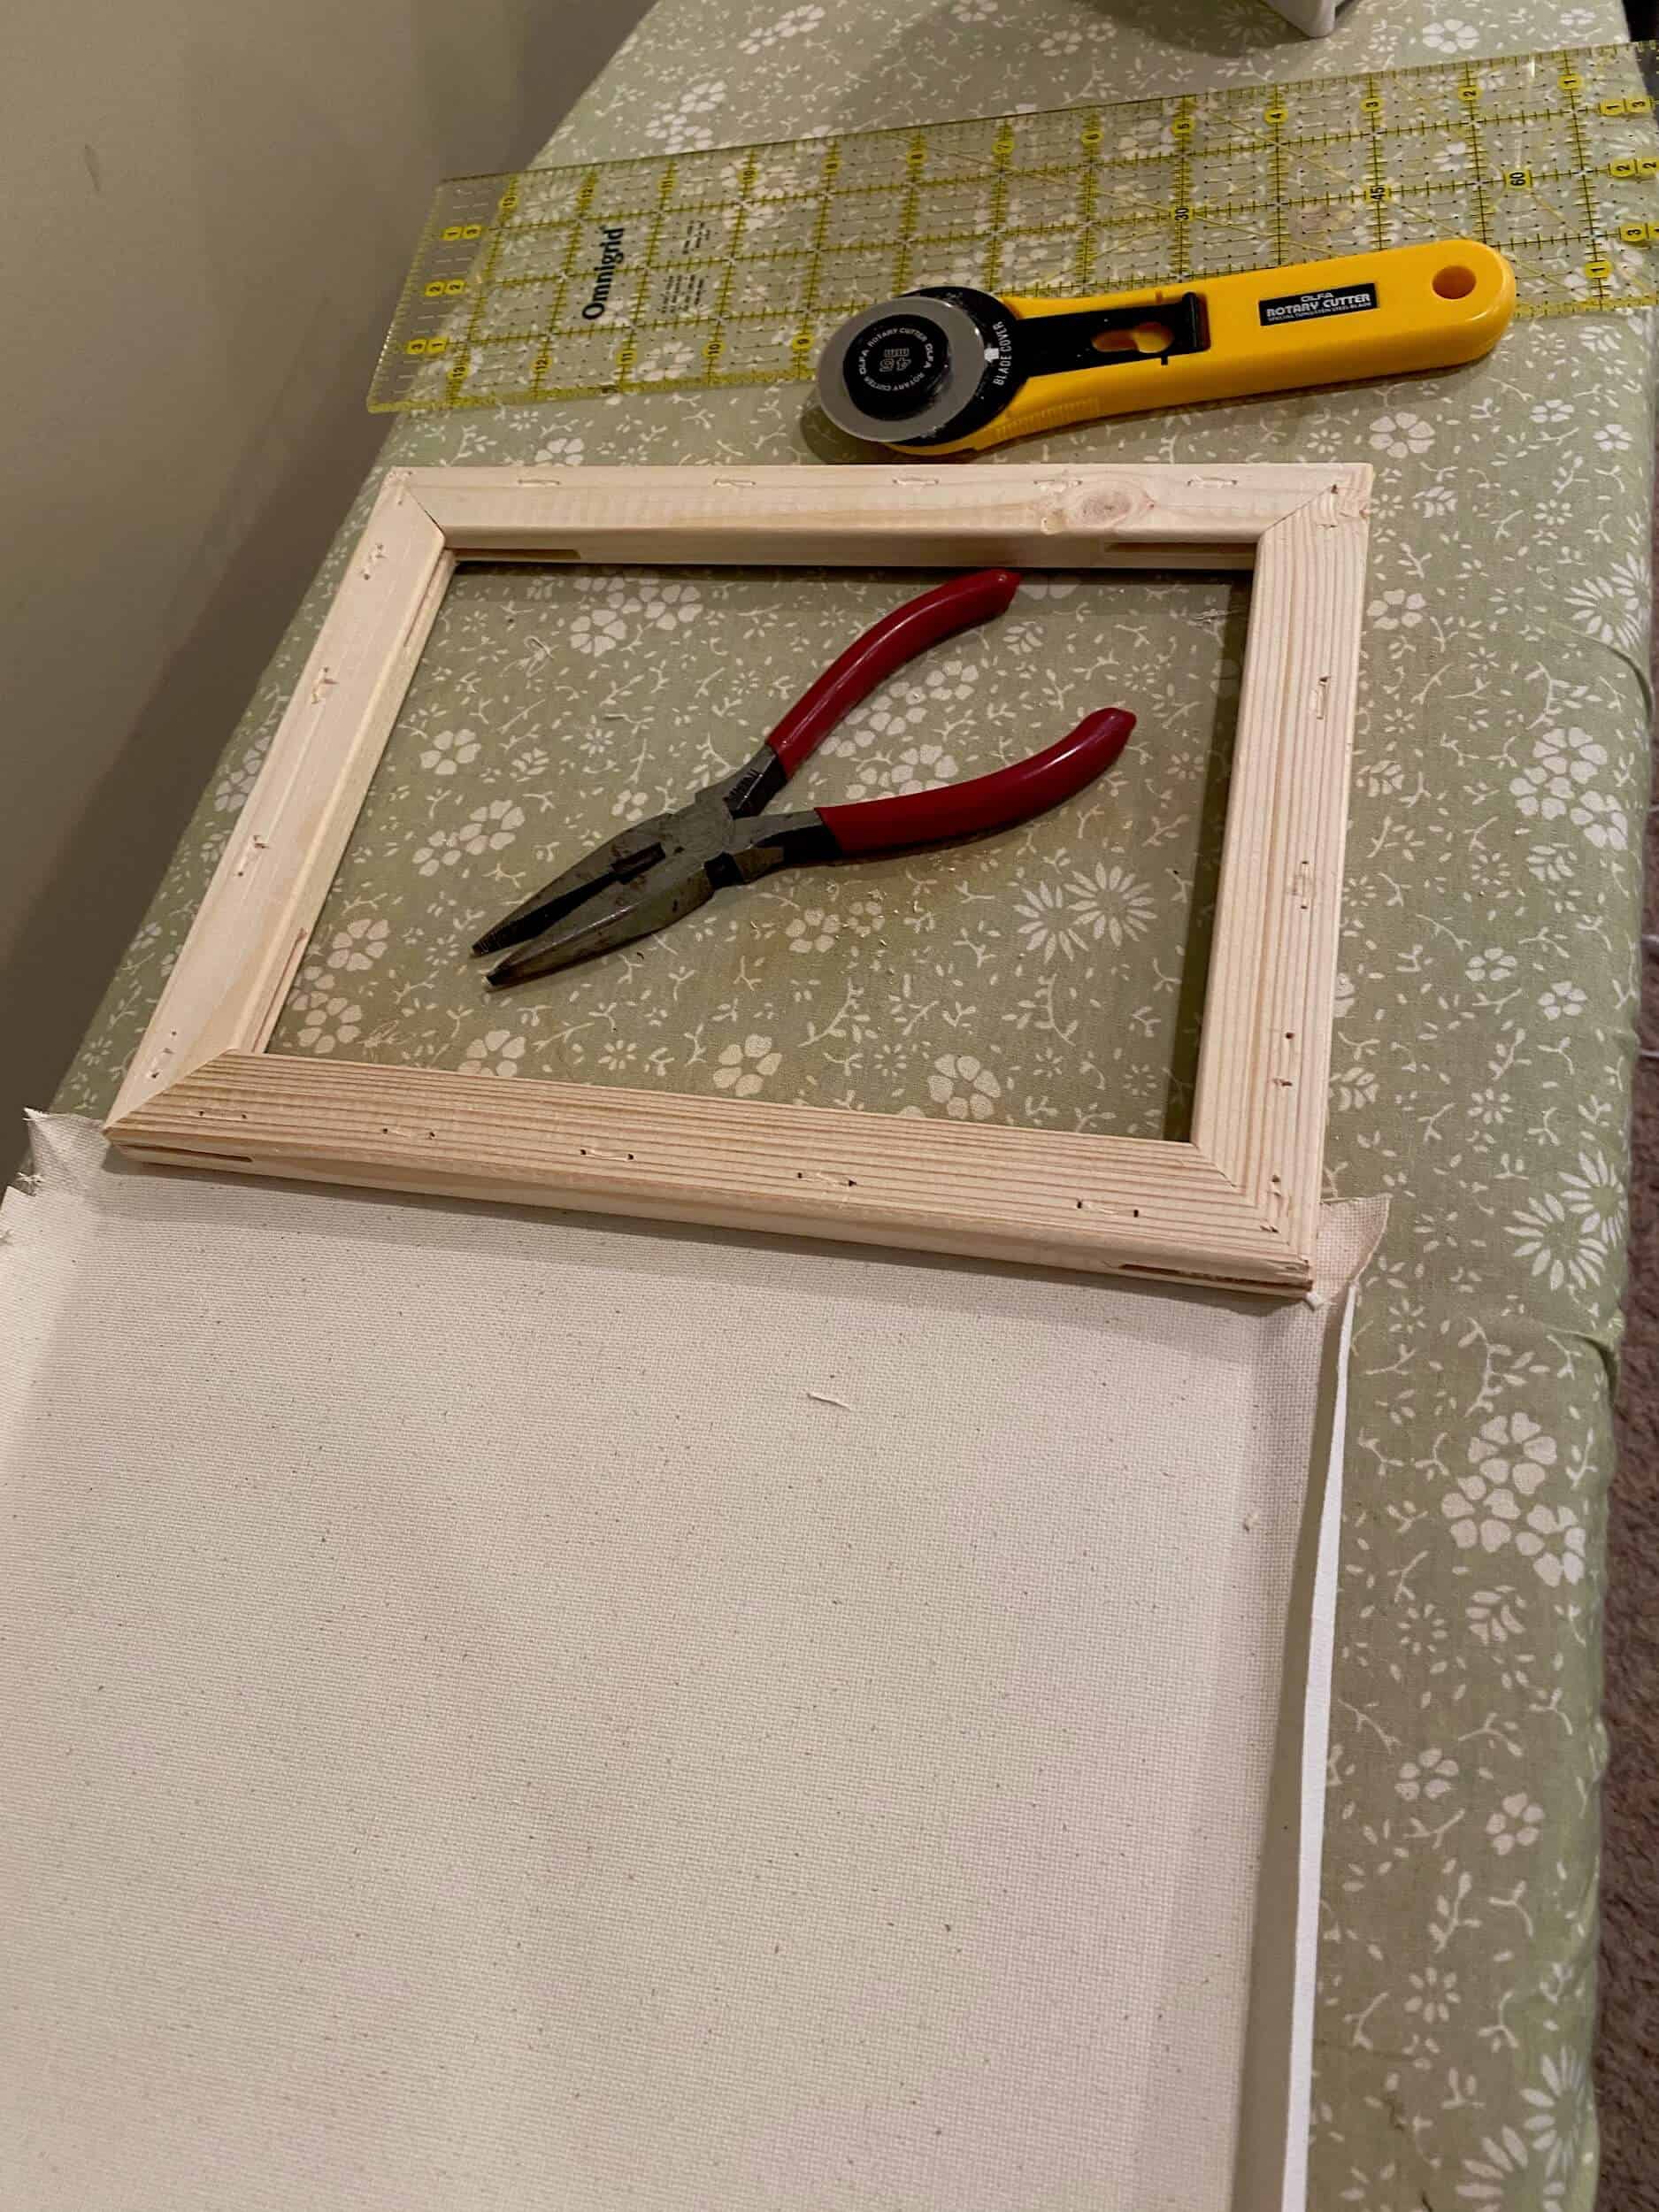
I painted my frame at this point so it could dry while working with the canvas. Paint or stain is totally optional, just depends on the desired look. I typically use what I have on hand, like leftover stain, house paint, or acrylic, it’s all good. I roughly painted with white, gray, and tan acrylic paint.
STEP 2: HTV IMAGE
Create or upload the image in Design Space. For my reverse canvas, I used an adoption quote (found in the free resource library) created by my graphic designer friend, Julie. If you have an idea for a piece of art to be designed check her out at Strong Hold Art & Design, she’s great!
I typically create the shape of the inside of the frame to give me a visual boundary for the design layout. In Design Space simply add a shape, unlock the dimensions and type the dimensions of the frame opening, in this case, width 6 and height 8. Upload the design that you plan to cut from the HTV material. Just an aside, if you wanted to do this with adhesive vinyl you could. I prefer HTV because it’s easier to work with and I think it gives a cleaner print in the end. Size the image to have a good even border between the design and the frame visual boundary.
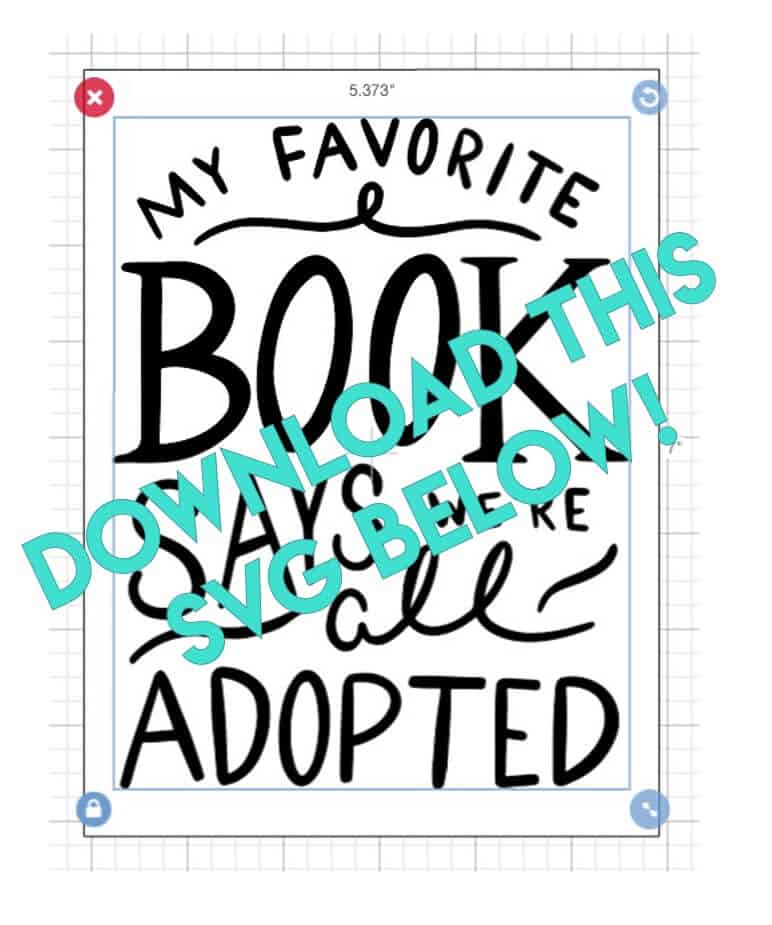
Find the SVG file in the free resource library.
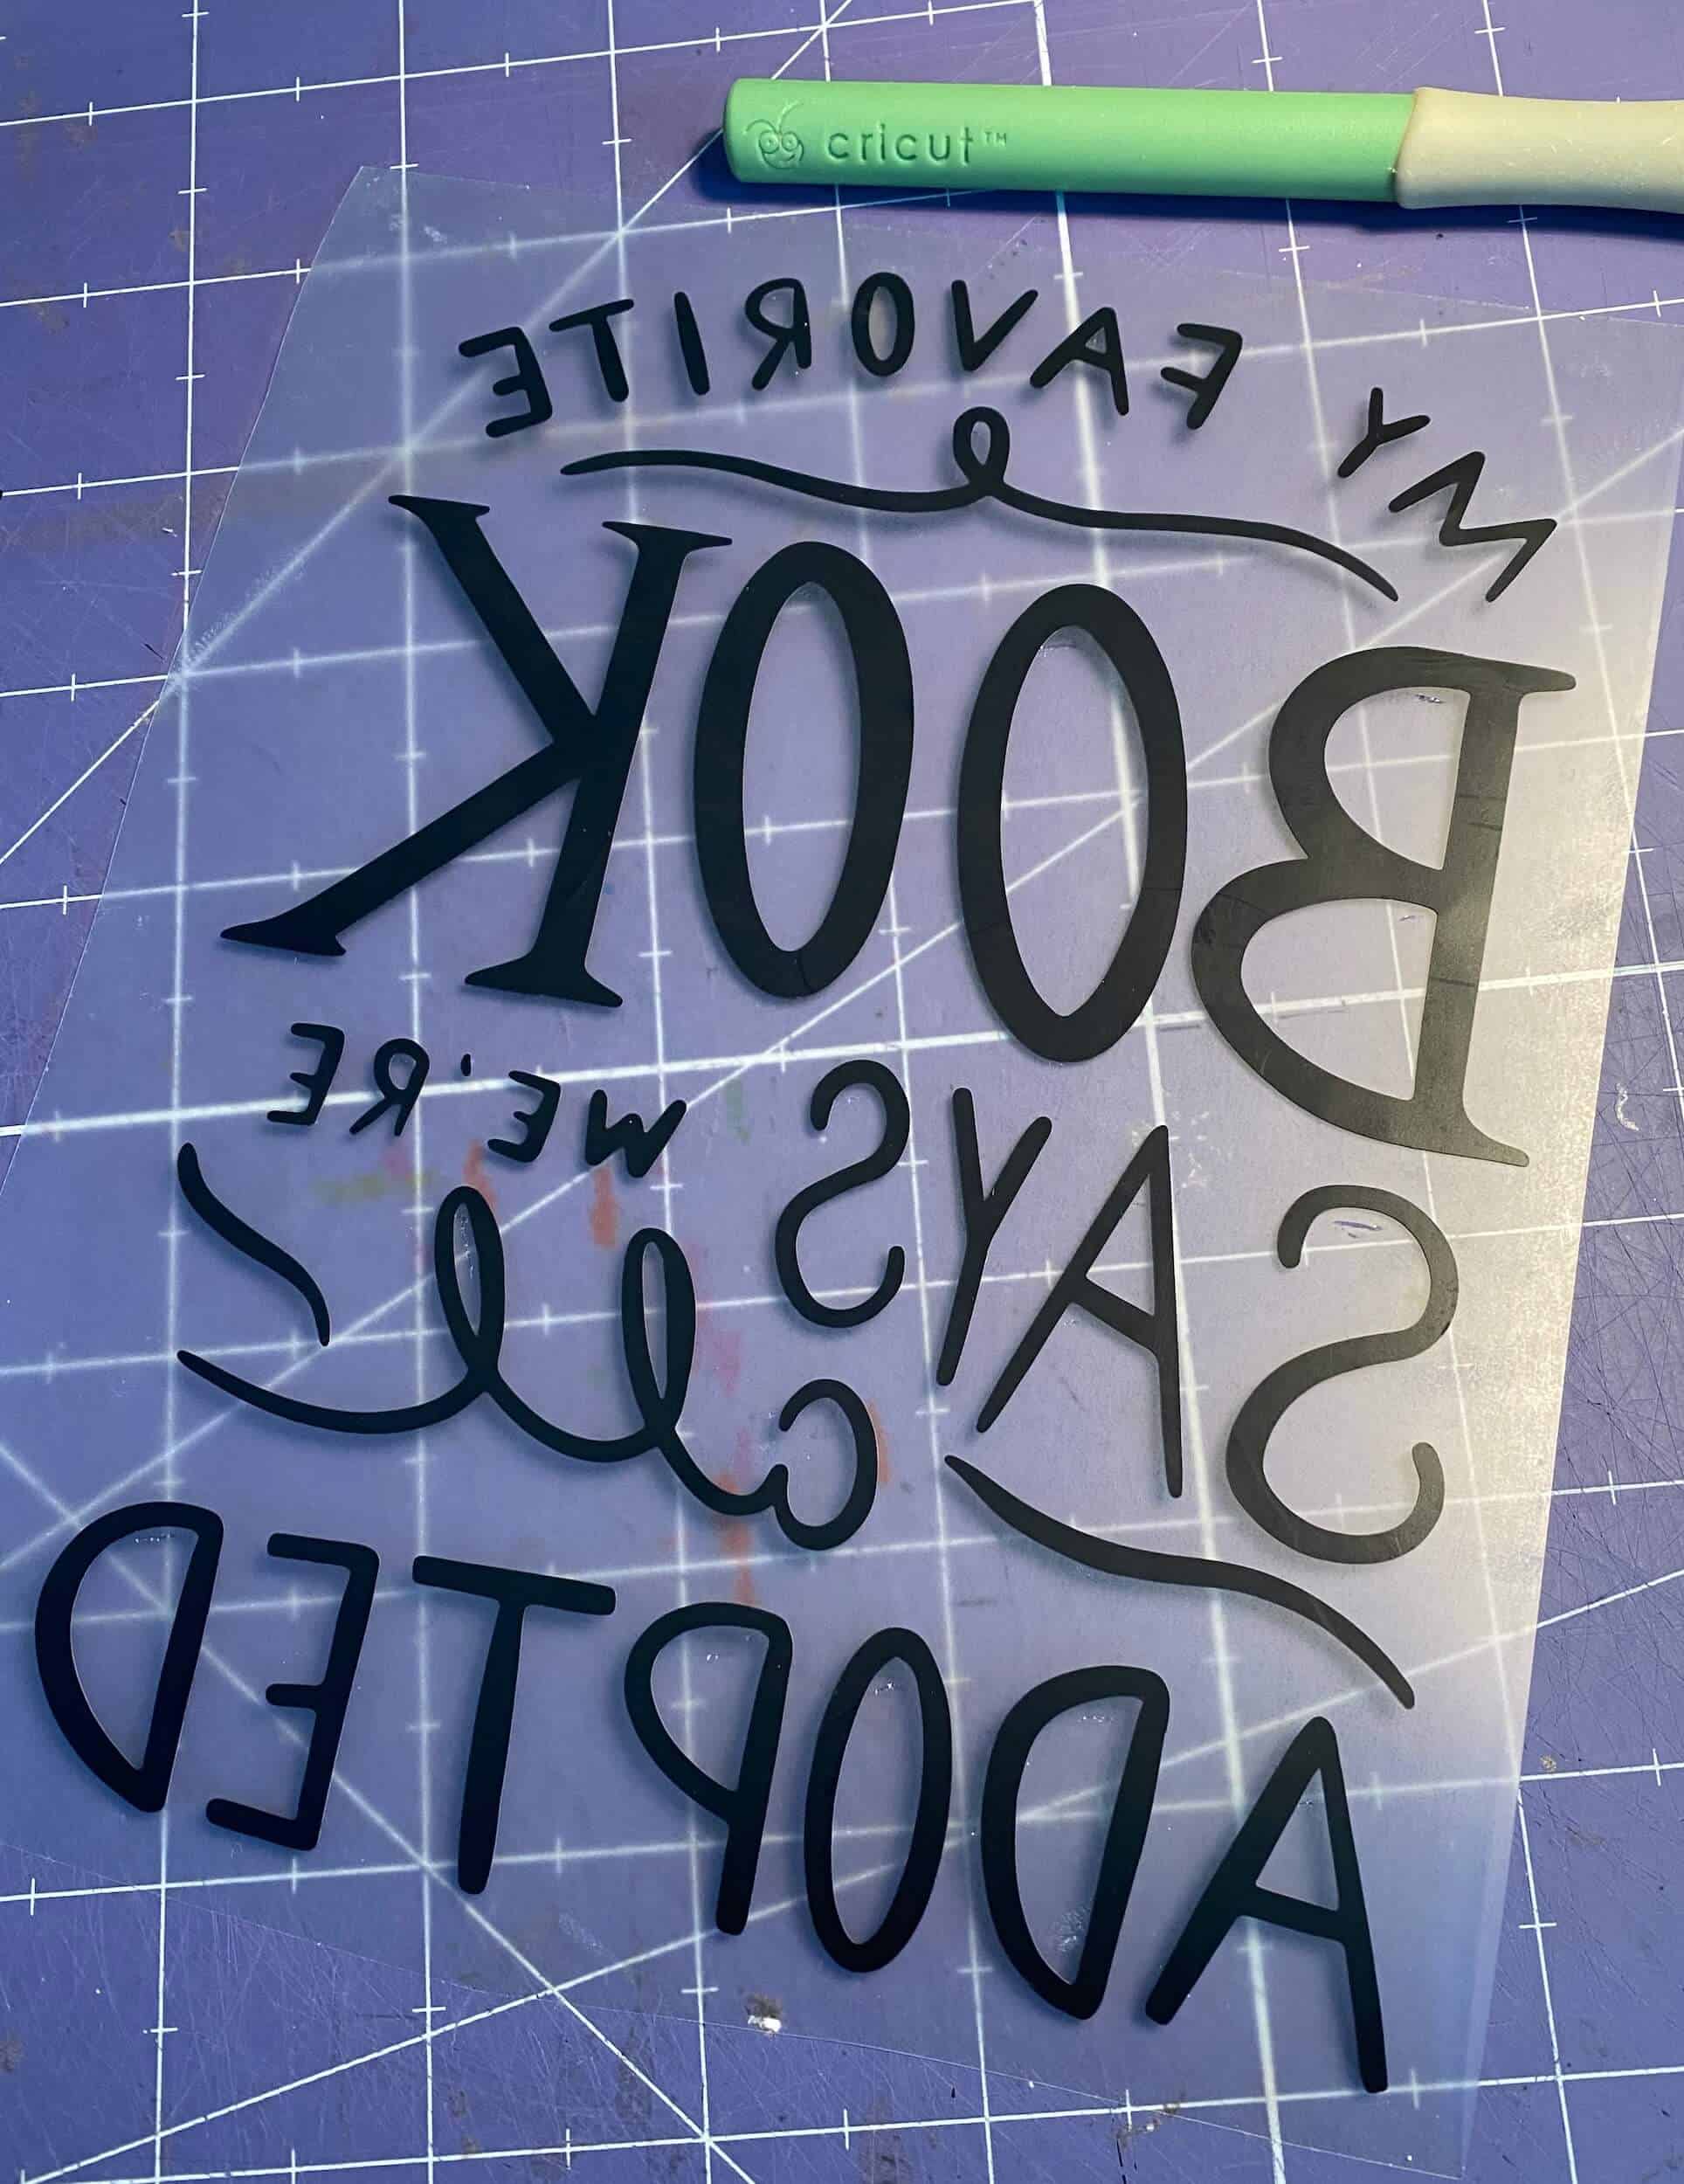
STEP 3: CUT & WEED HTV
When the design is ready to cut, hide the visual boundary (if one was used/created). If this Adoption Quote SVG is used, first select the entire image and Attach. If this step is not completed the letters will be all over the cutting mat. Also if you wanted to use different colors on your project, like Julie originally sent, you can easily separate the image and Attach like colors before selecting Make. Depending on the image used, the steps of color assignment and attachment may not be required.

Find this SVG file in the free resource library.
Send the design to the Cricut by selecting Make, remember to mirror the image because we are using HTV, select continue and set the material setting to iron-on vinyl. Place the HTV shiny side down on the cutting mat and start the Cricut by pressing the flashing Cricut C.

When the cutting is done, unload the mat and weed the design, which just means removing all the unwanted vinyl from the HTV from the transfer sheet that was just cut.
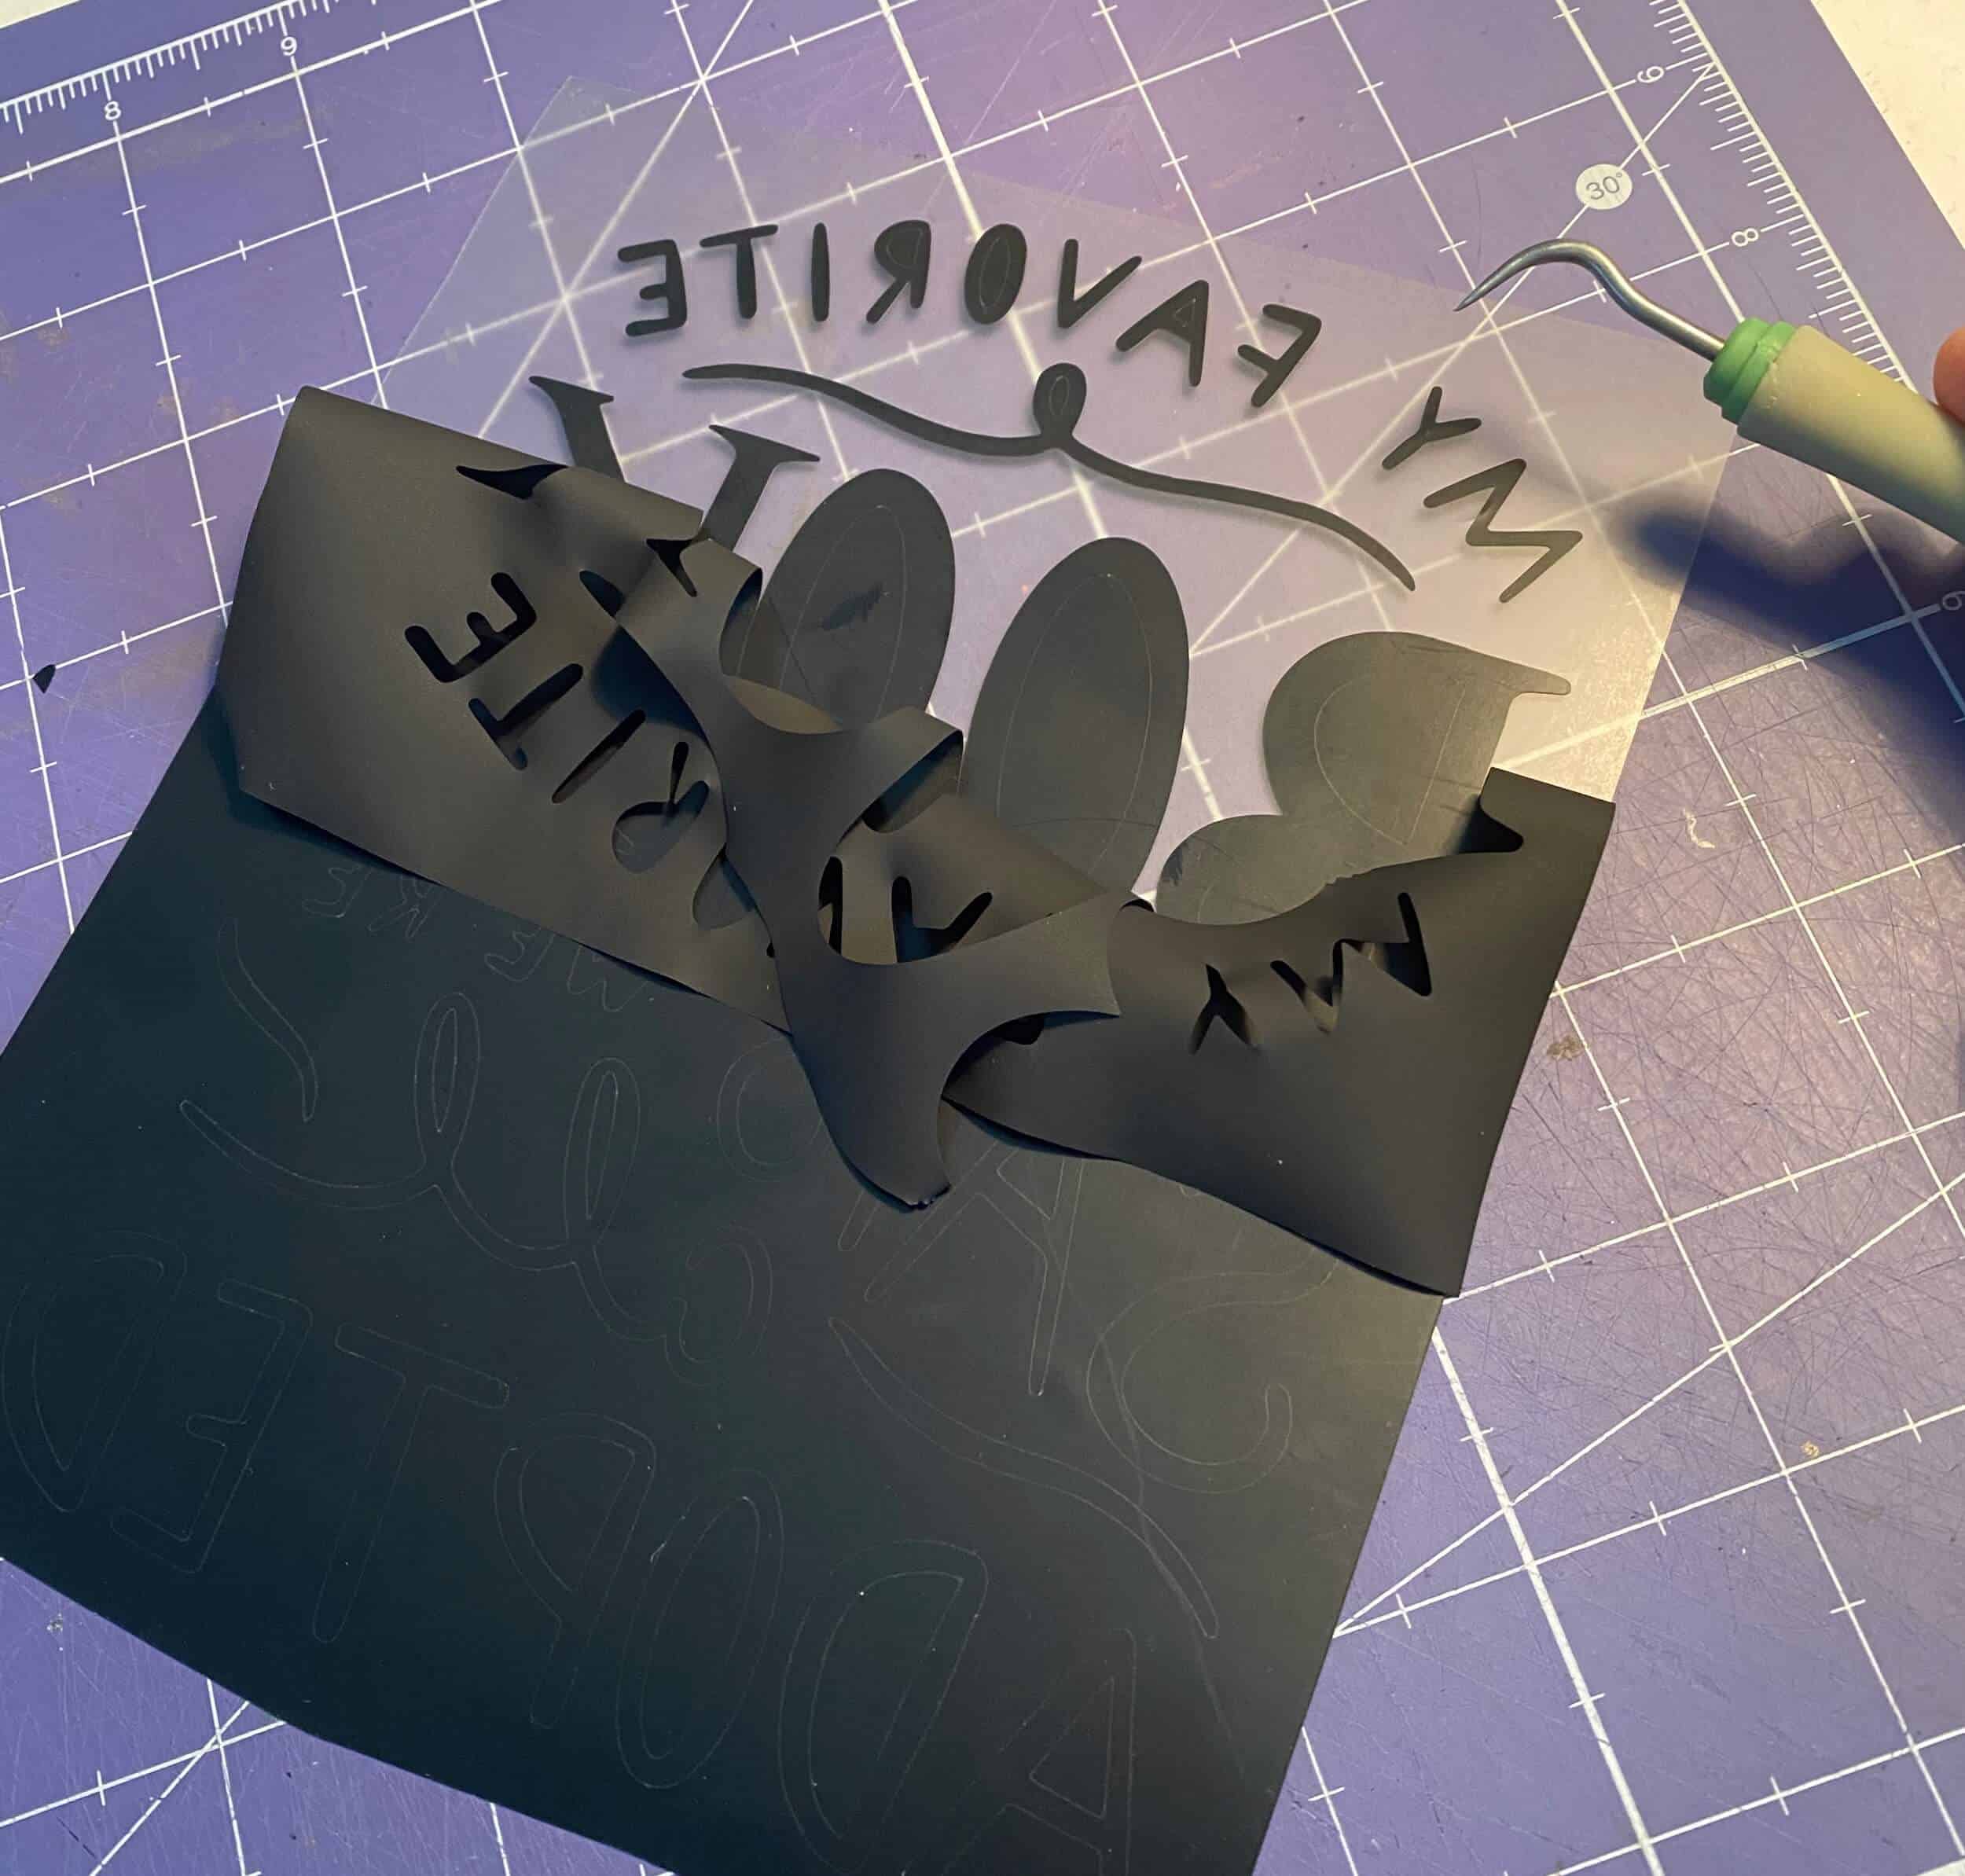
To accomplish this and most weeding projects, some basic tools help to get the job done easily. I just use Cricut’s weeding tools and put my design directly under a light to help me see the cut lines. HTV is generally very easy to weed, so this step should go quickly. When the weeding is done, only the mirrored design will be left on the sticky transfer sheet.
STEP 4: PRESS HTV TO CANVAS
Back to working with our canvas, first I pressed the blank canvas flat, then placed the HTV design in the approximate center of my canvas. An approximate center at this point is fine because it will be centered more accurately later when the frame is attached.
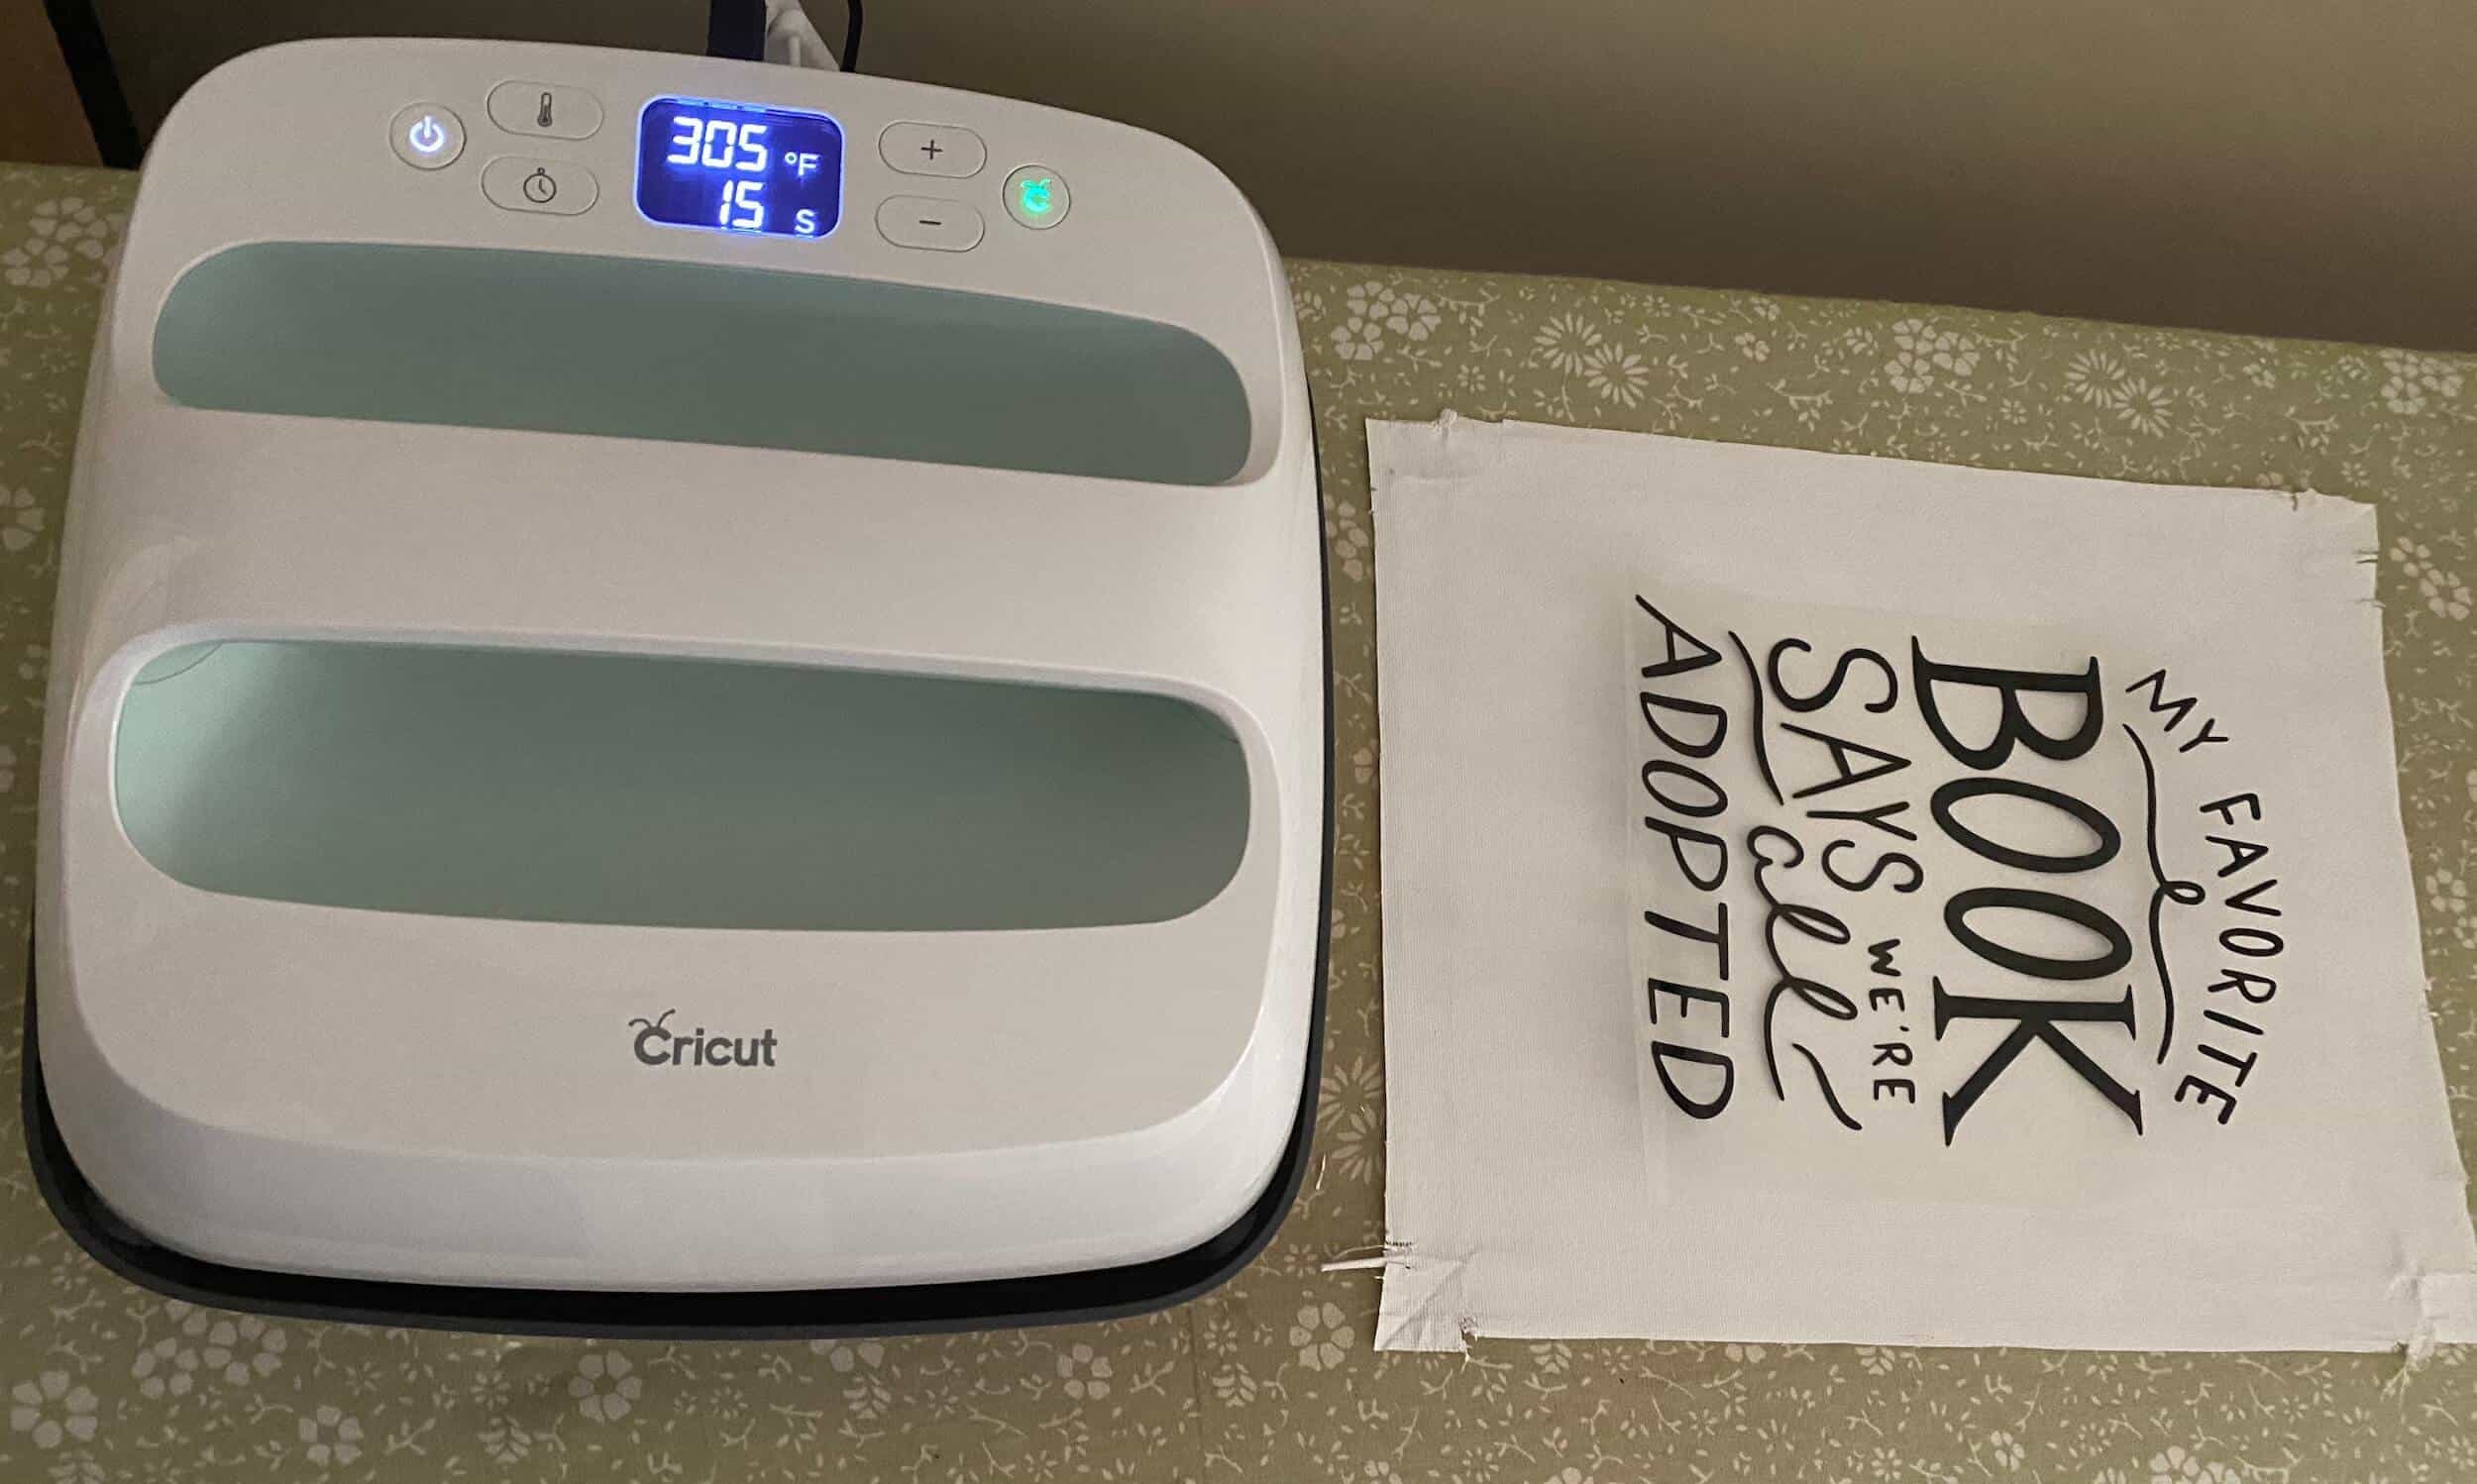
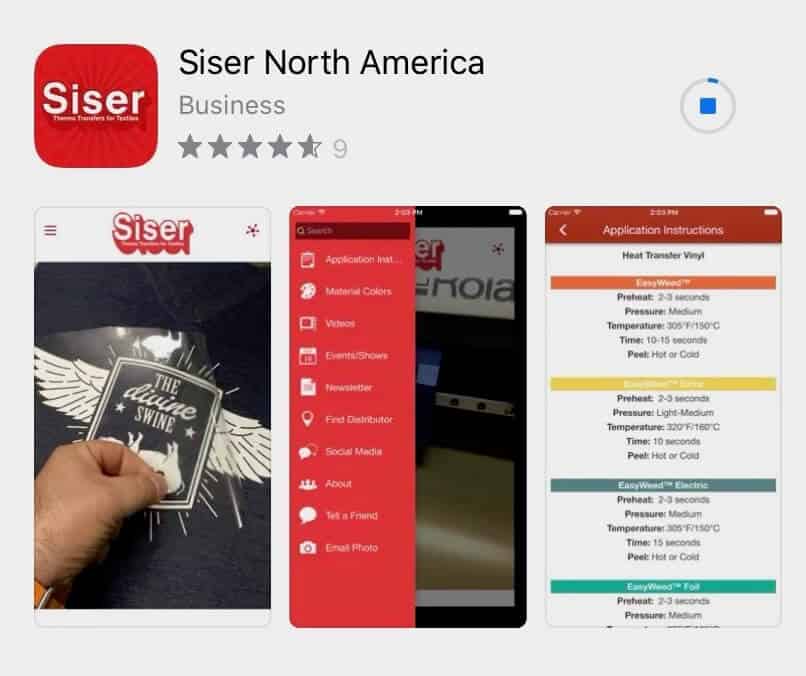
Cover the design with a Teflon sheet to protect the canvas and press the HTV on with the Cricut Easy Press. If you don't have a heat press any household iron will do. I pressed the HTV at 305 degrees for 15 seconds, but check the settings for the particular brand of HTV used. Also if using Cricut products you can check the heat guide online, or for the Siser products, I used they have a handy app called Siser North America. It’s really easy to pull up and get cutting and pressing info, and even household iron directions.
I let the pressed design cool a little and slowly peeled the transfer plastic off the design, making sure the design was staying put. At this point, if the transfer sheet is not coming up easily and it’s still trying to hang on to the design, just press it a bit longer.

STEP 5: FINISH FRAME (Optional)
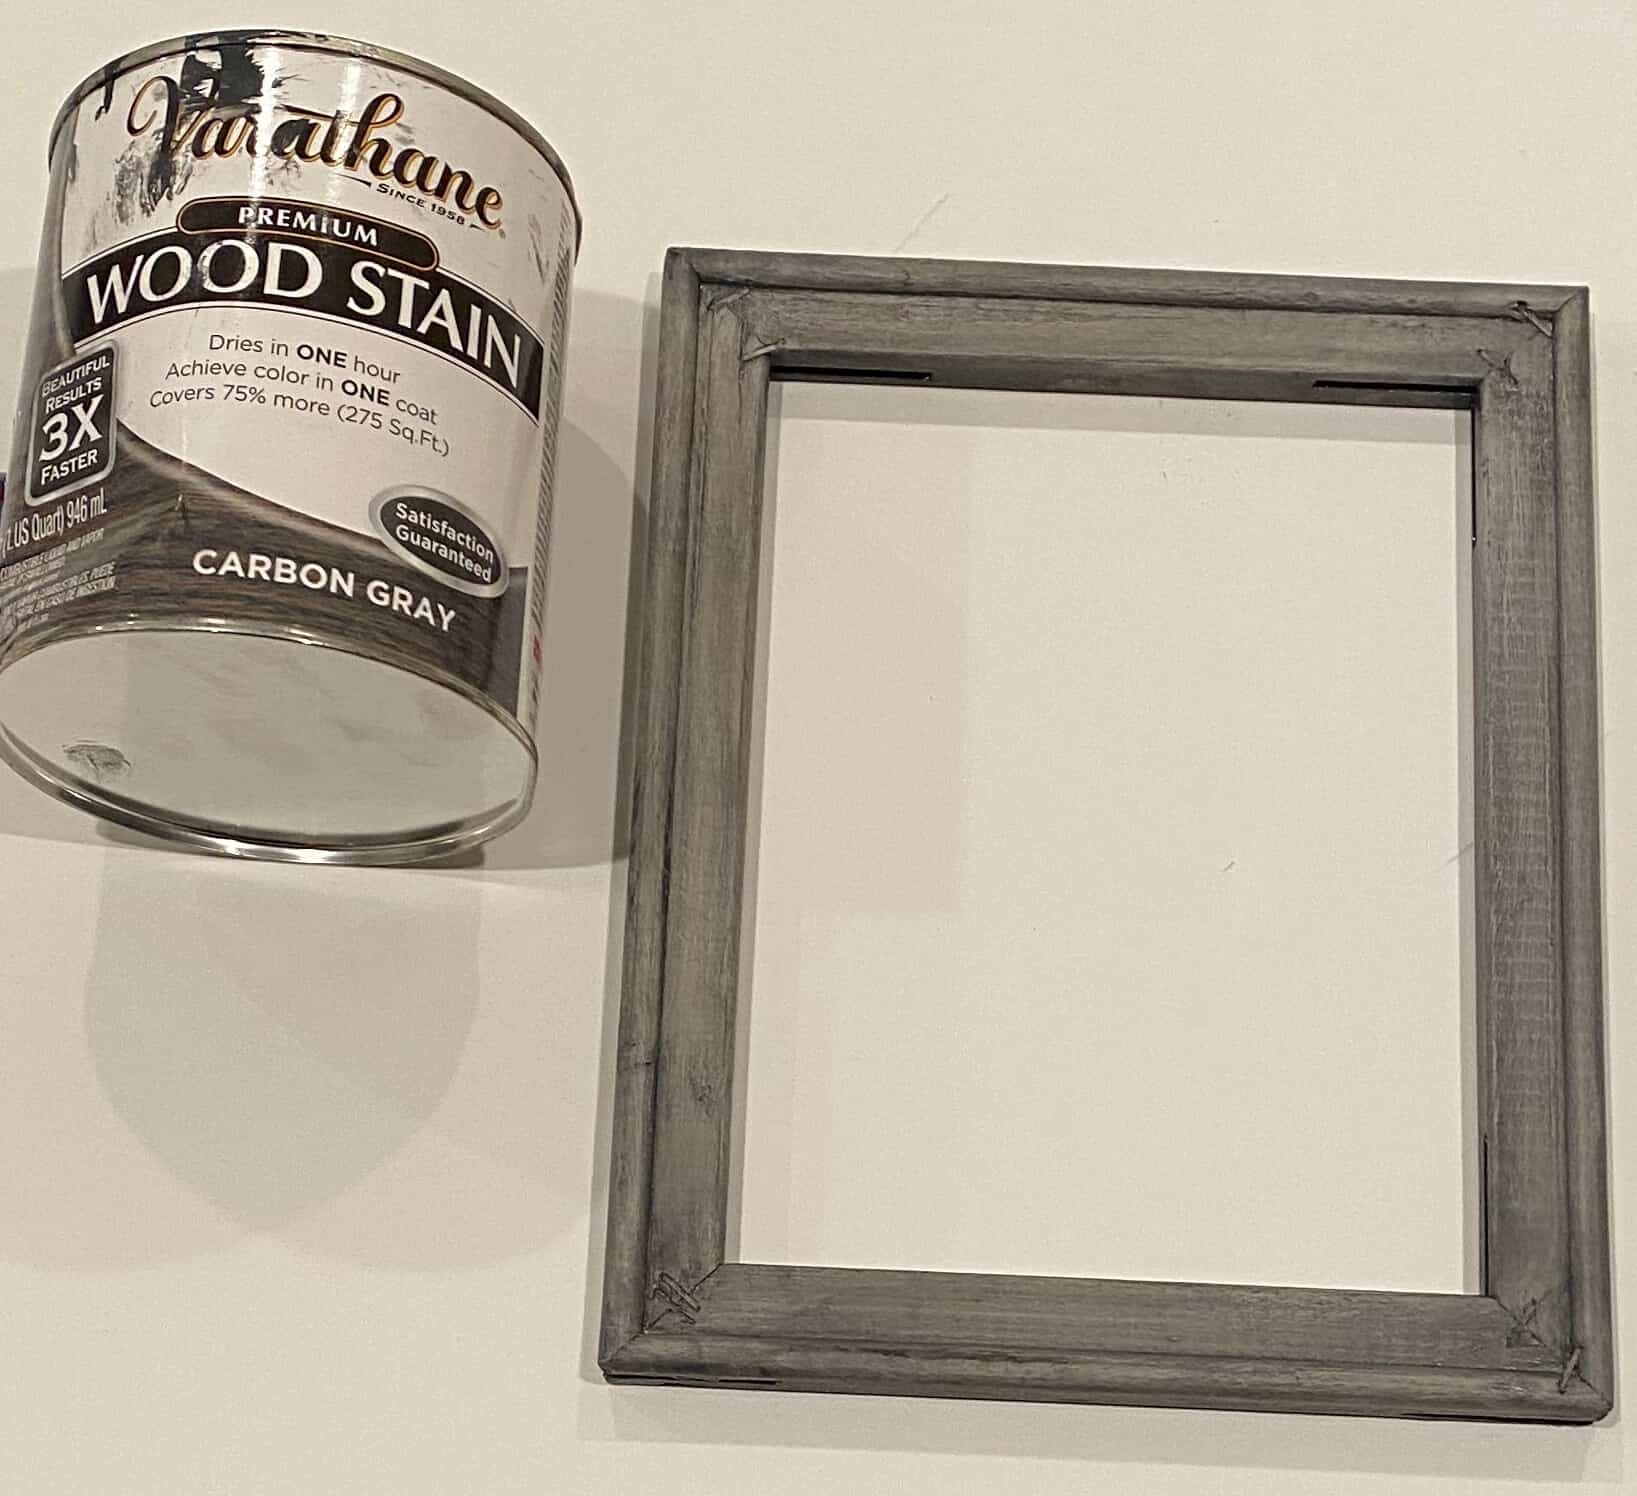
For my frame, after the paint dried, I chose to add a coat of stain on top of the paint. I think it made all the difference. This is the stain I used in the Carbon Gray shade. It took longer to dry because it was over paint. When working with stain, wear disposable gloves, and don’t take them off till after the brush is cleaned. If you forget this step as I might have, just use mineral spirits to remove the stain from hands, the sink, the soap dispenser, etc. – oops!
STEP 6: TRIM THE CANVAS
Make sure the frame is dry before centering the frame on top of your canvas. This is where the exact centering takes place. When satisfied with the placement, trace the outside of the frame on the canvas with a pencil.
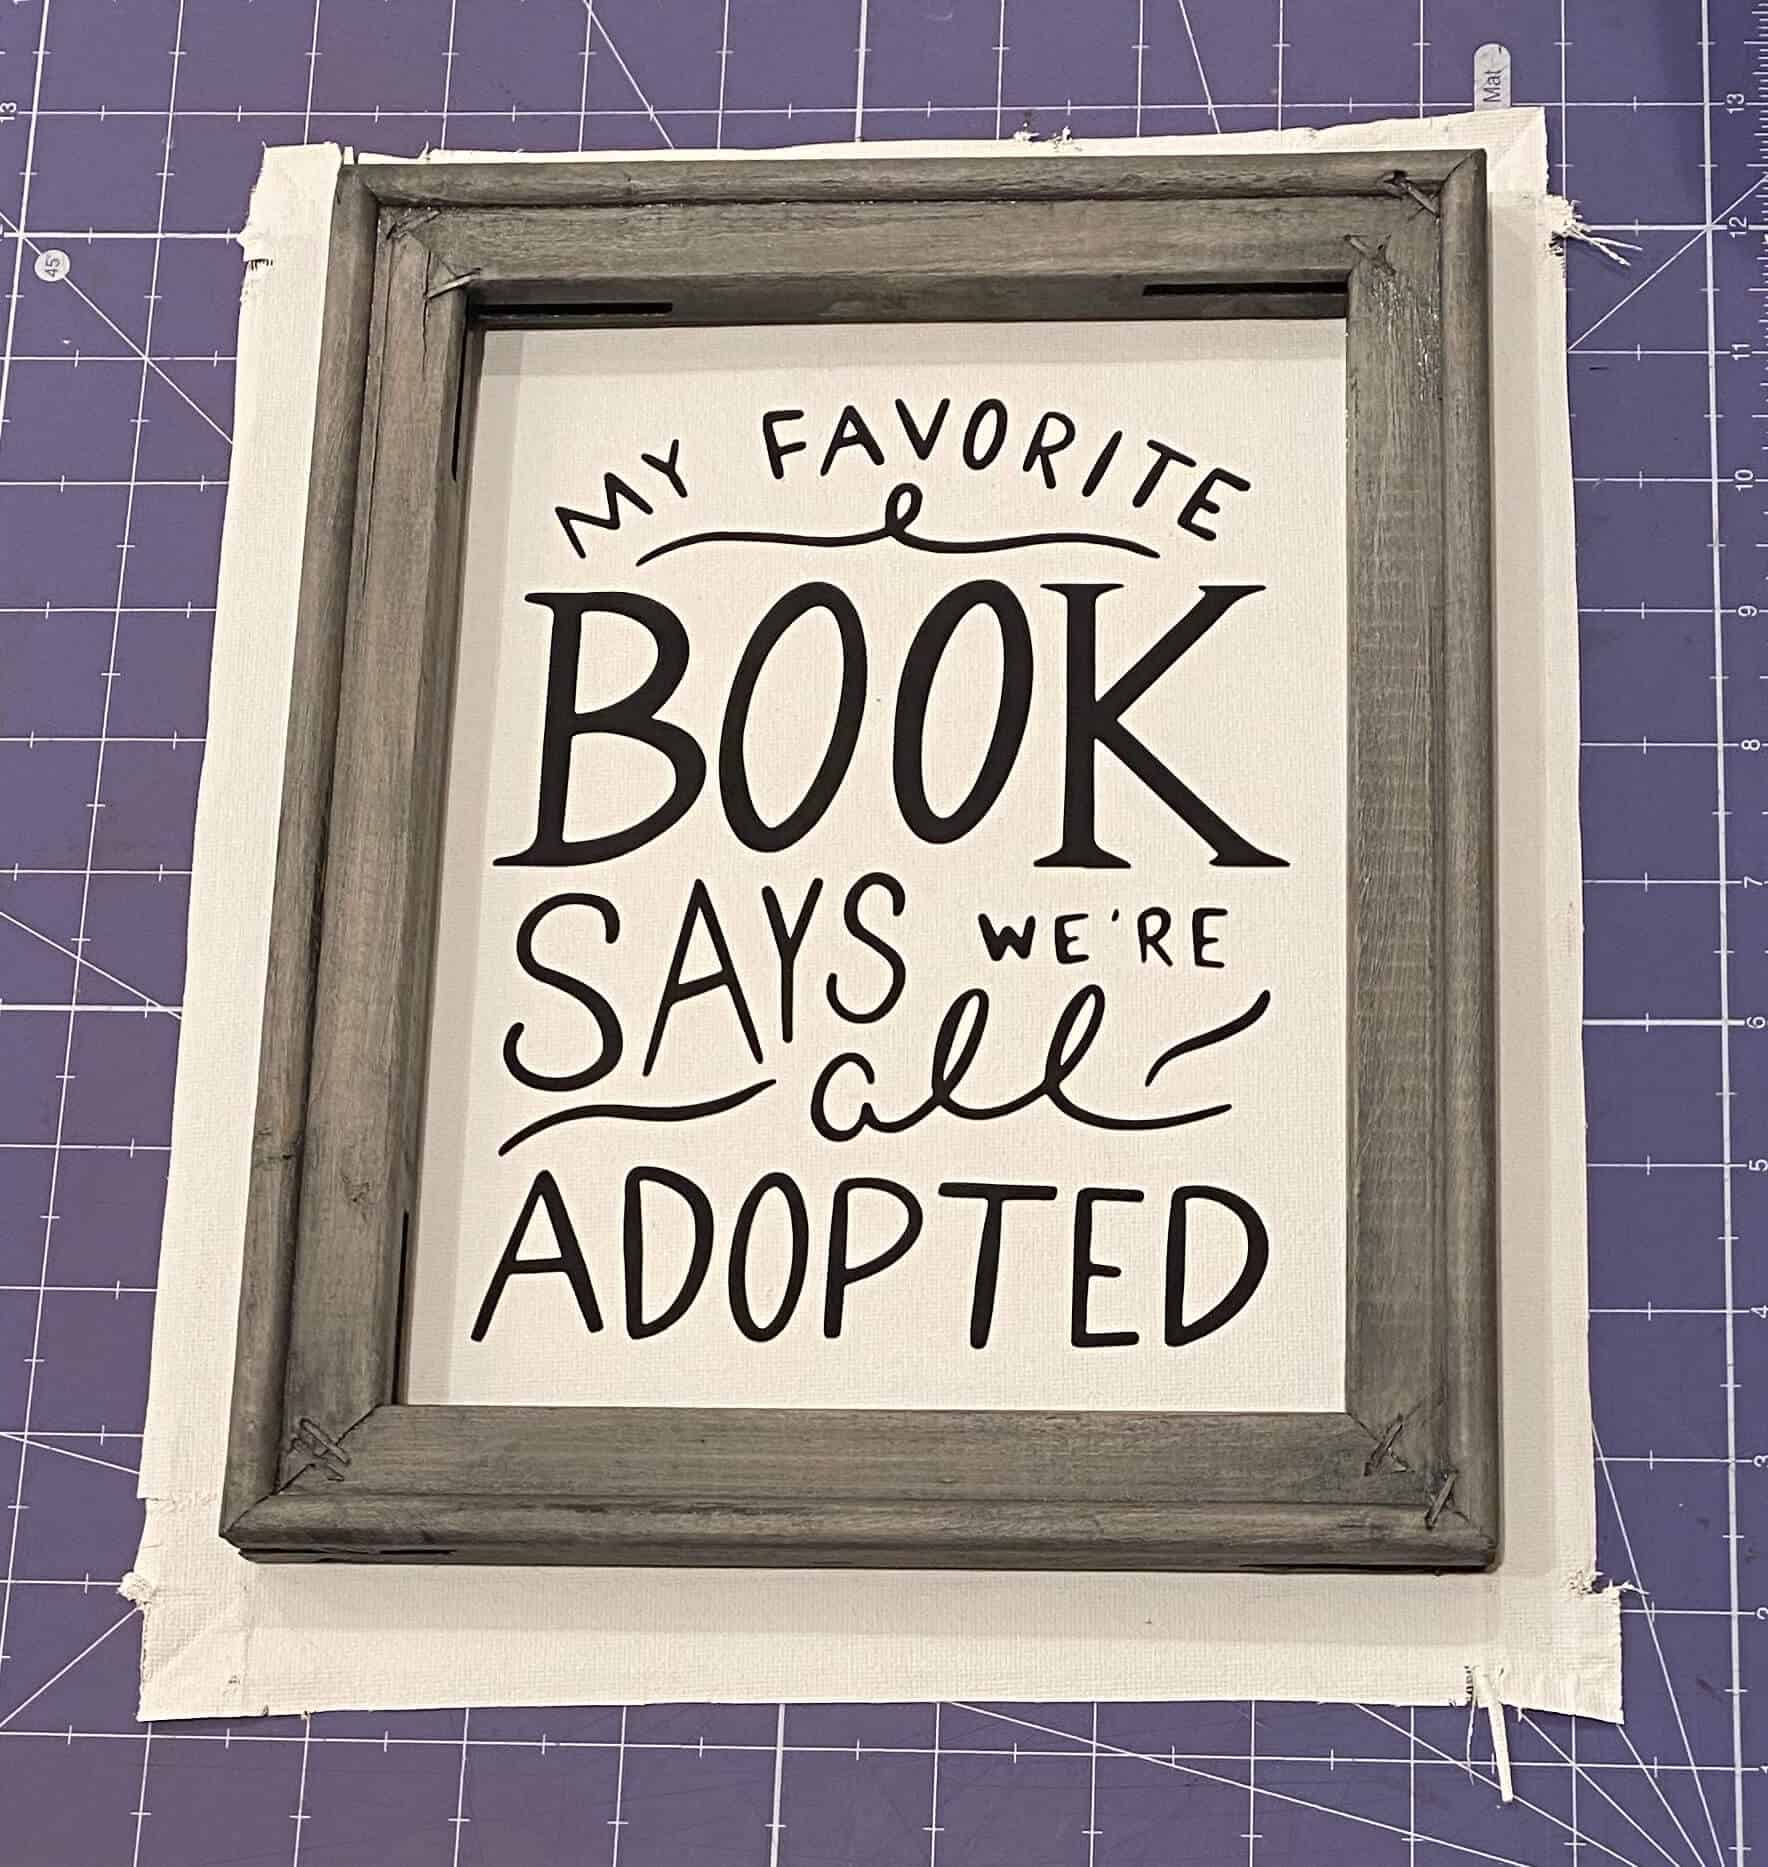
Put the frame aside and trim the canvas just inside that outline. I used my fabric cutting tools for this step - make it an even offset from the traced line so it will be easy to glue from behind. Side note, I love this ruler. I use it all the time for sewing, scrapbooking, and crafts in general. I didn’t list it on the materials needed, because it’s not needed, but it’s just a very helpful ruler!
STEP 7: ATTACH CANVAS TO FRAME
Flip the frame upside down, run hot glue along the top edge of the frame. Carefully place the canvas centered, there is little wiggle room for this step. Once it is hot glued on, it is very hard to move without damaging the canvas...ask me how I know. Continue to glue down all the sides making sure it is pulled tight and doesn’t have any slack. Turn the frame around and the frame is done! Easy, right?

The first time I made a reverse canvas I stapled the canvas to the back of the frame, but it turned out wonky. I went back and hot glued it and was much happier with the result. Also, the frame under my canvas from Michael’s was really cheap; I might try another brand next time to see if it’s any nicer. Of course, I bought a multipack so I will deal with this style at least 7 more times unless I choose to use it as a wrapped canvas.
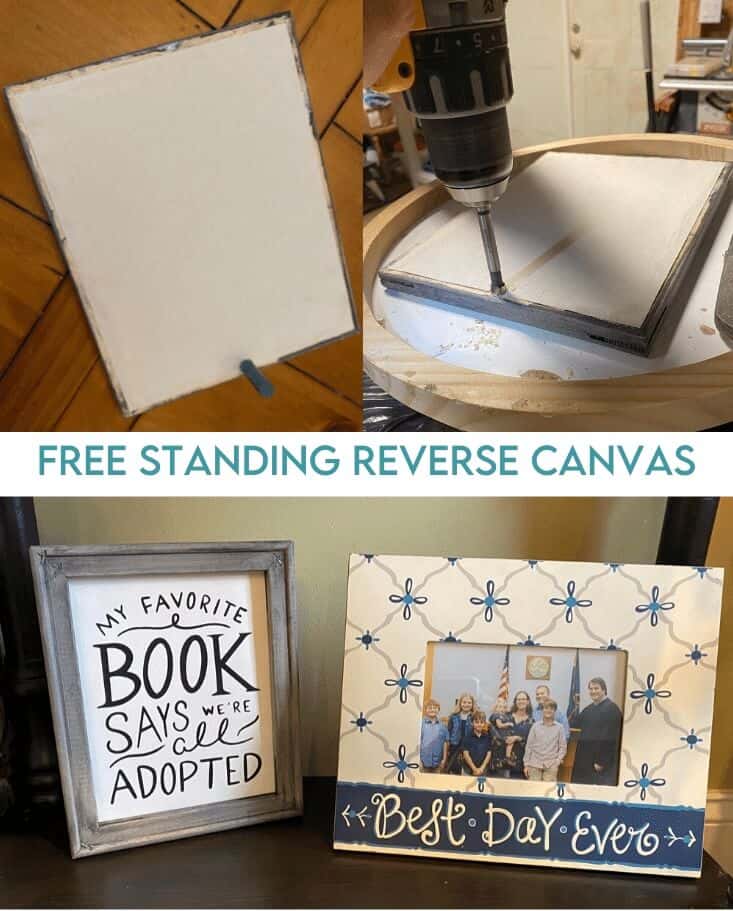
The frame also had cut-out pieces along each edge. I wasn’t expecting this, so I wasn’t careful to apply the stain inside the notches. The second time around I stained inside those notches before attaching the canvas. Below is a pic of the first reverse canvas where I just stained the frame, I think it turned out fine too, just a different look.
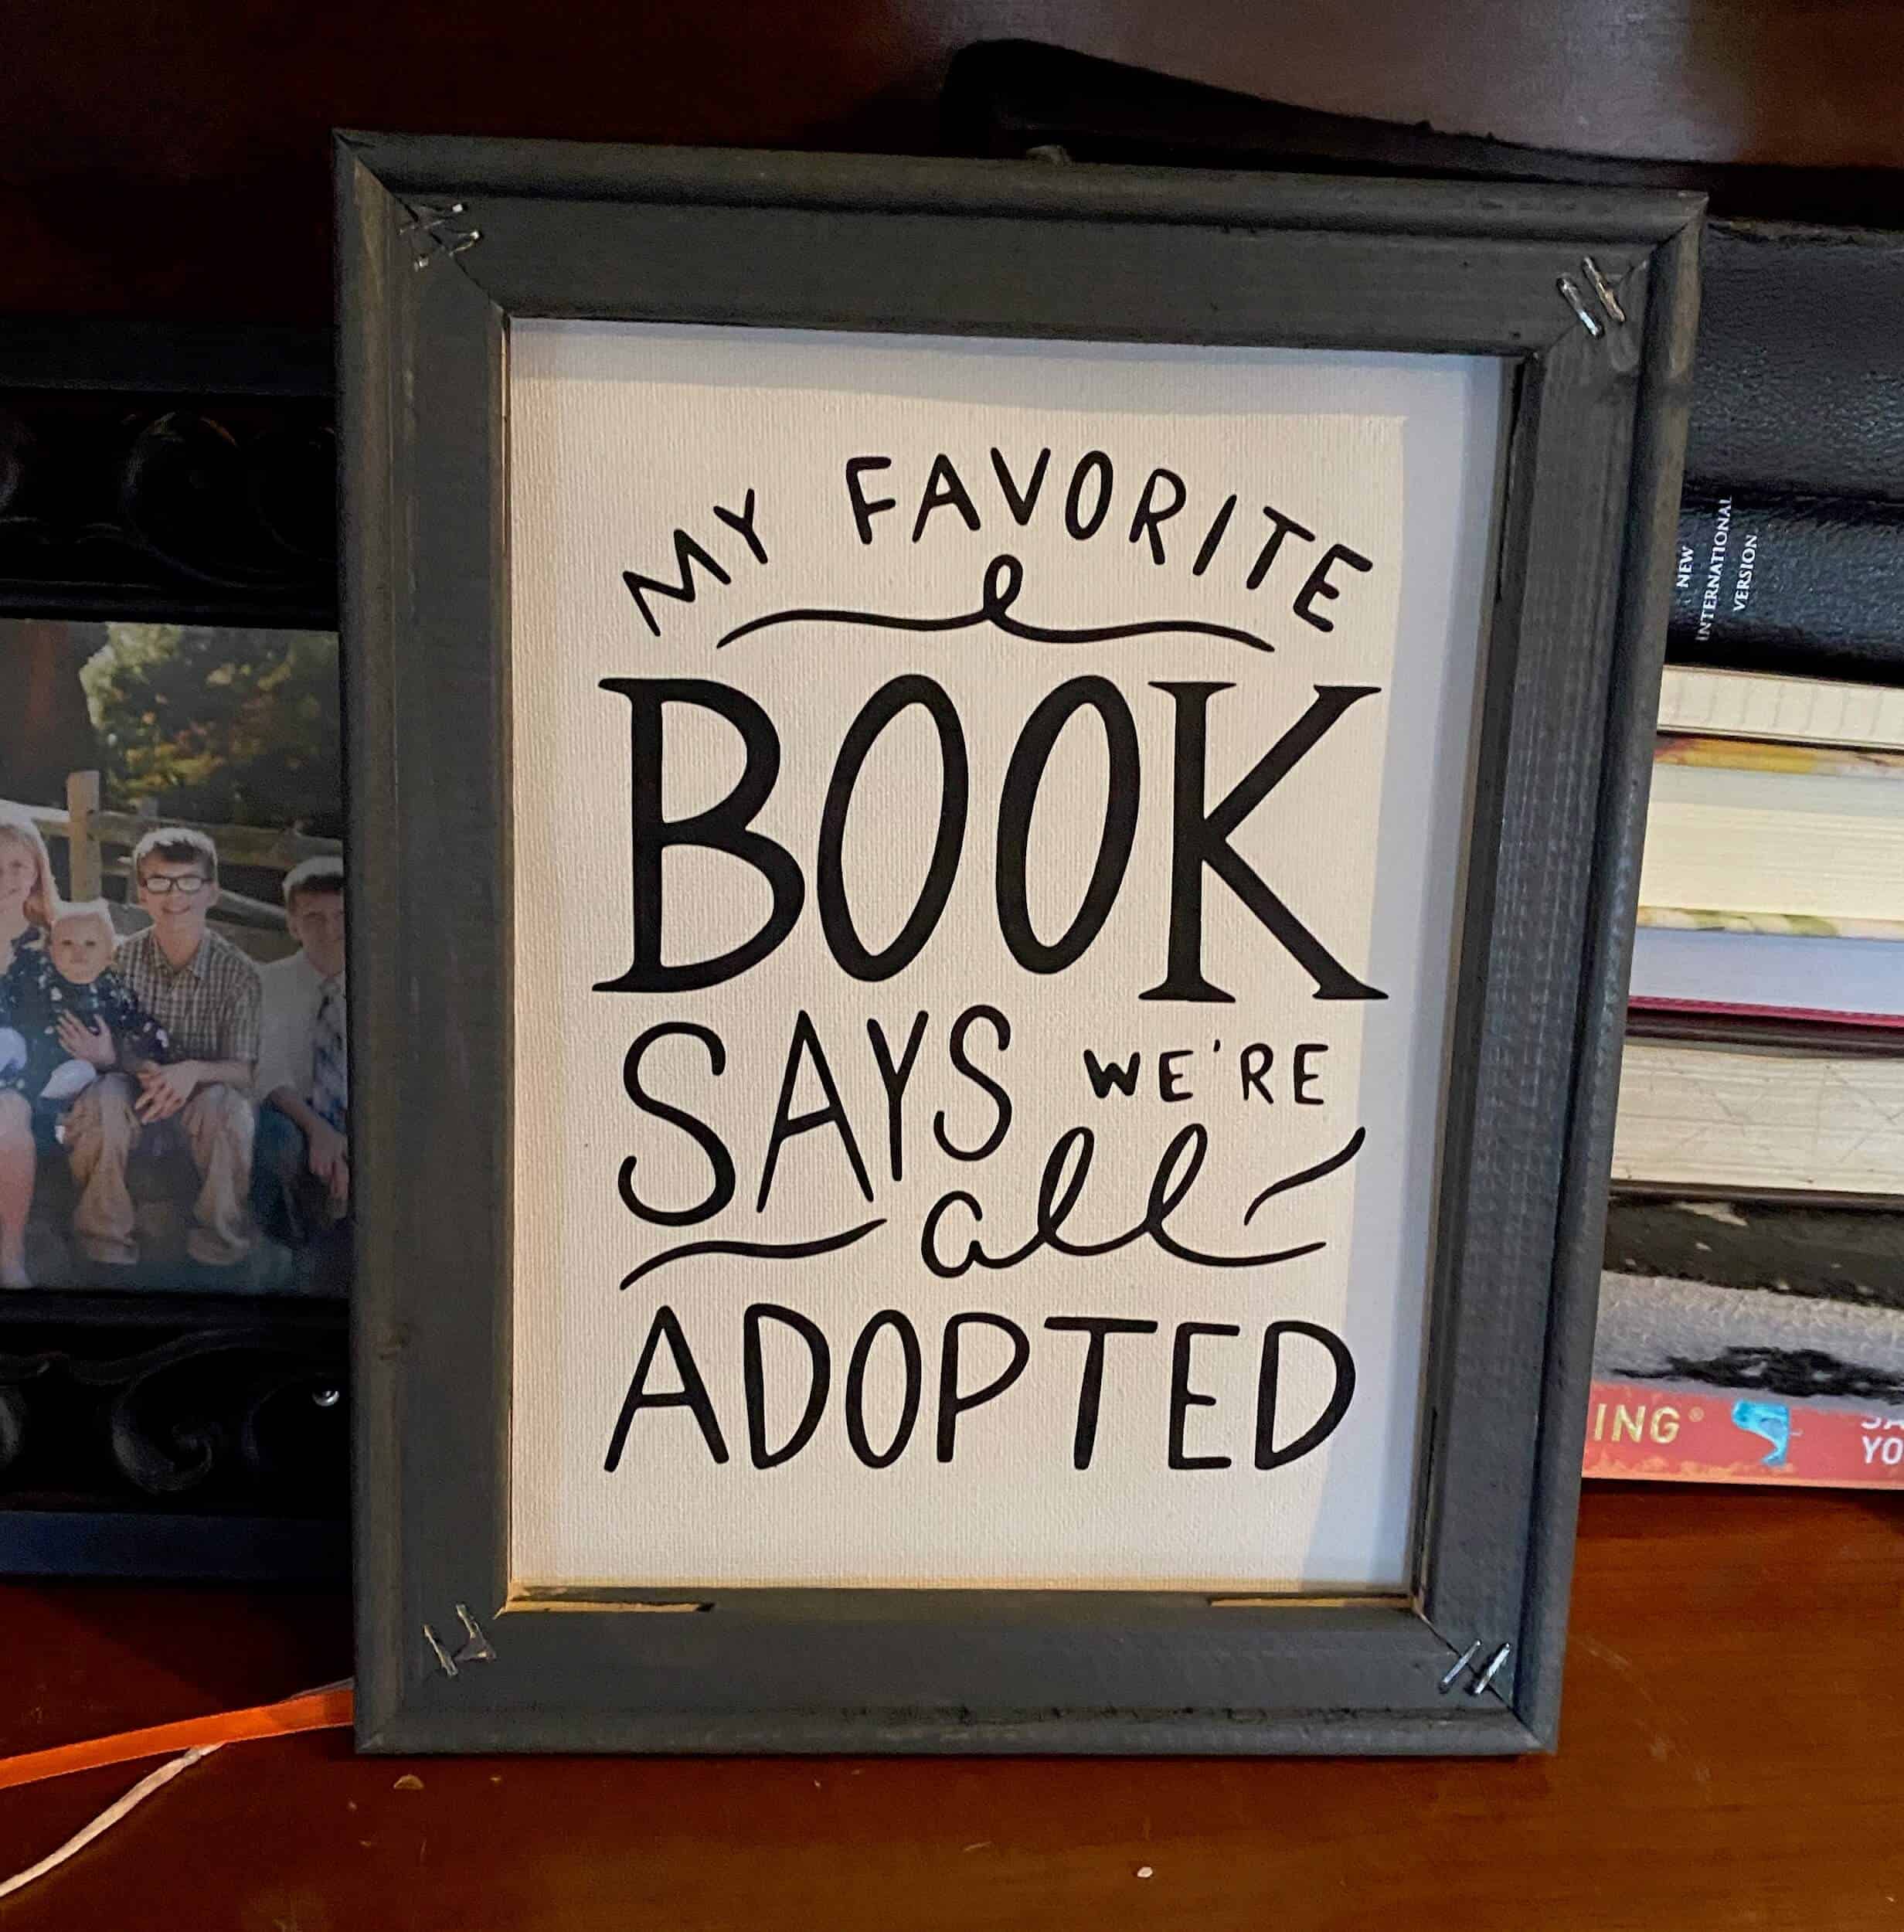
I recommend using 3M Picture Hanging Strips, these frames are so light you can use the small ones. I like this method because it’s not permanent and you can easily adjust it or remove it all together. I wanted my reverse canvas to stand freely so I drilled a hole on the bottom back of the frame the size of a dowel to keep it upright at a slight angle.
Hope you enjoyed my tutorial, now let's get crafting!
I hope this step-by-step tutorial to create a reverse canvas was clear and easy to follow. As always if you have any feedback or questions just contact me and I would be happy to hear from you.
I can’t wait to be able to give this DIY frame to our friends that recently finalized their adoption to their foster love. I love the SVG my friend Julie created for this reverse canvas tutorial. Subscribe below to get access to the adoption artwork used in this reverse canvas tutorial.
Related Cricut crafts:
- Cricut Basics for Beginners
- Vinyl Decals
- Waterslide Decals
- Etched Glass
- Elephant Stuffy
- Free Resource Library
Create a Reverse Canvas Today!